


Learn about types of beading findings in our educational jewelry guide! When you are beginning beading, the lingo can be overwhelming. Learn the essential vocabulary and common components you will need. Choose the right beading wire, clasps, headpins, and more for your next beading design.
Choosing a beading wire is critical in your jewelry designs, but so is choosing the right beading findings to complement your wholesale beads. With your finished piece, do you want it to be affordable or are you aiming for a high-end professional look? Did you decide on the crimp type? How about crimp covers? Check out our insightful Q & A section before you design your next jewelry piece and keep scrolling down to find the most popular essential beading findings out there!
In this blog we'll cover:
- Popular Stringing Material
- Alternative Stringing Material
- Jump Rings
- Crimps & Covers
- Tips & Ends
- Clasps & Closures
- Headpins & More
- Bead Caps
- Types of Metal Beads
Popular Stringing Material
There are many options for stringing your beaded jewelry, Beadalon and Soft Flex are the most popular options. These beading wires are available in different strengths and flexibility. Understanding the differences between the options will help you choose the right material for your beading project.
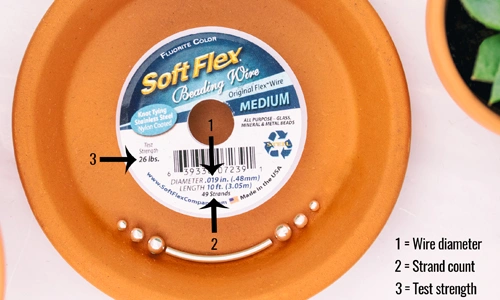
Beading Wire Terminology
- Material: stainless steel wires, nylon coating, wires are woven or weaved together
- Strand Numbers: lower strand count = less flexibility; higher strand count = excellent flexibility
- Diameters: Thinner diameter= lightweight findings; thick diameters = heavier components
- Test Strength: the weight limit for that particular beaded wire
Choosing the Right Beading Wire
Before starting a new beaded jewelry design there are several questions you should ask yourself about which beading wire you should use. These questions are geared to make you think not only about the designing process and the finished product but also about the longevity of your next beaded creation. These questions can make a difference in your finished piece whether you are new at beading or an experienced one.
Q: Will the jewelry be worn daily or rarely?
Seven strand wires are economical and perfect for use in designs where stiffness is needed or for items rarely worn, but for strength and long-lasting beaded jewelry consider the higher strand counts. These can withstand daily wear and tear better than a 7 strand can.
Q: What findings will be used in your jewelry design?
High-end designs that are using gold-filled or sterling silver components should use 19 or 49 strand stringing wire. These are stronger and look more professional when hanging, plus 7 strand wire is prone to kinking, which can alter your design in an unpleasant way if it’s ever snagged. You cannot beat the draped look found in the 49 strand stringing wires.
Q: Do you want stiff or flexible wire?
For a choker or collar necklace, 7 strand necklaces are the best. These hold their shape like metal wire does. If it’s for a bracelet, where wear and tear are common, flexibility is important so the bracelet doesn’t break off under daily use, in that case, 19 or 49 strand wire would be the best.
Q: What are the hole inner diameters on the beads?
The diameter of the bead hole is crucial when choosing the jewelry stringing wire. The smallest bead hole is as large of a wire diameter as you can go. The thicker the wire the stronger the piece and you also want the tightest fit possible. Bead holes will gradually wear down the stringing wire, especially when they’re loose on the wire.
Q: Will the components be light or heavy?
If you use heavier objects in your pieces, you’ll need to account for that in your beaded designs. For one, you’ll need to check the test strength of the stringing wire which can be found on the label or online. Also, do you want the finished piece to be draped or fir tight like a choker?
Alternative Stringing Material
Beading wire isn’t the only option out there. You can also use a stringing chain and even satin and leather cords, which are especially useful if there is a known metal allergy. For more information, check out the details of each type below.
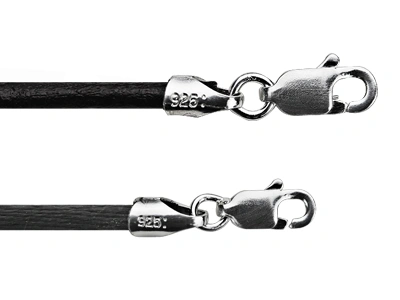
Leather Necklaces
A great alternative for people who suffer from metal allergies is to use satin or leather cords. These are finished slightly differently, using an end cap and a clasp. These tend to be on the thicker side, so you’ll need to check the diameter of the cord with the bead’s inner diameter hole size.
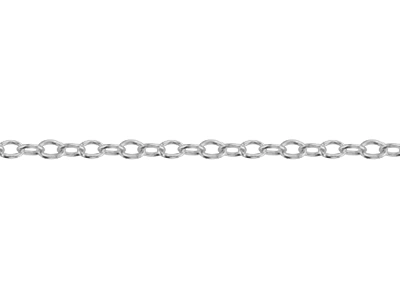
Footage Chain
A beautiful alternative to wire and cord is a stringing cable chain. This tiny chain is perfect for small, lightweight charms and beads. Choose a small diameter chain that will fit through the holes in your beads. Small cable chains are available in 1mm diameter, or even thinner. Finish the piece with a drop of glue and crimp ends.
Jump Rings for Beading
One of the most popular items on any jeweler’s bench is jump rings. Jump rings are essential beading findings. You can cold connect virtually anything in beading designs with these small components. They are used for attaching closures and clasps or hanging charms and pendants from stringing wire, chain, and earring findings. Open jump rings are ready to use in beading designs, however, you’ll need to check the different tempers of the wire.

Soft Tempered Jump rings
A soft, pliable jump ring. They will pull apart easily when tugged or snagged, but you can’t beat the flexibility. We suggest work-hardening the rings before using them. You can work harden soft jump rings by hammering them with a nylon or rawhide hammer or tumbling them prior to using.
Hard Tempered Snap Jump Rings
Stiff jump rings that are made with tempered wire. These are sturdy and reliable when used in beading designs, they do not need to be work-hardened. They snap in place for a secure connection. Learn more about these hard snap jump rings in the video below.
As demonstrated in the video, it is important to open and close jump rings properly to avoid warping and damage. By using this simple step, you will keep your jewelry looking beautiful longer.
Crimps & Covers Used in Beading
Keep your beading components in place by using crimp beads. Crimps are essential when using stringing wire, but which do you prefer? Rounds or tubes? If you’re unsure, check out the differences in the crimps below. Unlike crimps which are essential, crimp covers are not. We’ve added them for those beaders out there who would like a more professional look to their jewelry designs.
Crimps: Rounds & Tubes
Crimps are an important finding for beaders! They secure your components in place and can be used to finish your piece. Round crimps are more affordable; however, crimp tubes are more user-friendly. With a longer hole, they can grip the stringing wire better, plus they are stronger, whereas round crimps tend to break. It’s vital that you pick a round or tube crimp that is wide enough for the stringing wire to thread through it twice, but no larger than that. The fit should be snug before you crimp it, otherwise, if it’s too large it will collapse the crimp and make it look unprofessional.
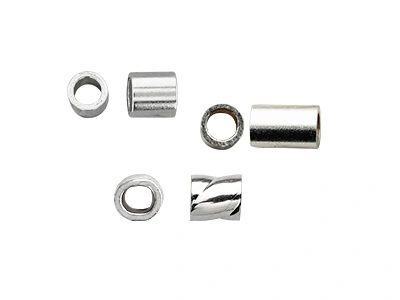
To use: run the wire through the crimp, form a loop, and thread it back through in the opposite direction prior to crimping.
Crimp Covers
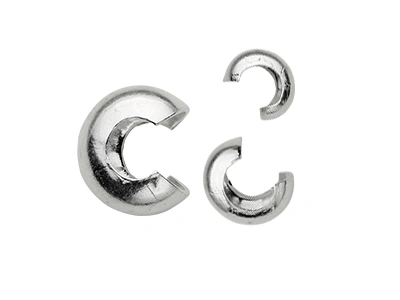
You don’t have to use crimp covers, but it really looks better when you do! Crimp covers are “C” shaped findings that fit over your tube or round crimps. Once a crimp cover is closed, it looks just like a round metal bead. These covers not only hide the crimped bead but are also a design element as well. When choosing a crimp cover, make sure it covers the crimp completely.
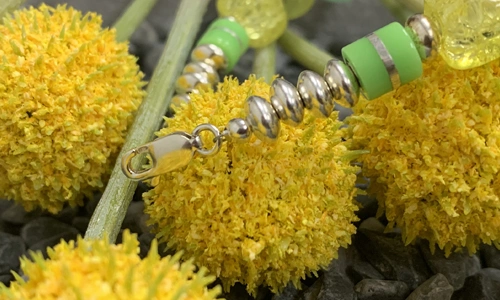
Cable Thimbles
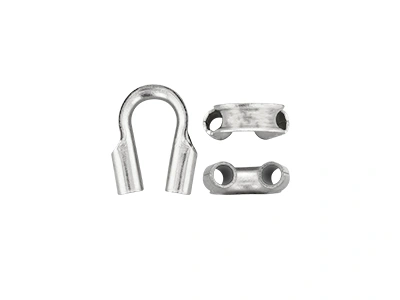
Another component that isn't necessary, but one that really adds to the elegance of your overall piece. When you make a loop through your crimp bead a cable thimble is inserted in that loop to protect the wire from fraying. A clasp is then attached to the cable thimble. As the metal from the closure rubs against the cable thimble the wire is protected.
To see how crimps, crimp covers, and cable thimbles are used, check out the video below:
Beading Findings: Tips & Ends
End Caps
These essential beading findings work well with both chain and cords. With splits down the sides of the end cap, you’ll insert a slightly smaller or equal sized chain or cord into the cap, then squeeze the sides together. When inserting a cord, use a drop of glue for a more secure fit. To finish, attach a clasp to the end and you’re done!
Check out this short video on adding end caps to leather cords:
Clamshell Bead Tips
Finish your stringing wire projects with a bead tip! Thread your stringing wire through the back of the clamshell bead tip, knot it or secure the end with a small crimp bead, trim the excess off and then close the bead tip over the knot or crimp bead. Attach the clasp and you’re finished! This gives you a nice, professional finish to your beaded jewelry designs.
To learn more, watch this video on using clamshell bead tips:
Sterling Silver Clasps & Closures
You can’t finish a necklace or bracelet without these essential findings! Clasps and closures are as important as stringing wire when it comes to beading findings. There are many types of closures out there, so we’ve broken down the most popular ones for you here. Since no two are alike, there are pros and con’s that you should be aware of. Some are easy to use but tend to open and some are difficult for people with arthritic hands. Here are our favorite clasps and closures.

Alternative Clasps
These alternative style clasps are less common than the above clasps, but offer various benefits. These are generally easier for arthritic hands or create an interesting design element.
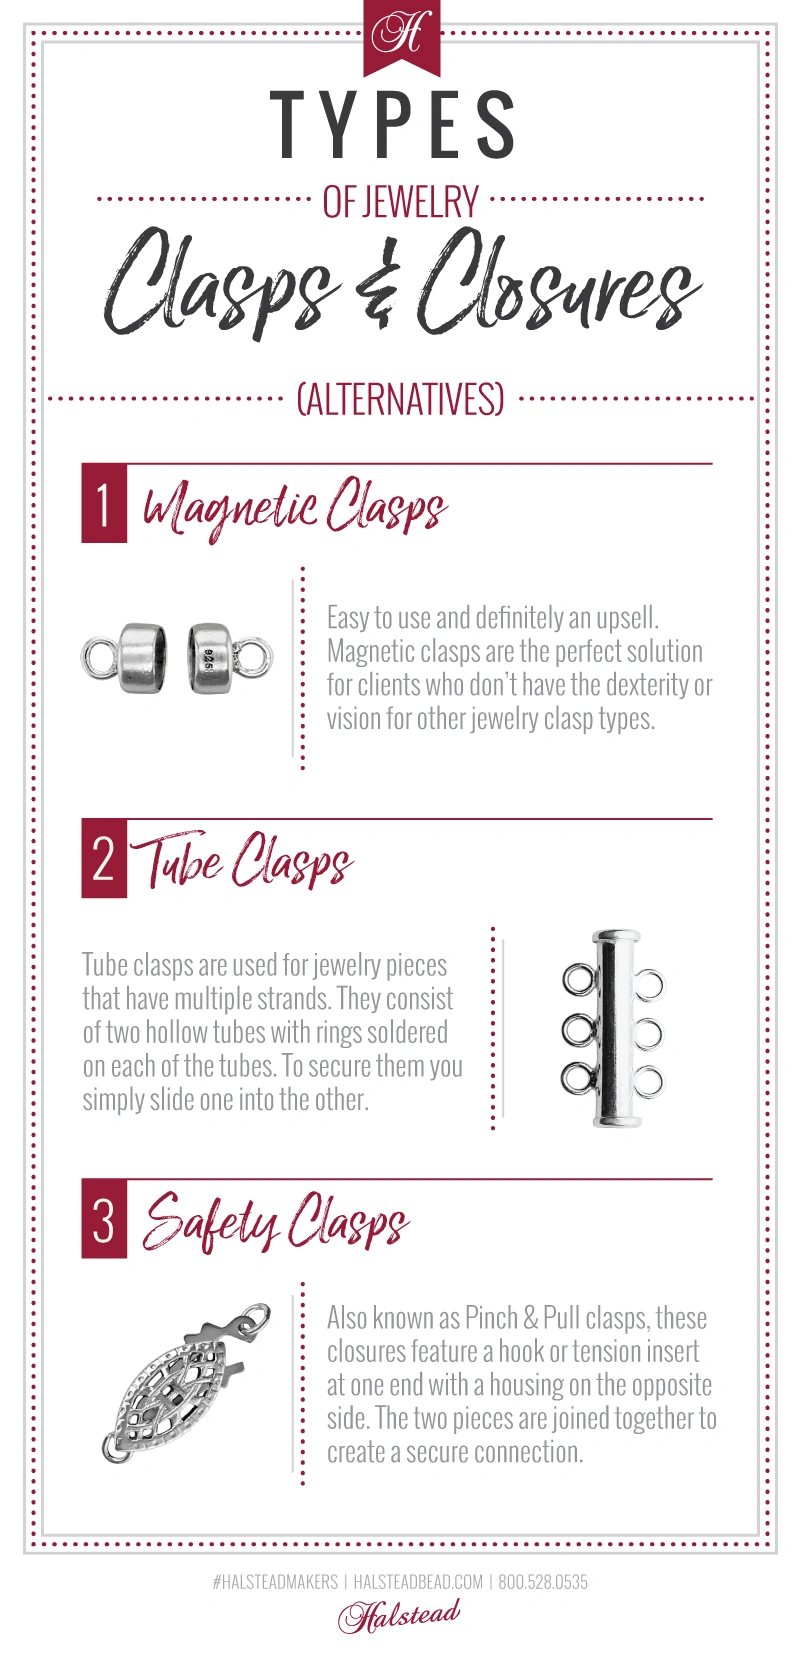
For additional information on these and other styles of clasps, check out our article: Types of Clasps & Closures.
Beading Findings: Headpins & more!
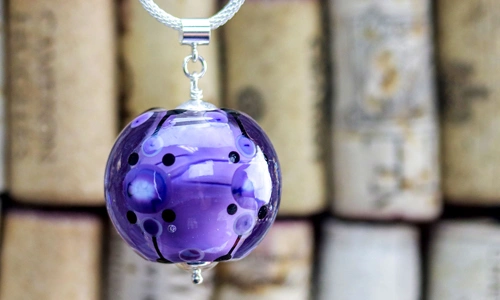
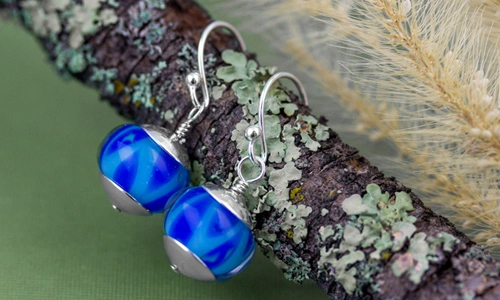
Glass Bead by Kris Schaible
If you want to hang beads from chain links or earring designs, you’ll want to use these essential jewelry beading findings! Headpins, ballpins, and eyepins each have their own distinct use, but knowing which to use can be confusing. Here is a breakdown of each one so that you can make an informed decision when choosing your next jewelry pin.
Note: Be sure when purchasing beading pins that the gauge of the wire can fit through the bead hole and check the length. They range from .5 inches and longer.
Headpins
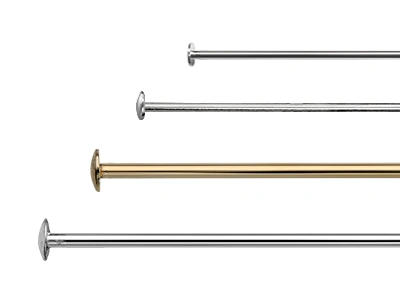
Headpins are the most popular of the pins. The head shape of this pin is flat, making it ideal to use when not only hanging beads but also wanting to have the pin discreet. The result is a hanging bead with just a flat, round sterling silver or gold-filled piece at the end. It covers the hole yet also prevents the bead from sliding off the headpin.
Learn more about our most popular headpins in this short video:
To use headpins in your beading projects, be sure that the head of the pin is larger than the bead hole size. Drop the bead(s) on the headpin and then form a loop at the other end using round or chain nose jewelry pliers. The loop is then attached to chain links or earring findings.
Ballpins
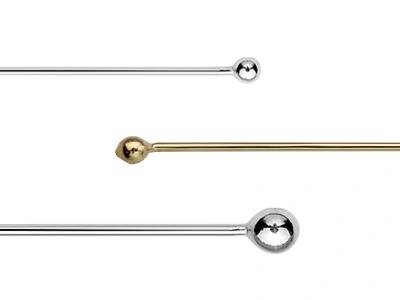
Unlike headpins, which are discreet, silver ball end pins add a jewelry ornament to your hanging designs. Just like headpins, their main purpose is to stop the bead from dropping off the pin by acting as a stopper. Where they differ though, is that ballpins have a round ball tip on the end. This small round ball will hang below your bead, making it a design element to your piece.
Learn more about our most popular ballpins in this short video.
To use ballpins in your beading designs, make sure that the ball on the pin is larger than the bead hole size. Drop the bead(s) on the ballpin and then form a loop at the other end by using round or chain nose jewelry pliers. Attach the loop to earring findings or chain links to finish your piece.
Eyepins
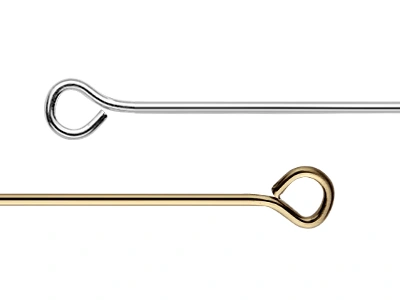
If you plan to link beads, eyepins are an essential jewelry beading finding! The looped end on eyepins keeps your beads securely in place, but the eyepin design allows you to form links. Once both end loops are formed, you can link these together to create full necklaces, bracelets, or drop a charm at the end and then hang them from earring findings.
To use: drop your bead(s) on the eyepin, trim to size, and form a matching loop at the opposite end of the existing loop.
Fancy Headpins

Fancy headpins are fun to implement in your jewelry creations! These types of headpins can be shaped into an array of designs including points, swirls, hearts, and squares. They can be handmade easily by shaping the wire or purchase them pre-made. They work in the same way as the headpins above, they are just a fancy bead stopper for your hanging designs.
Bead Caps & Why They’re Essential Beading Findings
Glass Beads by Stephanie Sersich
As designers you know that beads come in all shapes and sizes, with bead holes varying as much as the beads themselves. With an array of different hole sizes at your fingertips, it can be difficult to find beads with holes the same size. Having the same size holes is crucial when stringing beads on wire or headpins where you want them all to align perfectly. Bead caps make that problem disappear! They not only line up your beads perfectly and secure beads with large holes from sliding around loosely, but they also add a beautiful design element to your beading endeavors. Plus, they come in a variety of fancy and plain shapes.
To use: thread the first bead cap (wide side up) on your stringing wire or headpin, next add your bead and then thread the second cap (wide side down). The bead should be cupped inside of the bead caps. If you are using several bead caps and beads, continue stringing them in that order to finish your piece.
Note: There are two things you need to check when using bead caps; 1) The bead must fit inside the bead caps. 2) The diameter of the stringing wire or headpin must be able to fit inside both the bead and the bead caps inner diameter holes.
Types of Metal Jewelry Beads
Round Metal Beads

Round metal beads are a staple among beaders. These popular components come in a variety of sizes and materials for all your design creations. From sterling silver to gold-filled beads, they can turn basic beading projects into high-end professional designs. Large round metal beads can be used as focal beads whereas, the small rounds can be used as spacer beads or decorative drops. The sky’s the limit with these silver beads!
Tube Beads
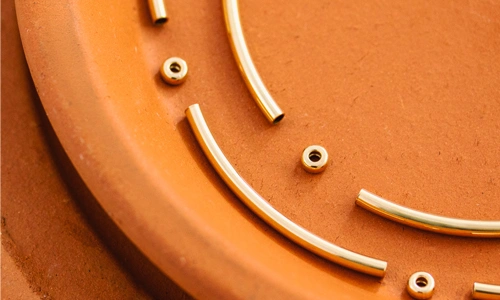
Curved and straight tubes have a variety of uses too among essential beading findings. Curved tubes with rings can hang your favorite lampwork beads, wire-wrapped stones, and pendants. Plain curved tubes can be used as focal elements either alone or mingled together with other beading findings. Smaller-sized sterling silver tubes can be used for stringing together liquid silver bracelets and necklaces or interlaced as spacers in gold-filled or sterling silver jewelry beading designs.
Spacer Beads
Break up the consistency in jewelry designs by implementing spacer beads! Spacer beads are used to break up patterns especially when stringing gemstones and beads that all look similar. Whether it’s gold-filled or sterling silver spacers, you can’t beat the look of these gorgeous beading findings!
Heishe Beads

Tassel by Gwen Youngblood
Beautiful heishe beads have been around since 6000 BCE. They were originally handmade of organic materials such as stones and shells until silver became the most popular. They originated from New Mexico by the Kewa Pueblo people, and although silver became the most prominent material, there are still a few artists still handmaking the originals today.
Rondell Beads
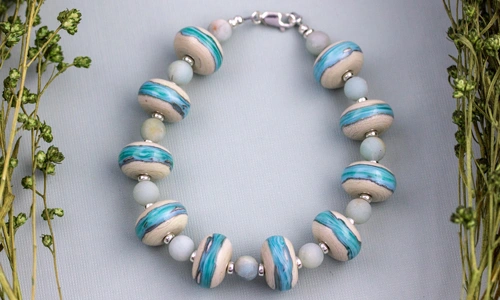
Bracelet by Sheila Davis
Rondell spacers are plain next to heishe beads; however, they really blend in well in designs where you want fancy beads to be the star and not the spacer beads. In the bracelet above, Stephanie Sersich’s gorgeous lampwork beads are accentuated by the amazonite and rondell spacer beads. There is no denying which beads are the focal pieces, but the smaller beads add to the classy look of this stunning bracelet.
Alternative Spacer Beads

Heishe’s and rondells are commonly used as spacer beads, but technically any bead you choose can be a spacer bead including saucers, cubed, fancy, and bicone beads. Don’t limit yourself to just a couple of types, enjoy using a variety of different styles in your jewelry designs.
Misc. Metal Beads
Now that you’re familiar with common metal beading findings, look at the wide array of wholesale beads that we have at Halstead. We have all kinds of shapes and sizes including faceted rounds, saucers, and corrugated beads, all of which can be used as spacer beads. In addition, we also carry gorgeous Bali-style cast beads which are made in Turkey. These run in different sizes and can be used as focal beads or spacer beads. They are high-quality, top-notch sterling silver beads!
Next Steps
Now that we've laid out the most popular essential beading findings, hopefully, this guide will help you make the most informed decisions in your future beading creations. Don't hesitate to reach out to the Halstead team with any questions that you may have. We're here to help you become a success!
For more beading information try these articles:
Best Beading Tools Used for Making Jewelry
Shop hundreds of beading supplies at Halstead now!
To get our latest articles sent straight to your inbox subscribe today.

