


Building an at home jewelry photo setup is a great option for quick and basic jewelry photos. Read our tips and supply list!
Having quality jewelry photography is critical in today's competitive jewelry market. With professional photos you can add perceived value to your jewelry and brand. Choosing to take your own jewelry product photos at home is a great option if you’re not ready to hire a pro photographer. And you can still have high quality photos at home without breaking your budget. It is important to have the right jewelry photography equipment to capture the best images at home. Read on for our tips on the best tools and supplies you’ll need.
The Camera
The camera is the biggest investment you may choose to make for your home jewelry photo setup. They can cost anywhere from a few hundred dollars to a few thousand. If you choose to make the investment, it's important to find a camera with a good sensor, decent macro capability, mid to high megapixels (for better resolution) and at least 3x OPTICAL zoom (optical is the keyword here; digital zoom = lower quality images). Some sites will tell you optical zoom isn't necessary for product photography. However since many of you will be shooting tiny reflective mirrors, giving your camera some space from what you're shooting is ideal.
Janelle hosted a webinar all about how to invest in a DSLR camera for your jewelry photography.
However, if you’re not ready to invest in a DSLR, we also have tips for using your smartphone for photos. Many of today’s cell phones have high quality cameras that will work just as well for most basic product photos for your website or social media. If you need high quality photos for publications or judging, we’d recommend taking the leap and investing in a DSLR or hiring a pro photographer.
Lighting
Having good lighting is the most important part of taking good jewelry photos at home. You want to have plenty of light when shooting as it’s easier and better to darken a scene than it is to brighten it. There are three basic lighting options to choose from when setting up your home jewelry photo setup: natural lighting, a soft box light kit (referred to as a light box in the video) and a light tent. Keep in mind it is good practice to use a consistent if not permanent setup in order to have harmonious jewelry photos. Your photos will represent your jewelry and your brand better if your jewelry photographs are all lit and shot in the same way.
Natural Lighting
If you have a room with a nice window that allows plenty of sun in, natural lighting is a great option for home or studio shooting for one main reason: it's free! Using natural light for your jewelry photography can yield some great results, however it comes with several drawbacks. Time of year, weather, time of day and other variables can all change how and when you take your photos. These inconsistencies can interrupt your shooting schedule and can cause too much variation in your product shots.
When shooting in natural light, try to pick a spot that gets the most dependable lighting. An east or west facing window usually works best as these will get more direct morning/late afternoon light. Try to shoot at the same time of day, when the light is at the best angle for your shot and the brightest. Brighter light gives you more to work with. It is much better for photo quality to speed up your shutter speed and compensate for too much brightness than it is to use a longer shutter speed to compensate for too much darkness. This would also require using a tripod to obtain a clear photo.
You can use a diffuser screen (or a large sheet of semi-transparent white paper or cloth) to help soften the light. Use one or more reflectors to bounce the light coming from behind/beside your piece to illuminate the front. These can be purchased or homemade from something shiny like aluminum foil. If you have the space for your camera to be set up you may also aim your piece towards your window/light source, however make sure the light on the front is not too harsh (you may still need to reflect light on some areas of your piece). You will have to experiment with your setup, time and place in order to achieve the best results.
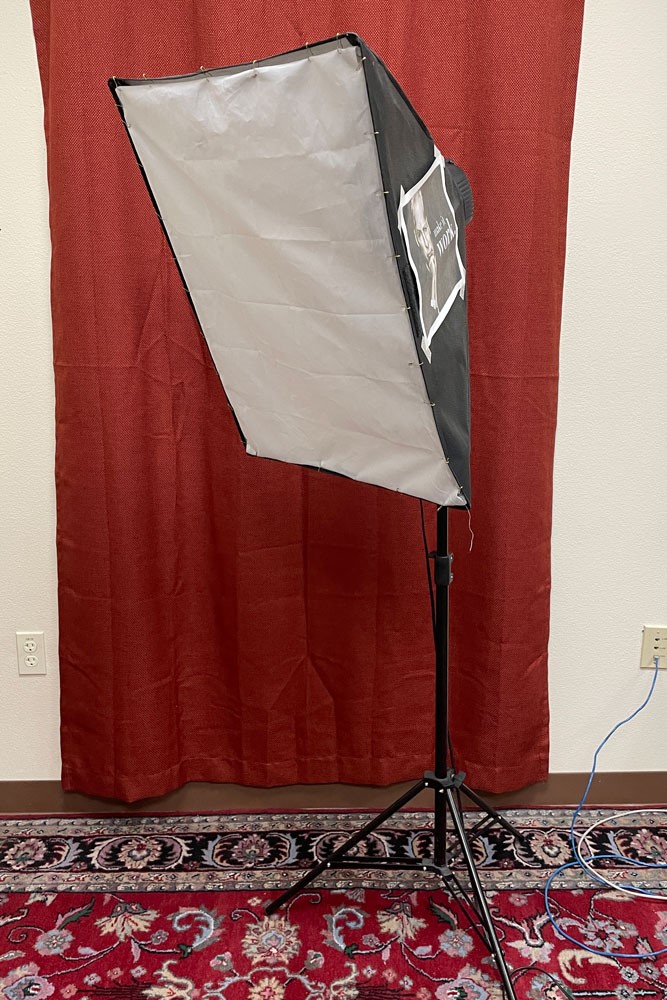
Soft Box Light
Having a soft box setup in your home/studio is the option we most recommend. It can offer quality and even light, and at a fairly affordable price. Most soft box light kits start around $40 and go up from there. In general, the more money you can invest, the better the quality and greater the versatility of your kit. An ideal kit would come with a fairly large-sized soft box (or two), floor stand, multiple bulbs inside the soft box and some kind of light intensity adjustment. For jewelry photography 5000K daylight bulbs work best; power will be based on your purchased light's specifications.
Soft Box lights are great for getting consistently well-lit photos of your jewelry. The price is comparatively low for setup as opposed to other lighting options. The kit is also easy to set up in smaller spaces. If you only have one light, a reflector will still be necessary to bounce light back to the front of your jewelry pieces. The overall price and quality of a soft box light kit are what make it our recommended setup for your home/studio jewelry photography.
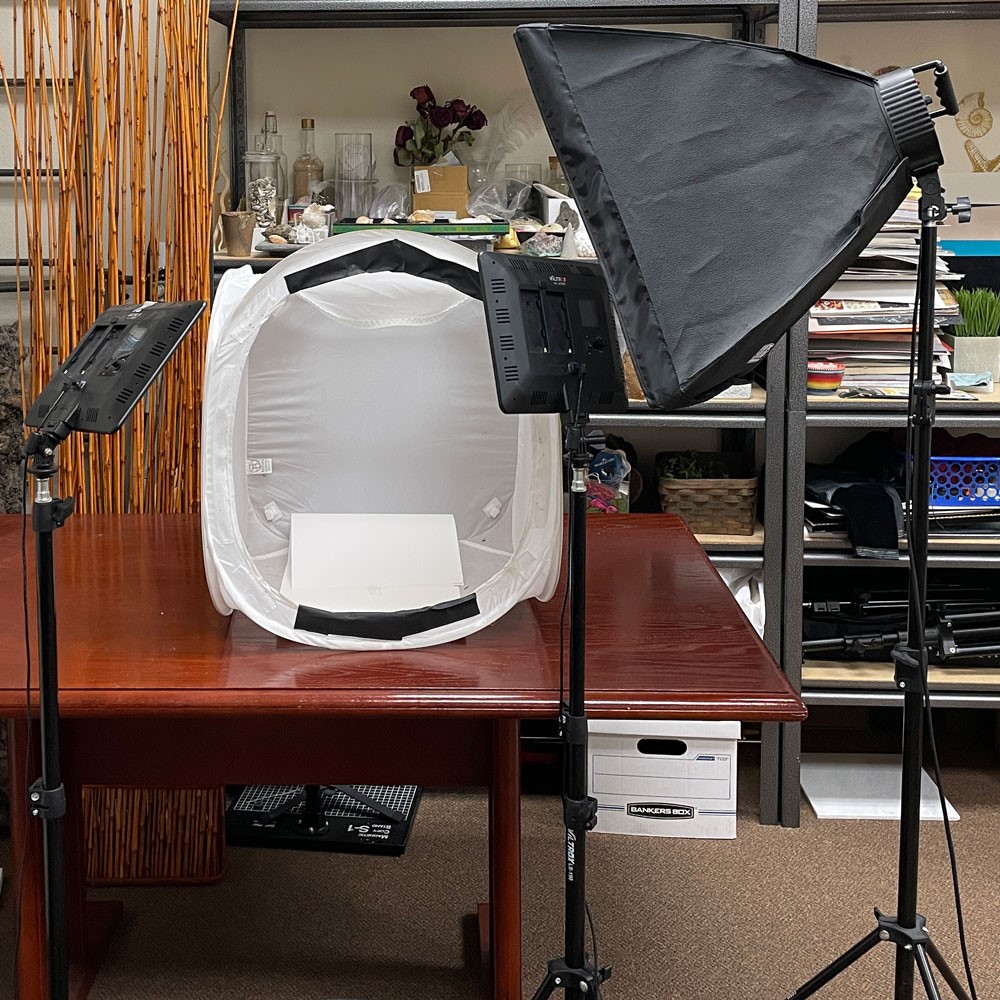
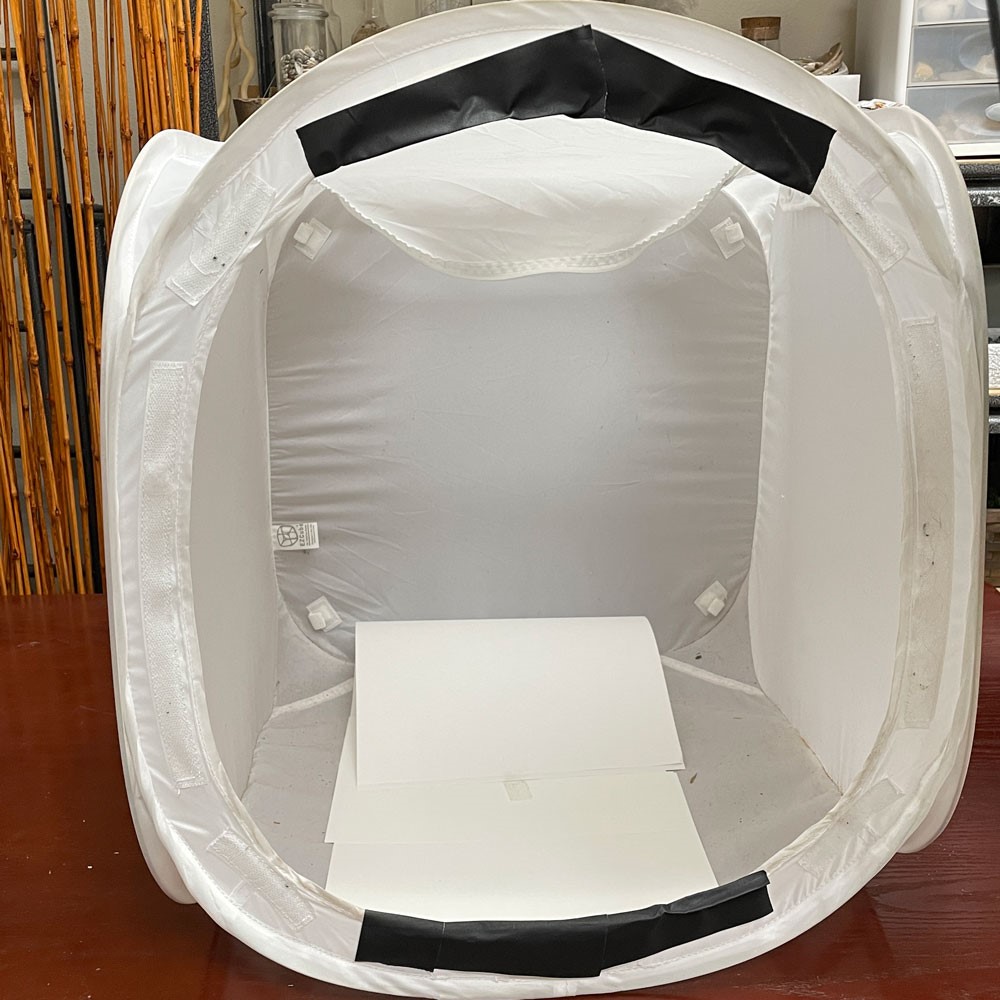
Light Tent
The third option for your home/studio photography setup is a light tent (preferably the white soft box pop-up variety). Light tents generally start around $20 and go up based on quality and size. Some come bundled with lights as well. A light tent with quality lights will yield the best and most consistent results for your photographs. The brightness and light diffusion a light tent affords mean your jewelry will be well-lit without harsh light or shadows. Uniform photographs are also easily achieved with a light tent. Light tent setups generally tend to cost a bit more money than the other options as 3-4 light sources are needed to get good lighting in addition to the tent itself. The setup will also take up more space and will have limited space for moving/shooting inside the tent itself.
Learn more about lighting for your home jewelry photo studio in this video with Hilary.
Budget Friendly Lighting Options
Buying lights for a home jewelry photography setup can be tricky since this is an area where generally the more you spend, the better you get. One option is the StudioFX Kit that comes with only one softbox but has multiple bulbs (reflector not included). Which setup you choose really depends on what will work best for your studio. Keep in mind you will need the light and a reflector to properly light up your jewelry. Make sure to buy a 5000K or higher daylight bulb with at least 2000 lumens. You can also DIY a reflector with something bright white and/or some aluminum foil on a solid background for stability.
Tripod
A tripod is an important tool for your at home jewelry photo setup because it will keep your camera steady. Your images will be crisper, clearer and cleaner when you use a tripod for stabilization. Stabilization is critical when using the manual settings on your camera. We recommend shooting with an ISO of under 200 for sharper, more detailed images.
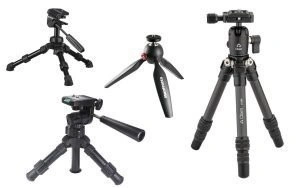
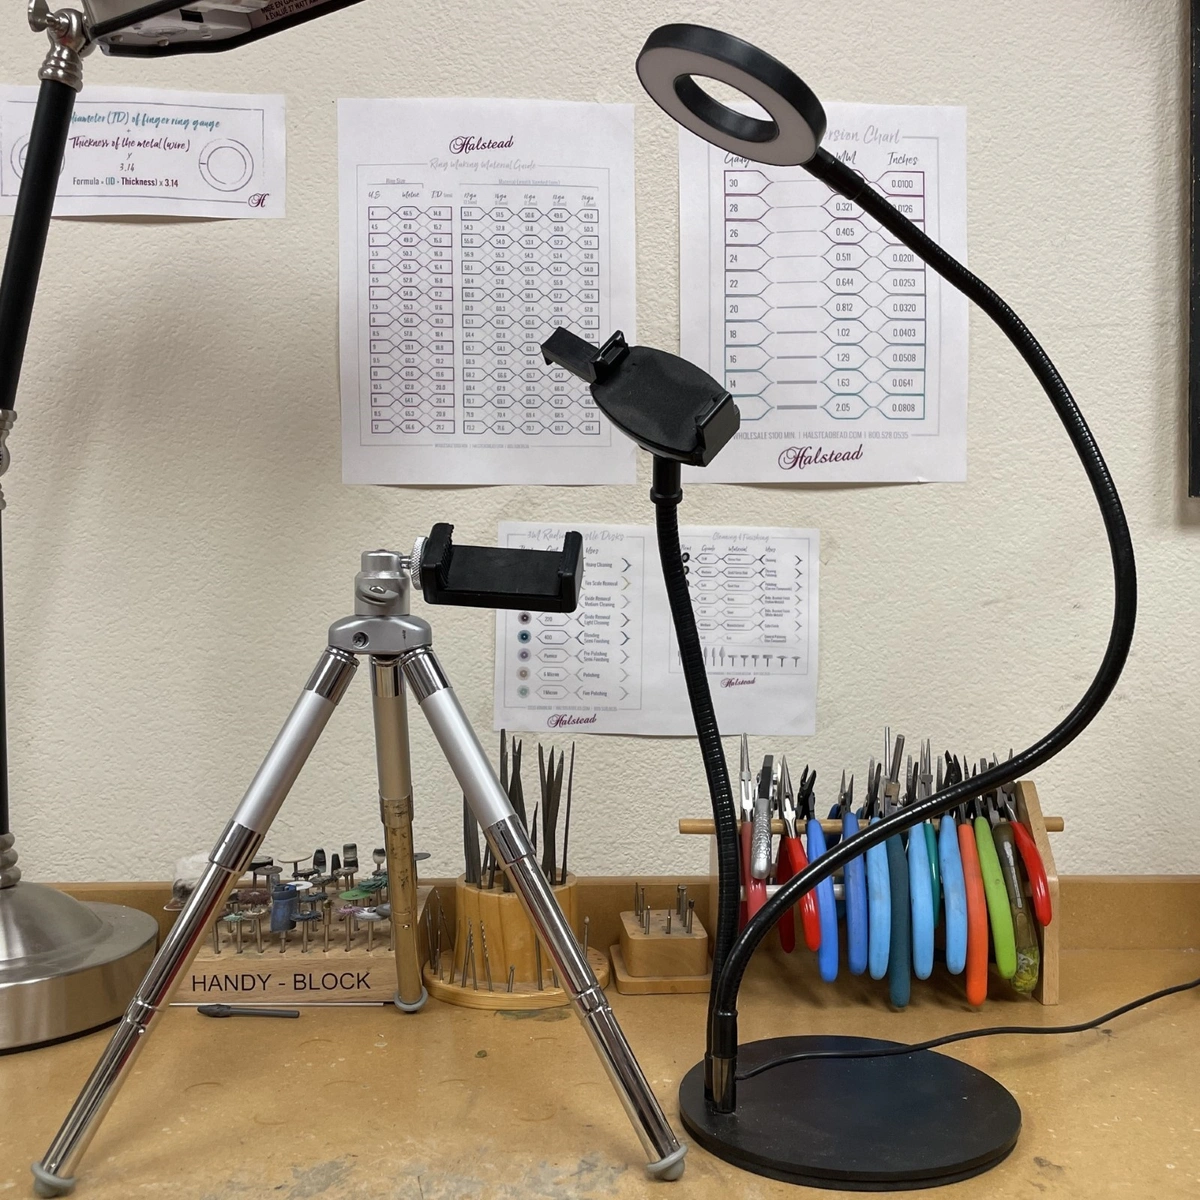
Tabletop Tripods
Tabletop tripods generally range from about $10 to $100. They're best suited for use with point and shoot cameras or phone cameras. Tabletop tripods don't work as well for DSLR cameras, as they are not strong or stable enough for the weight. They are likely to tip over when you add a top-heavy camera to your set up. It is important to get a tabletop tripod with pan/tilt capability to get the most options for positioning. When ordering a tabletop tripod, be sure to choose one that supports the weight of your camera AND lens if you want to use it with a DSLR.
Benefits of tabletop tripods:
-
Least expensive
-
Small and easy to maneuver
-
Can set up on a table next to your jewelry setup
Drawbacks of tabletop tripods:
-
Can be top heavy
-
Minimum focal distance of camera can limit how close you can get to your subject
-
Limited height options
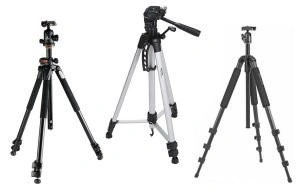
Full Size Tripods
Full length tripods can run as low as around $35 and can be as much as $400 and beyond. Consider how your photo area will be set up when thinking about what jewelry photography tripods to buy. You can save money if your tripod doesn't need to move a lot (aluminum vs carbon fiber).
Full-length tripods stand on the floor next to your photography surface. Again, look for pan/tilt features to ensure that you can shoot from multiple angles. You will also want a height adjustment feature that corresponds with your worktable or light box height.
Benefits of full-length tripods:
-
More features
-
Greater height options
-
More stable
Drawbacks of full-length tripods
-
More expensive
-
May be further from piece
-
Bulkier for travel
Choosing a Tripod
-
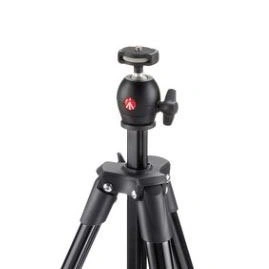
A ball head attachment for your tripod can increase the range of motion on your camera. Be sure to get a strong one so it will support your camera at any angle. Read product reviews to make sure the ball head position can be firmly locked in place. Some cheaper tripods have insufficient tightening mechanisms, so your camera slowly slips out of position during use.
-
A full-length tripod with an adjustable center column that adjusts to 90 degrees. This extender arm gives you the ability to shoot straight down at your jewelry from an overhead angle.
-
A remote shutter release (wired or wireless) is invaluable for getting still, clear shots. It allows you to take your photo without touching the camera, reducing movement in your shots. This can be critical especially when using a longer exposure.
Budget Friendly Tripod Options
The AmazonBasics 60-Inch Lightweight Tripod is a fantastic standing option on a budget. A great tabletop option at a similar price is the Manfrotto MTPIXI-B Mini Tripod. This ball-topped tripod will allow you to get good angles from a tabletop position with a sturdy base and strong roller-ball function to hold your camera steady.
Tips for Using a Tripod
-
Use the center column to add height to your tripod only when necessary; it makes your tripod less stable.
-
Did you know? You can even get a tripod mount for your cell phone; to stabilize even if you don't have a normal camera.
-
Make your tripod more stable under the weight of your camera (especially when setting the center column at a 90 degree angle) by positioning one of the legs of the tripod directly under the weight of your lens/camera.
-
If you don't have a remote shutter release, use your camera's self-timer function to give enough time to allow your tripod/camera to settle.
-
Be sure to turn your camera and lens stabilizer settings off when using a tripod. Failing to turn the stabilizer off can cause a feedback loop, in which your camera/lens will detect its own movement, causing camera shake.
Photography Background
Lastly, having a good neutral background in your home jewelry photography setup is important. White is usually best as it interferes with reflections/colors/etc. the least. If you're hoping to do beauty shots as well, be sure to have some props on hand. Depending on the kind of space you will be shooting in, you might choose something like this Table Top Light Tent or a Photography Backdrop Roll like this. The benefit of a light tent (if you are able to stay small) is that you don't necessarily need a light with a diffuser/softbox light rig as the tent will diffuse the light on its own. There are also options that combine a light box or light tent with interchangeable backgrounds or boards that can be propped up as a tabletop background.
Janelle also discussed tips for your studio setup in her 2022 JBF webinar.

