


Learn all about the torches used for jewelry soldering, including the various pros and cons. We’ll also cover your pickling solution and talk about ways to remove firescale
When it comes to torches and pickle for jewelry making – there are a lot of options! It can be overwhelming to know what’s the right option for you. In this blog we’ll cover the different types of torches used for jewelry soldering, including the pros and cons of each option. Additionally, we’ll discuss what pickle does, different types, and how to remove the ever-elusive firescale.
Jewelry Soldering Torches and Fuel Types
There are a lot of different torches and fuel options for you out there. We’ll discuss some of the most popular and common options used in the jewelry studio. SHOP JEWELRY TOOLS >>>
Torches
Butane
Butane canister jewelry torches are an inexpensive and easy way to bring a heat source into your jewelry studio. This is a great starter torch before making the leap to a standard acetylene torch, which can be pretty intimidating. Butane jewelry torches are perfectly adequate for many annealing, soldering, and enameling jewelry making projects – many people never make the switch to a different torch!

Tips for Using a Butane Torch
- It’s easy to find butane canisters at hardware stores. If you feel the need to upgrade, look for ‘triple refined’ butane for a more consistent and efficient heat.
- Lighting the torch may be difficult. Try setting the flame adjuster to the smallest size.
- You may notice inconsistencies in your flame size. Always check if your fuel canister is full first. If yes, you may have excess air in your canister. Vent your torch outside before refilling by depressing the refill valve to release the air.
- Altitude can affect butane torches easily. Play around with the settings to get it right for where you live.
Acetylene/Air Torches
These torches use one fuel tank, acetylene, and bring in oxygen from the air. They are super easy to use, as you are only working with one knob. They can do a wide variety of jewelry making tasks. While you easily have control over the size flame you’re using – by adjusting how open the torch is or using different tips – you don’t have much control over flame type. This refers to how sharp the flame is, or the ratio of gas to oxygen.

Two Tank Torches
There are a bunch of different torches on the market that utilize two tanks – one for a fuel, like acetylene or propane, and one for pure oxygen. These are great options because you can have control over the flame type, like I mentioned above. This allows for more precise soldering jobs. The downside is they are typically more expensive and have a slightly more complicated set up.
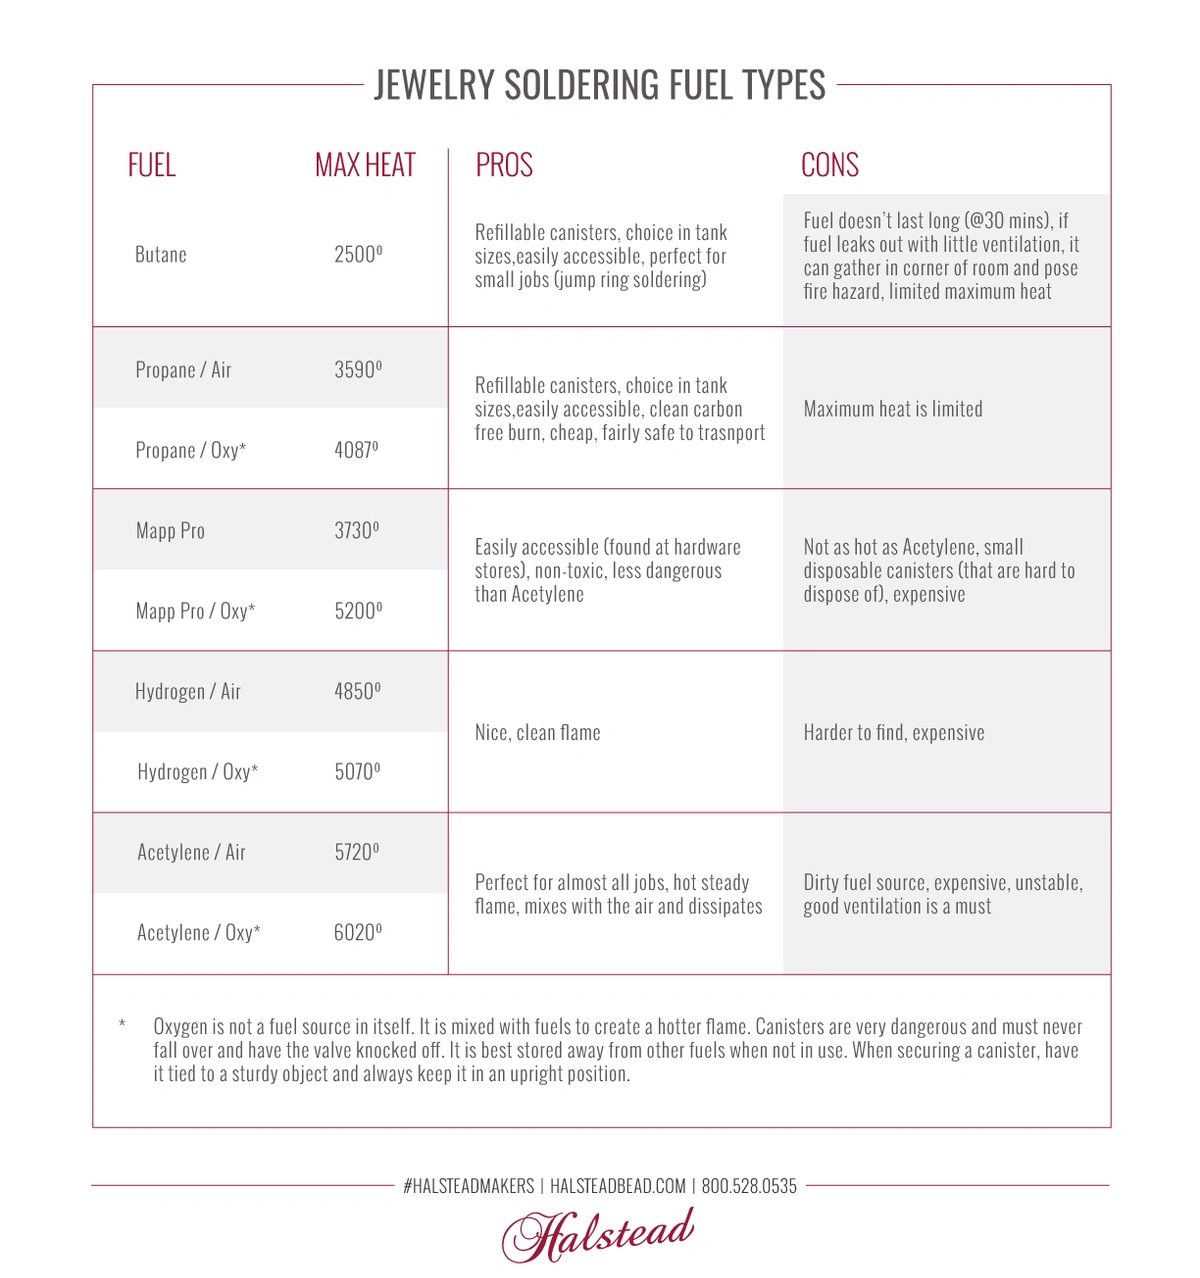
Fuel Types
Choosing which fuel to use in your jewelry studio can be overwhelming. The chart below compares the most common jewelry soldering fuels. When you order fuel tanks in your local area you will need to find a commercial gas vendor. In Northern Arizona, we use a company called Praxair. These suppliers are an amazing resource. They are used to ushering new buyers through a long list of questions to help you safely and effectively set up your space.
Torch Maintenance
It’s important that you maintain y our torch and tips. If your torch has O-rings on the tips, be sure to check them every 3-4 months for cracks or breaks and replace. They create a tight seal, so are important to keep in good shape! If your torch has hoses that connect to fuel or oxygen tanks, always double check there are no cracks, leaks, or breaks.

Pickle
Every time you solder jewelry, be ready to pickle your piece as you go. Pickling is simply dissolving oxidation and flux from the top layer of your piece after it has been heated. It's called pickling because it’s a solution made with alum, which is the same compound used to make pickles.
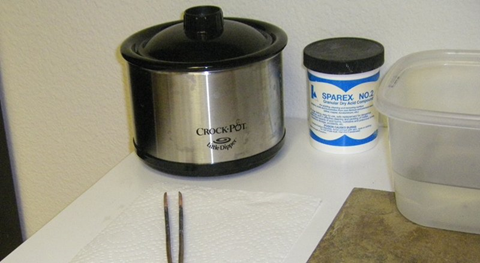
There are a few different types of pickle for jewelers out there. Sodium bisulfate is one of the most common ones and can be purchased from most of your jewelry tool suppliers, like Gesswein. Citric acid is also another common pickling acid. Sodium bisulfate and citric acid are both dry granular compounds and must be mixed with water. They work best when used warm. pH Down, for neutralizing the pH of pools and hot tubs can also be used as pickle and found in your local hardware store. Those that don’t want harsh chemicals in their studios can also use a salt and vinegar solution.
Pickle Disposal
Pickle is an acid and removed oxidation from your piece, meaning there are fine metal particles floating in the solution. It’s really important to make sure you dispose of pickle properly. Check with our state or county on regulations for disposing of pickle. The safest way is always to take it to a hazardous waste facility.
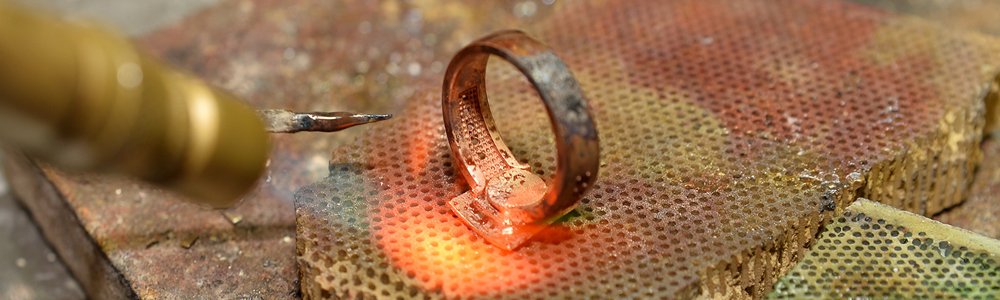
Firescale
Firescale, is a purple, gray, or blue color that comes to the surface of your silver after it’s been heated. When you heat sterling silver, the copper in the metal rises to the surface, creating this purple color. It’s much more common if you overheat the piece. The only way to remove firescale, also referred to sometimes as firestain, is by sanding it off. Pickle will not remove it. To help prevent firescale, be sure to not overheat your piece. Many jewelers also use a barrier flux, like Firescoff, Borax/denatured alcohol, and Prips Flux.
Now that you’ve familiarized yourself with the different types of torches, fuels, and pickle out there, you can make the right decision for you and your studio! Always remember when working with torches and pickle to have the proper safety precautions, including ventilation and eye protection. When mixing pickle you’ll also want to wear a mask and rubber gloves. Consider starting with the jewelry soldering tools kit - it comes with all you need to get started soldering, including a torch head, pickle, flux, and more. You can shop all jewelry making tools on Halstead's website.
Further Reading:
5 Steps to Start Silver Soldering
Learn to solder!
Got questions? Email our studio coordinator at [email protected]. We’d love to hear from you. Sorry, studio support is not available by phone. Emails only, please.

