


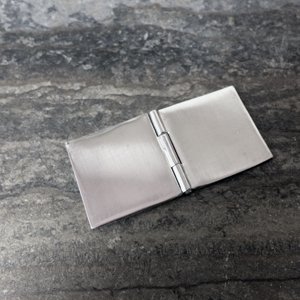
Learn how to make a basic knuckle hinge in your jewelry designs using tubing, sheet metal and jewelry wire.
Learning how to make jewelry hinges may seem intimidating, but they can actually be very easy with a little practice. Hinges are essential for lockets, boxes, poison rings, or many kinetic design elements. Adding this technique to your jewelry making skill set will allow you to conquer a whole new set of technical challenges. Sterling silver and brass will work well for hinges. This technique can be used with copper; however, it is a softer metal and the hinge may not last as long. Let's get started!
How to Make a Simple Knuckle Hinge for Jewelry:
Step 1. Cutting the Tubes
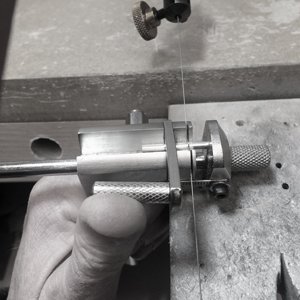
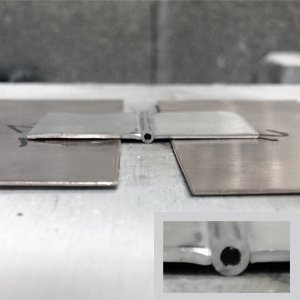
To create the hinge shown above, I used a tubing cutter jig with a saw to cut two 6mm lengths and one 8mm length of metal tubing.
- Tip: Make sure to cut your tubing with a saw. Using cutters or snips will collapse the tubing at the cut. We like to use tube cutting jigs to make it easier. Miter blocks work well for holding tubing while cutting also.
Step 2. Preparing the Sheet
I've lined the tubing up with the sterling silver sheet and used a permanent marker to draw the lines on the sheet where I will cut the pieces to fit the length of the tubing.
- Tip: Use a saw here too. Cutting with shears will not leave a square edge and can be bent and uneven. A saw will require less clean up.
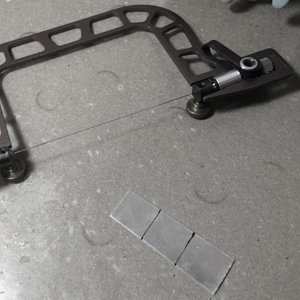
Step 3: Tubing and Gaps
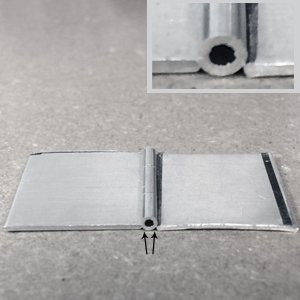
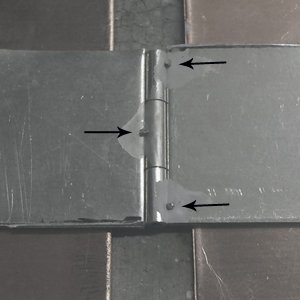
I've finished preparing the metal sheet and I've placed the tubing in-between the sheet to check the fit. The length of the tubing fits perfectly, however, look where the arrows are pointing and you can see a large gap on each side of the tube. If you look at the zoomed image, you can see that there just isn't enough contact between the tubing and sheet to create a strong join.
- Tip: Place graphite rod the same size as your hole through the tubing to keep it aligned.
Step 4. Gap Solution
There are a couple of solutions to this problem. First, you can file your sheet on the edge where the tubing meets the sheet using a round joint file. This creates a round indent along your sheet that the tubing rests in. Second, you can start by placing two additional metal sheet pieces on top of your soldering block. Place the sheet you will be using for the hinge on top of those with the hinge resting between them. This creates a platform that lifts your sheet up to the center of the tubing, which removes the gaps and will create a strong join in the center of the tube.
- Tip: This was a great solution since I didn't have a file on-hand that would work. The solution cam from Soham Harrison's YouTube video '3 Knuckle Hinge'
Step 5: Prepping for Soldering
You'll want to place your silver solder bits on opposing sides, as shown by the arrows above. The one on the left will hold solder onto the sheet on the left and the two on the right will solder to the sheet on the right.
- Tip: You don't want your solder to flow from one piece of tubing to the one next to it. Make sure to keep your solder pieces away from adjacent tubes. Using just the right amount of solder (not too much) will help. For extra protection paint yellow ochre where you don't want solder to flow.
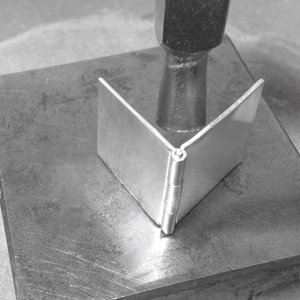
Step 6: Soldering your Jewelry Hinge
Solder your pieces now using a jewelers torch. After the solder flows, pickle, quench and dry your pieces.
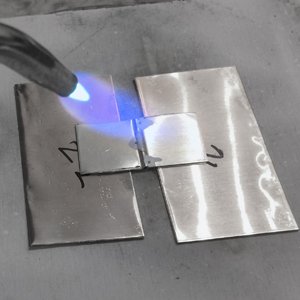
- Tip: Heat the whole piece gently to evaporate any liquid in your flux so it doesn't bubble up and displace your solder chips.
Step 7: Cleaning
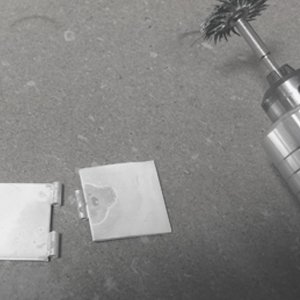
Clean your hinge sections now. I used 3M Radial bristle disks on a flex shaft.
- Tip: Keep anything too abrasive away from the tubing ends - it can round them out.
Step 8: Creating the Jewelry Hinge Pin
Piece your hinge together with a jewelry wire that fits inside the tube. Cut the wire so that only 1mm is showing on either side of the tubing. Using a bench block and riveting hammer, flatten the wire ends slightly so they can't slip out on either side. Sterling silver is a soft metal that can fatigue with frequent use. If your hinge mechanism will open and close often, it may be better to use steel wire for the hinge pin fabrication. Steel will be more durable over extended periods of time.
- Tip: Make sure your wire fits as snugly as possible, just as you would for a rivet.
Keep Practicing!
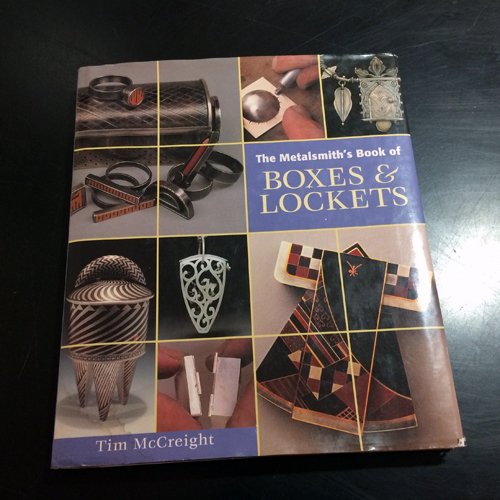
Now that you know how to make a jewelry hinge, have fun experimenting with new designs! One of my favorite books that we have in the Halstead Library is The Metalsmith's Book of Boxes & Lockets by Tim McCreight. I highly recommend it if you'd like to learn how to make different types of jewelry hinges. It's full of how-to instructions and the photos inside are beautiful and inspiring.
Got questions? Email our studio coordinator at [email protected]. We'd love to hear from you. Sorry, studio support is not available by phone. Emails only, please.
Shop Hinge Materials:

