


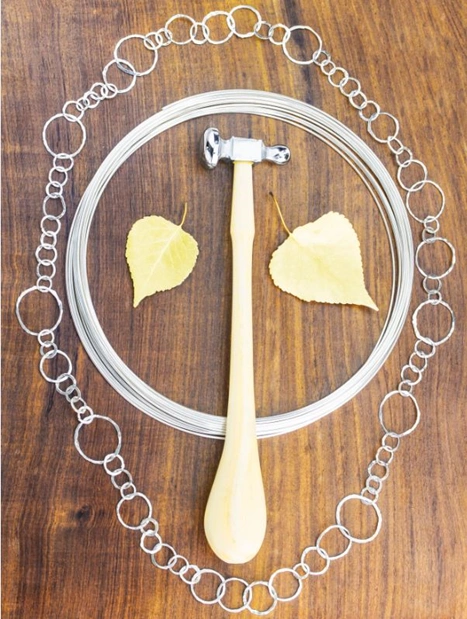
Wire is a fundamental jewelry material and can be used to make so many things. Learn how to make hoop earrings, hook clasps, jewelry links, custom chain and more.
Wire is a core material used in jewelry making. In this blog we’ll go over basic hoop earrings and a few design elements that you can easily make out of jewelry wire. We’ll cover some basic findings, like clasps, but also get into chain and links. Making chain or link elements is a great way to add your personality to your jewelry!
Jump ahead to other projects in this article using these quick links:
How to Make Jewelry Chain With Wire
Making Simple Hoop Earrings
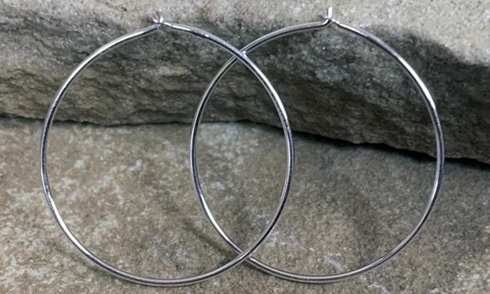
Hoops are a staple in earring collections and the pair below can be made in a variety of sizes. The nice thing too is this pair requires minimum tools, so they’re great if you’re just starting to make your own hoop earrings or jewelry designs. These DIY hoop earrings are easy to make and fun to wear. Try our convenient hoop earring making kit to get started.
Choose the Right Jewelry Wire
- Gauge – Because you’ll be using one piece of wire to create the entire hoop, you want to make sure it’s appropriately sized to go through the ear hole. 20-22 gauge is the sweet spot, although some people will go as thick as 18 gauge. Keep in mind not all customers will like the thicker material. 20 gauge is the sweet spot – not too thick, not too thin, so it still holds its shape.
- Temper – The next decision is deciding how stiff the material is. Half-hard is perfect for light forming.
- Material – The material you choose is important as well. Keep in mind that many people have allergies to copper or brass. Sterling silver or gold-filled is a great option because of this and the sensitivity of earlobes.
Tools
- Flat nose pliers
- Chain nose pliers
- Round nose pliers
- Flush cutters
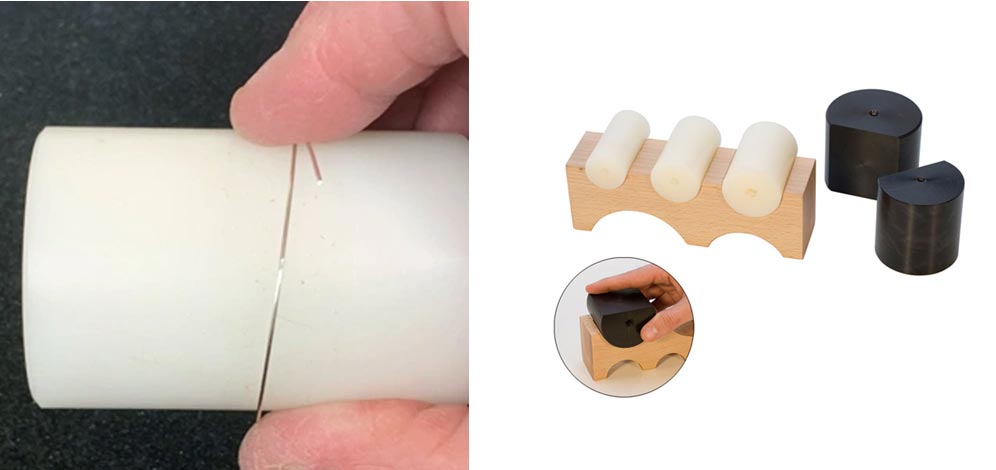
- Cylindrical object
- Rawhide or texturing hammer
- Bench block
Process
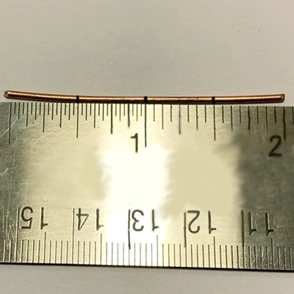
- Size and Cut – Pick a cylindrical object, like a mandrel, hammer head, or wooden dowel, to wrap your wire around. Some common household objects will work just fine. The diameter of this object will determine the diameter of your hoop. Overlap the ends by about 1 inch. Use your rawhide hammer to form the wire around the object so it keeps its shape. Use your flush cutters to snip the wire. A bracelet bending block is a great multi-purpose tool. It comes with multiple sizes of plastic to wrap your hoop around for a perfect circle, and is great for creating cuffs!
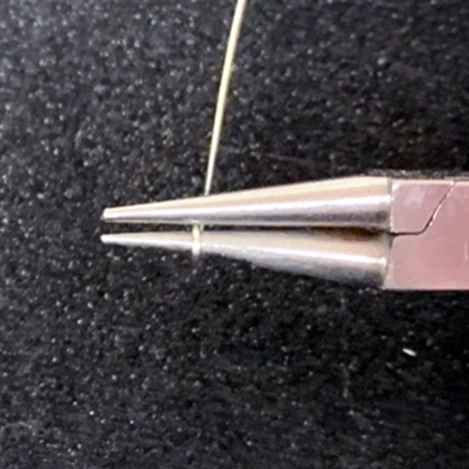
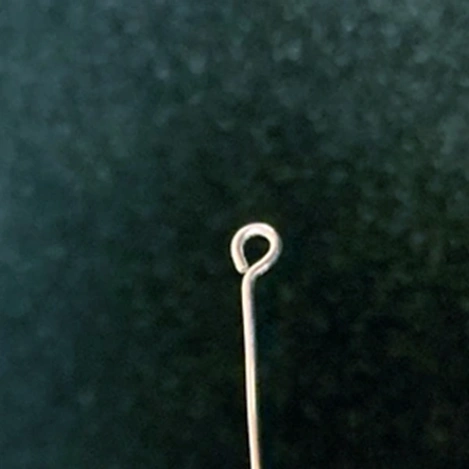
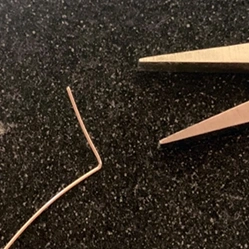
- Loop the end – You need to create a loop on one side of your hoop earrings. This is wear the end will thread through, making sure the hoop won’t fall out. Place the tip of your wire between the jaws of your round nose pliers. You may want to mark on your pliers where you do this so you can make the loop on each earring the same size. Wrap the wire around the pliers until you complete the loop.
- Straighten the loop – When you finish the step above, your wire will look like the letter ‘P’. Use the chain nose pliers to pinch the wire at the base of the loop and bend it so the loop is centered on the length of the wire, like a lollipop.
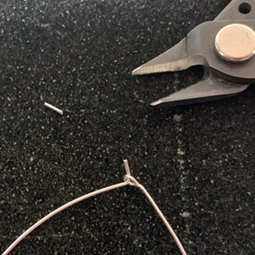
- Create the hook – Place your hoops back on your cylindrical object and mark where the wire intersects with your loop. You’ll create a bend here so that your hoops hook closed. Using your flat nose or chain nose pliers, bend the wire up and away from the center of your hoop. Snip the wire so it is only about ¼” long. It’s important that you file and sand this end smooth, as it will be the part going through the earlobe.
 |
 |
 |
- Work hardening – Close your hoop and place it back on your cylindrical object. Use your rawhide mallet or texturing hammer to tap out the wire to work harden it so the hoops retain their shape. You'll want to double check it's flat too. Place it on a steel bench block and hammer flat with your rawhide mallet, making sure to avoid the loop.
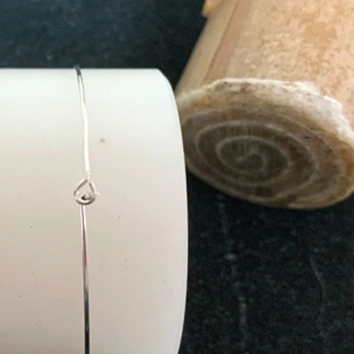
Now that you have the basic technique of making hoop earrings down, you can add beads or charms to spice them up. Create a fringe or just slip on a single charm. Check out the video below to see the process of how to make simple wire hoop earrings. And buy our hoop earring making kit now!
How to Make Wire Hook Clasps
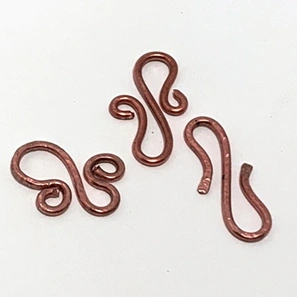
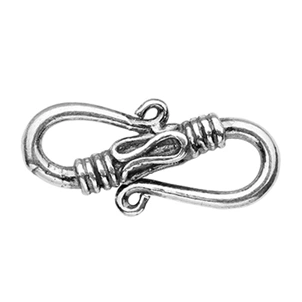
Once you've conquered DIY hoop earrings, you'll see that wire is an exciting material. Enhance your jewelry-making repertoire by creating fabricated wire clasps! As you move forward in your jewelry journey, you’ll likely start using jewelry chain that doesn’t have a clasp. Knowing how to make them allows you to finish footage chain how you want to, but also add some design interest that you can’t always find in pre-made clasps. Below are the steps to make a simple S-hook clasp. From there, you can make it as fancy as you want!
- Choose you’re wire. The wire gauge will depend on the chain links inner diameter and the weight of the entire chain. You’ll want to choose a wire that can handle the weight of the overall finished necklace and can slide through the chain end links. Generally, 18 gauge silver wire is a good choice.
- The length you cut your wire to depends on the size clasp you want. The larger the chain, the larger the clasp. 2 inches long is a good length to create a medium sized clasp. Make sure to clean up the ends of your wire to smooth them out.
- Divide your wire into 4, evenly space segments with a permanent marker.
- At the first mark, place your round nose pliers and wrap the wire around the jaws until it folds back on itself.
- Repeat this at the third mark, but wrap it in the opposite direction.

- Flare out the tips of the wire using the end of your round nose pliers. This is optional, but does make it easier to use the clasp.
- Work harden the clasp by gently hammering each bend. This is important because it will keep your clasp closed every time you slide it through the chain. Hammer on a steel bench block.

Now that you have the basics down – have fun with it! There are a variety of variations on S-clasp designs, such as the flat and looped finials shown below. Check out the video below to see the process in action!
 |
 |
How to Make Wire Links
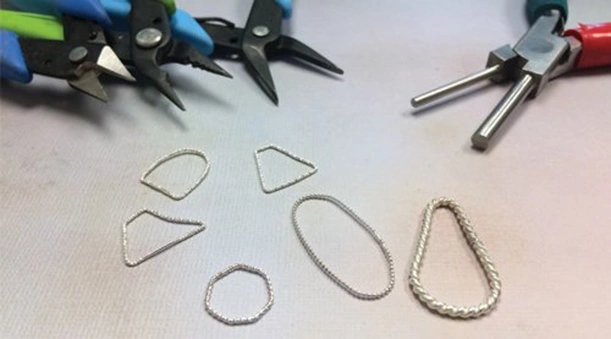
Fancy jewelry wires are typically described as twist, bead, hammered, sparkle, or diamond-cut wires. They’re still round wire, opposed to pattern and gallery wires which are typically flat or low-dome strips. Fancy wire are great for so many jewelry applications. You can use thinner gauges to add decorative wraps for bezels, links, rings, earring components and more. The thicker gauges can be used for bangles and bracelets, links, rings, chain, among other things. Scroll down for some tips on creating fancy wire links.
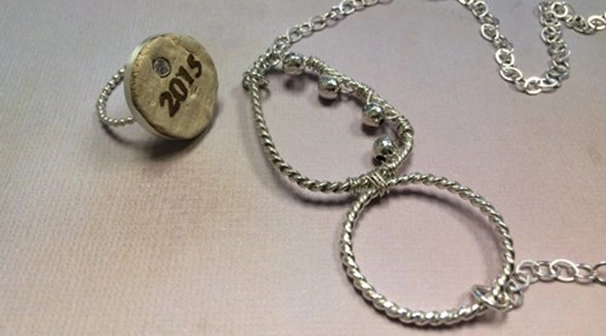
How to Shape Jewelry Wire
Shaping fancy jewelry wire is very similar to regular wire, but there are a few additional things you want to keep in mind. You can use any of your favorite pliers to create different shapes. Metal pliers may leave marks on your wire though. Bend around the plier tips as opposed to squeezing, or use nylon-jawed pliers so you don’t mark up your metal. You can also wrap your wire around a variety of mandrel shapes and hammer. Make sure you only hammer with a rawhide or plastic mallet. A metal hammer will alter the texture of your wire. SHOP JEWELRY MAKING TOOLS >>>
How to Make Jewelry Chain With Wire
Here at Halstead, we sell a lot of finished and footage jewelry chain in a huge variety of styles, but sometimes you want something different. Making your own chain, or chain segments, is a great way to add some spice to pre-made chain. It’s a great option for larger or textured chains that aren’t as readily available for purchase.
Chain links can be made from almost any gauge wire and out of any shape! You’ll want to be mindful of your link diameter though when selecting the gauge wire you’ll use. Thicker gauges might be too hard to form into small links and thinner gauges won’t hold their shape when they get to a certain size. You can use pliers or mandrels to form your links. Make them all the same, or different! Jill MacKay created the chain below using various sized links of 18g wire. She then hammered out each link to give them some texture and visual interest.
Chain Making Process
- Create all your chain links by forming them with pliers or wrapping around a mandrel
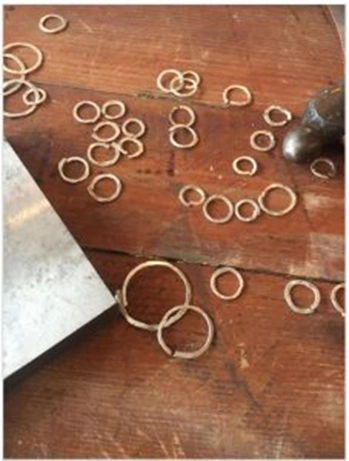
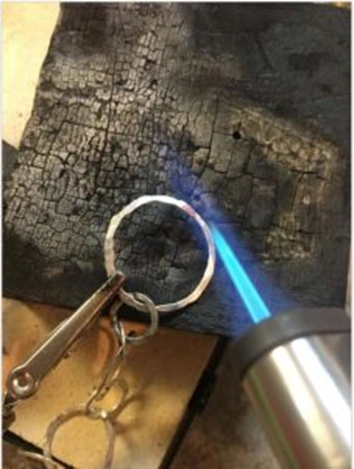
- Solder only half of your links closed – it’s much easier to solder them when they’re flat on the solder block before you link it up as a chain
- Link all your links together forming the chain or chain segment
- Solder all the open links closed – a third hand can be really helpful during this part
- Clean up and polish!!
If you’d like to texture your links, it make be easier to solder them all closed, texture, and cut half of them back open. Hammering can deform the shape if they aren’t soldered closed. You may choose to texture wire first, and then form your links as well. Handmaking chain and chain segments is a great way to experiment and have fun, while also building on some technical skills.
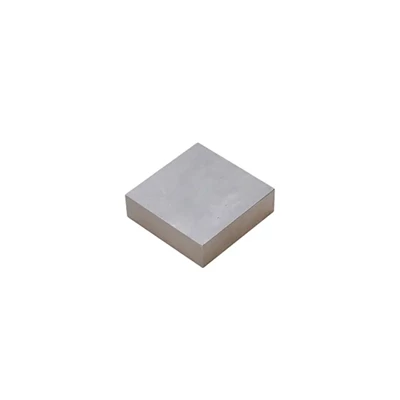
While many of the tools used to create these elements overlap, like pliers or hammers, there's one tool you'll want to make sure to have on hand - a steel bench block! This allows you to flatten all of your elements, making for a professional finish. It's also the surface you'll want to use for hardening and adding hammer texture to links or hoops.
We hope this blog has given you some ideas on what you can make with jewelry wire! Knowing how to create clasps and findings are great in a pinch if you can’t purchase your favorite ones or want to add some of your design voice to fundamental components. Links and chains are great ways to add your personal voice to pieces and mix in with purchased components. We hope this article sparks your creativity!!
Shop Bulk Jewelry Wire:
Continued Learning:
Five Steps to Start Silver Soldering
Jewelry Making Supplies for Hobbyists

