


Bench pin 101 for new jewelers. Also learn tips and best practices for sawing, one of the bench pin’s primary uses.
Jewelry making is full of tools and gadgets, but there’s one that’s fundamental – your bench pin. You’ll come back to it time and time again; it’s a primary work surface. One of the main functions of a bench pin is to support your jewelry sheet metal sawing and piercing. We’ll also cover sawing tips and best practices.
Anatomy of a Bench Pin
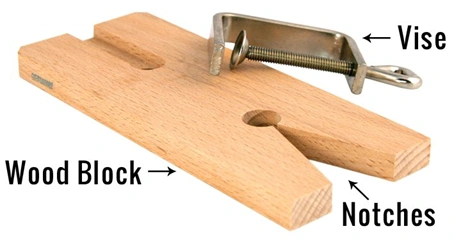
The image above shows a common variation on the basic bench pin. Almost all bench pins you encounter will be made of wood with a triangular notch in the center. This cutout allows space for your saw to move while cutting. This bench pin example comes with a vice. That’s a great option because it means you can attach it to a variety of table tops and work surfaces – you can even take it on the go!

The above image is the other most common type of basic bench pink you will encounter. This one is well loved, but has the same basic construction. It differs in that it has a larger, angled bottom that some jewelers like to face up and use as an additional work surface. You’ll also notice there’s no vice with this pin. It fits into a slot on your jeweler’s bench. This can be a great option because there’s no vice to get in the way. This bench pin is well-loved and you’ll notice additional notches. Customize your bench with grooves, extra notches and slits, or anything else that makes working easier for you.
Common Uses
There is a plethora of ways you can use your bench pin. Sawing, filing, polishing, and drilling are the most common. We’ll go into a few here, and touch more on sawing later in the article.
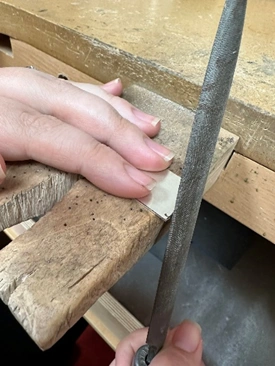
Filing
The grooves and openings in your bench pin are well-suited to brace your work against when filing. You can place it flat on top to file straight edges or wedge it into a small notch when filing smooth curves. You always want to support your work against something while filing – no air filing!! Support makes sure that each cut the jewelers file does is working to its fullest.
Polishing
Bench pins are also great for supporting your work while polishing. The bench pin is just a super versatile work surface. It’s situated above your drawer, so any metal and bench sweeps during polishing will be accumulated.
Drilling
You’ll notice in the bench pin above, one from the Halstead Studio, that there’s tiny holes allllll over it. Bench pins are great when drilling into your pieces. A) You probably already have a bench pin and B) they’re a lot cheaper than a drill press. Having wood support your piece while drilling means you won’t punch through with force and risk hitting your piece with the flex shaft chuck. That can cause damage that is a lot of work to remove.
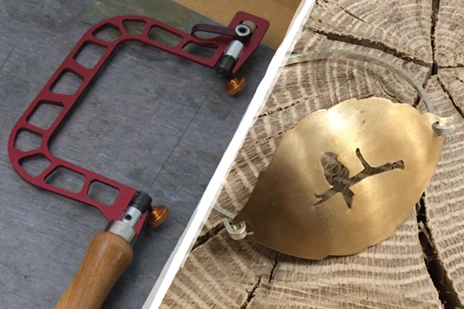
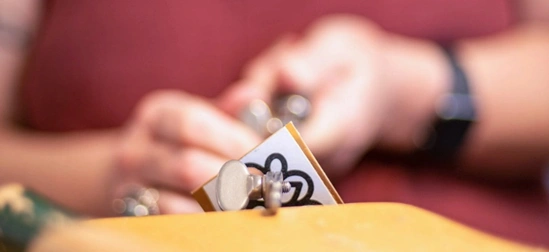
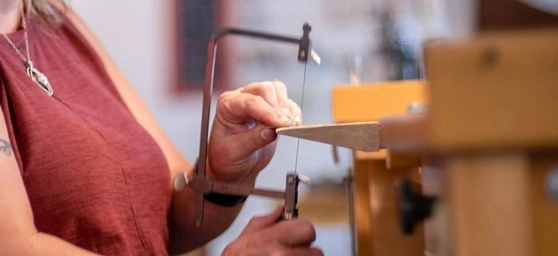
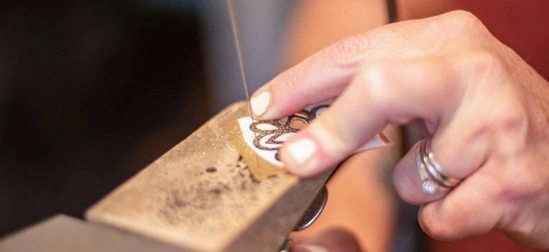
Sawing
Sawing is one of the most common uses of a bench pin. The flat surface is perfect for fully supporting your piece and the opening at the center allows for your blade to move freely. Sawing and piercing (cutting a small piece out of a larger whole) are some of the most basic and earliest jewelry skills you learn. You will use them constantly throughout your practice – from piercing intricate designs out of silver sheet to cutting jewelry wire to the right length for making a ring. We compiled a list with Julie Sanford of Studio JSD and one of our preferred teachers, to get you sawing like a pro in no time! Start sawing with the jewelry saw tool kit.
Top Tips for Sawing
- Wear protective eyewear – jewelers saw blades break frequently and can shoot off into space.
- Use pliers to grab a blade from the center of the pack – this is so much easier than attempting to unravel the tiny wire that holds them all together.
- Your bench pin should be chest height – if you’re sitting too much higher than this, you’ll be more likely to angle your saw frame and break blades.
- Have a sturdy bench pin – support is key. With a supportive bench pin your piece is less likely to wiggle around and break a blade.
- Angle the teeth down – always load your blade with the teeth facing down, like a Christmas tree.
- Tension the blade – a well-tensioned blade makes a high-pitched ‘ting’ when you flick it. A loose blade will bend while sawing. It’s more difficult to cut and more likely to break.
- Saw straight up and down – hold you saw perpendicular to the material for better cuts and less breakage.
- Use lubrication – cut lube, beeswax for jewelers, or soap all work great to lubricate your sawblade for smoother sawing. I like to put mine on the back of the blade so it doesn’t clog up the teeth.
- Use the whole blade – you’ll have more effective and efficient sawing if you use the whole length of the blade, not just a tiny section in the middle.
- Keep your fingers away – never have your fingers in front of the blade; always keep them on the sides or back. These blades are meant to cut metal, so they cut skin really easily.
- Relax your grip – keep a loose grip on the saw handle to prevent muscles from cramping unnecessarily.
- Don’t push – let the saw do the work. You don’t need to push the blade into the metal; you’re more likely to break a blade this way.
- Turn the metal, not the blade – when you’re cutting out curved lines you always want to move the metal. Your saw stays pointing straight ahead. This keeps it perfectly lined up in the opening of your bench pin.
- Listen – listen to the sound the blade is making. It can clue you in to man things. You might be pushing too hard or need to lubricate y our blade.
- Practice! – you’ll break a lot of blades when you’re starting out… and after that too! Don’t sweat it. Load a new blade in and keep on sawing!
More Resources for New Jewelers
Setting up a New Jewelry Studio

