


Learn how to rivet your jewelry designs using wire cold connections. This guide will cover the essential materials you will need plus technique tips for success.
Jewelry riveting is one of the most popular cold connection methods there is. It allows you to join to pieces of metal, often silver sheet, without the use of heat or soldering. You can start riveting jewelry with a small number of tools, jewelry wire, and sheet or blanks. It’s a great way to enhance hand stamped jewelry and build your metal forming skills. This blog will go over the process of how to rivet and talk about a few popular types of rivets.
Jewelry Riveting Tools
The list below includes the tools and supplies you need to create jewelry rivets.
- Riveting hammer or small ball pein hammer
- Flush cutters/wire snips
- Needle File
- Steel block
- Drill
- Silver Wire for rivets
- Sterling Silver Sheet or blanks
The following are optional tools that you may choose to use.
- Bench vice
- Bead reamer
Jewelry Riveting Overview
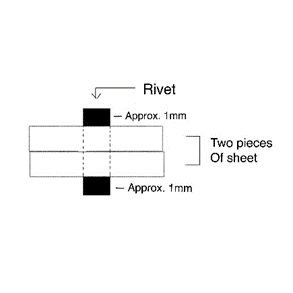
Before we get into the nitty gritty step-by-step process, I want to give you an overview of how jewelry riveting works. The rivet itself is the piece of wire that will pass through two, or more, pieces of metal to join them together. You leave a little bit of wire sticking out on either end. You then flare each side of the rivet with a hammer. The spreading of metal is what prevents the rivet from falling out – effectively joining the two pieces of metal together. Riveting is an excellent beginning jewelry making technique. It requires very few tools and is easy to learn.
Steps to Jewelry Riveting
- Mark where your hole or holes will go with sharpie – this is where your rivets will be
- Do this on the top piece only
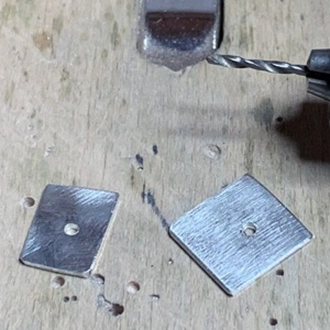
- Drill all holes using the same size drill bit as the wire you will be using for riveting
- Check out our blog with jeweler’s charts for a conversion table
- You want the wire to be snug in the hole
- Drill ONE hole on the back piece that lines up with one of the holes on the front
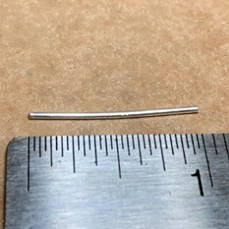
- Cut a piece of wire that is long enough to pass through both pieces of metal with a little extra on each side
- Thread the wire through the two sheets of metal
- Trim the ends with snips so you have approximately 1mm of wire sticking out on each side
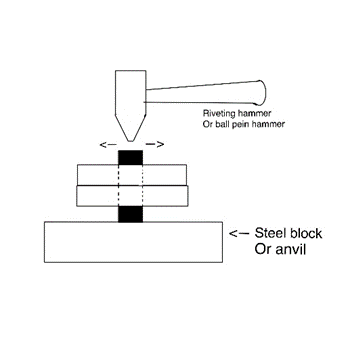
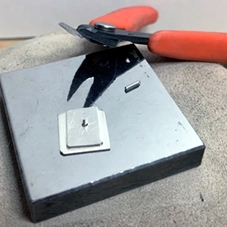
- Place your sheet, with wire in the hole, on a steel block. Support the pieces you are riveting together with a sheet of metal approximately 1mm thick (18g)
- This allows the end of your rivet to stick out while you flare the top side
- Trim the wire to have 1mm sticking out on top
- File the end flat and straight
- Using the cross pein side of your riveting hammer or a ball pein hammer and hammer the top of the rivet to spread it out
- Hammer in an even, circular motion
- Flip your piece over
- File the end of the wire flat and straight if you need to
- Hammer the end of the wire the same way you hammered the first side
- Flip between the two sides to refine your hammering if needed
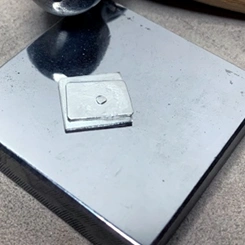
- Your rivet is now complete!!
If you have more than 2 rivets on your piece, you will want to drill the holes on your back piece as you go. Complete the first and second rivets to completion. After you do this, you can then drill the rest of your holes right through the hole on the front. This ensures that your piece won’t move around and that your rivets will always line up. Do not drill all of the holes on your front and back piece at the same time – this almost always means you’re going to have alignment issues!
Alternative Way to Create a Classic Rivet
An alternative method to creating a rivet is by flaring one end of the wire in a vice first, instead of supporting the piece and leaving the end sticking out. To do this you will cut a length of wire and gently clasp it in your bench vice with only 1-2mm sticking out the top. Be careful not to tighten the vice too much or you could deform your wire. File the top of the wire smooth and hammer it in the same way as above. You have now pre-spread one side of your rivet! You’ll place this side on the bottom, touching your steel block. Rivet the other side.

Other Types of Rivets
There are a few other types of rivets that are commonly used in addition to the classic rivet. Each ones is done slightly differently.
Ball Rivet
Ball rivets have a ball on the front of the piece, with a flat rivet head on the back. To do these you ball up one end of wire with a torch. When it comes time to rivet, support the ball in a small divot of a dapping block or cushion it with leather, while you hammer the other side. This way you’re not flattening the ball out. Ball rivets are often used for kinetic designs where the artist wants one layer to spin or move. However, movement will depend on how tightly you set your rivets.
Flush Rivet
Flush rivets have no rivet head sticking out above the top of the metal. The head is inset into the sheet. To create this type of rivet you will open the top of your rivet hole with a ball bur that’s a bit larger than the hole size. You want to go about one-third to one-half of the metal thickness. Rivet as you usually would – the rivet head is spreading into this wider opening that you created. You will then file the top of the rivet flush with the sheet.
Tube Rivet
Tube rivets are often used in a decorative manner, but can absolutely be functional as well. Instead of using wire at the rivet material, you will use a piece of tubing. You do not use a hammer to spread the top of the rivet though. You will use a center punch to flare the ends out. Alternate a little on each side to keep it even. Once your rivet is closed up, you can take a flat or slightly curved hammer to smooth the edges out. If your center punch begins to hit the steel block, place your hole over a divot on a dapping block to give yourself room.
Jewelry Riveting Tips and Tricks
- Make sure your rivet is cut to the correct length – if it is too long the rivet head will bend, not spread. If it is too short, it won’t spread enough and lock over the edge of the hole.
- If your hole is a little too small for your wire, you can use a round file or bead reamer to open it up slightly – go slow and check the fit often to make sure you don’t open it up too much.
- If your hole is too big, you can use a hammer or burnisher right around the edge. This will push the metal slightly into the center, making your hole smaller. This only works for holes that are slightly too big.
- Rivets are one of the last things you will do on your piece – make sure your textures and patinas are applied first. It can be difficult to get close to the rivet when finishing.
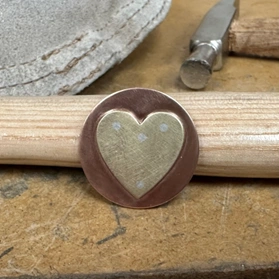
- Rivets can be purely decorative too – have fun with them and try using different metals for contrasting colors.
- You can refine the top of your rivets with a flat or slightly domed hammer.
Shop Riveting Materials Now:

