


Copper and brass are fun materials to work with in the jewelry studio. They are beautiful in their own right and they are perfect for learning new techniques. But, soldering these metals raises unique issues in design and technical execution. Learn more from our studio coordinator, Erica Stice.
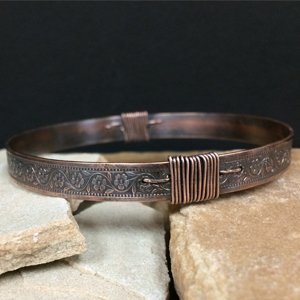
Soldering copper and brass metals can be challenging, but here in our employee studio, we use base metal for many projects. All of our beginner's classes start with these two metals for jewelry making to teach fabrication techniques before moving on to sterling silver. We use them for earrings, pendants and especially cuffs. You can't find a metal that patinas as nicely as copper or metal that polishes as easily as brass. Base metals are inexpensive and less intimidating while you are learning new techniques and tools.
Soldering base metals is a lot different than soldering with sterling silver or gold. Since copper is the trickier base metal, after successfully soldering with copper, switching over to sterling silver becomes an easy transition to make. SHOP SOLDERING TOOLS >>>
Understanding your Materials
- Ductile = stretching (If metal is ductile it can be drawn through a drawplate without breaking)
- Malleable = compressed (If metal is malleable you can pound on it with a hammer or roll it through a rolling mill)
Copper
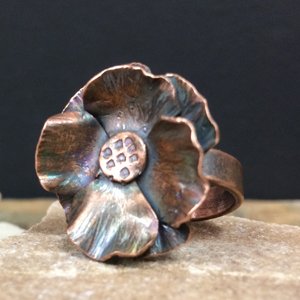
I love working with copper! It's soft and malleable, patinas easily and it improves with age. Call me naive but I thought, since it's on the Periodic Table, it would be mined in its natural state. But did you know that very little pure copper is actually found in that form? Copper is instead commonly found in ores. Jewelers frequently use copper sheet and copper wire as an inexpensive design material. Pre-cut copper blanks are a time-saver too.
To remove the copper from these various types of ores requires numerous steps. Each step is very important, because it separates out the undesired materials, therefore, improving the purity of the copper. The process steps to extract copper is fascinating yet it also produces a dangerous waste product that is harmful to our environment. Thankfully, in the United States, we recycle over half the copper that we use and that percentage is rising.
Brass
Brass metal is mainly a combination of copper and zinc. It is ductile and malleable, just like pure copper. There are 60+ different types of brass alloys, but the two most popular types for jewelers are yellow brass (copper 67%, zinc 33%) and red brass (copper 84%, zinc 15%, iron 0.05%, lead 0.05%).
Brass is inexpensive and easy to work with. Jewelry artists prize its golden color and affordability. Brass sheet and brass wire are popular materials.
Planning your Design
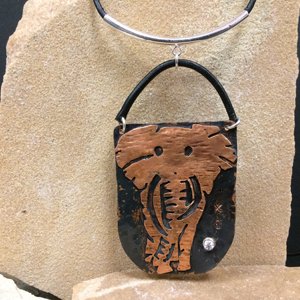
Now that you understand the materials you're working with, the next phase would be to plan your design. When I plan out my jewelry designs I keep in mind that I'm using silver solder and not copper solder. There are reasons for this. Copper solder is very brittle therefore it breaks often when texturing or maneuvering a piece after it has been soldered. Another reason is that it's not an exact color match after it's soldered onto a piece anyways. But the main reason why I choose not to use it is that there is only one flow temperature with base metal solder. There aren't any soft, medium or hard copper solders available so that makes it more difficult when creating multi-step soldering pieces. I prefer to work with Jewelry solder and just plan around the visible joins that will result.
You can overcome the different colored join issue in your designs in a variety of ways.
- Implement the solder joins into your design. For example, add silver embellishments so the silver coloring becomes part of the piece.
- Hide the joins by wire wrapping around them.
- Sweat solder your pieces so that the solder is underneath and hidden from view.
- Plate the entire piece with a uniform metal finish once it is completely fabricated.
- Patina the piece (Silver solder does not patina as well as copper, so I dip the entire piece first then use Liver of Sulfur, applied with a paintbrush, on the join itself).
Prepping your Copper and Brass Metals
Preparing your metals before soldering jewelry is crucial. Neglecting just this one step can really be the difference between success and failure when you attempt to solder. The first thing you need to do is to check your join. Those two pieces (or ends) must fit perfectly together. If it's hard to see, hold them up to a light source and see if any light shines through the join. If it does, use sandpaper, files, a saw blade or whatever else works, until that join is tight.
Now that you've completed part one of the prep work, you can move to step two which is to clean your piece. Base metals are dirty materials and all that dirt, grime, and oil need to come off so they don't interfere with the solder. Grab a 600 or 800 grit sandpaper and rub it on the joins where the solder will flow. When you're finished, don't touch it where you've sanded it, or you'll contaminate it and have to sand it again.
Now, you can prepare to solder.
Soldering Copper and Brass
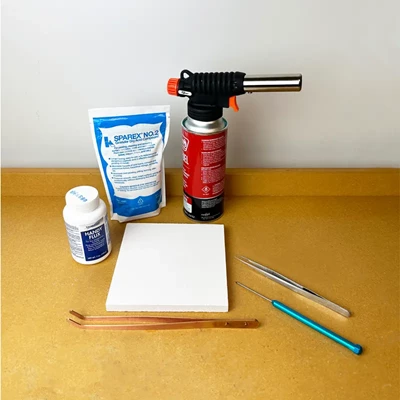
Before we get into the nitty gritty of soldering copper and brass - you'll want to make sure to have the proper tools The jewelry soldering kit gives you all the basics you need. Check out our blog, 5 Steps to Start Silver Soldering, for more detailed information!
Solder
Soldering copper can be difficult. It melts at 1983 degrees F, which is very high compared to other metals! To put that into perspective 14kt gold melts at 1615 degrees F, sterling silver at 1640 degrees F, brass between 1650-1724 degrees F, and fine silver at 1761 degrees F. Add 222 degrees F to that last temperature and you'll finally melt your copper. That's a lot of heat and some torches simply can't melt it. But what if your goal is to just solder it? That's a great question.
Tip: The flame doesn't melt the solder, the metal does.
Meaning, no matter how long you hold the flame over the solder it simply won't flow. Solder will not flow on cold metal. You must always focus on heating the metal and when that gets hot enough the solder will flow. So, as you can see, it's really important to get the metal hot enough to reach the temperature of the flow point of the solder.
We use silver solder when we're working with copper and brass. The amount of zinc in a metal alloy lowers the melting point, that's why brass melts at a lower temperature than pure copper. You can use any silver solder on copper or brass metal, but solder flow points vary between vendors so always check the flow points of the solders you choose.
Torch Tips & Flames
Copper oxidizes really quickly, so you need to get in there and heat it as quickly as possible before it gets too dirty. Flux will help with that and Handy Flux paste works great with copper and brass. Flux can melt off faster than the solder has time to flow, though, so choose your torch tip carefully because heat will be your number one friend when soldering metals.
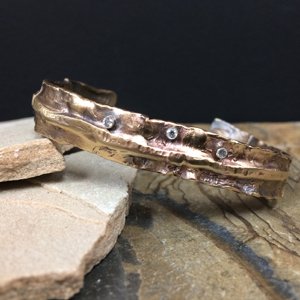
Note: We use a Smith torch here connected to air/acetylene tanks. We have three torch tips for everything that we do here and that's the perfect number for us. The small tip is used for small soldering joins (jump rings, earring posts), the medium tip is used for most of the soldering pieces (rings, pendants), and the large tip is used for the large jobs (cuffs, annealing, and melting).
Soldering Brass and Copper Troubleshooting Tips:
Solder not flowing:
- Metal could be too dirty/oxidized
- Torch tip too small for the heat needed
- Incorrect fuel for the job
- Incorrect flux/or no flux used
Not enough heat:
- Use a larger torch tip
- Create an enclosed space to solder in using fire or soldering bricks
- Solder on a charcoal block (charcoal blocks reflect heat, which warms up your piece significantly)
Brass turns pink when pickling (zinc has burned off, so copper is all that remains on the surface)
- Use sandpaper or 3m Radial Bristle Disks on a rotary tool to remove
- Place the jewelry in a container filled with pickle and a small amount of hydrogen peroxide. Remove it when it's clean (do not leave it in the mixture!)
Silver solder joins stand out because of the color difference:
- Plate it! Place the jewelry in pickle, add a piece of steel, let the copper plate the solder joins, remove the jewelry and steel from the pickle. You will not be able to reuse your pickle once you use it for copper plating.
- Oxidize the jewelry piece
- For even more ideas, refer to Planning your Design in the text above
Learn to Start Soldering
Shop now:
Here are more great soldering articles:
5 Steps To Start Silver Soldering
Jewelry Soldering 101: Torches & Pickling
Got questions? Email us at [email protected]. We'd love to hear from you. Sorry, studio support is not available by phone. Emails only, please.
References:
http://www.madehow.com/Volume-4/Copper.html: How Products Are Made explains in detail the entire process of extracting copper. It's a great read!

