


This blog covers important tips for soldering on earrings posts. From the basics to more advanced, we cover every aspect of the process!
Soldering earring posts can open you up to a whole new set of design possibilities. We’ll cover the basics of post soldering with a step-by-step list. Try our post earring making kit to get started right away. We also cover tips and strategies for those who are more advanced. We’ will dive into where to focus your heat, set up strategies, and working with multiples. Keep in mind that you can use pre-made solder ornaments, custom castings, or your own pierced shapes from silver sheet metal to create a variety of post earring designs. The techniques described here will work with a wide range of embellishments.
The Basics of Soldering an Earring Post
- Start with clean metal – I like to pre-finish my designs for easy clean up after. Soldering earring posts on is one of the last things you’ll do.
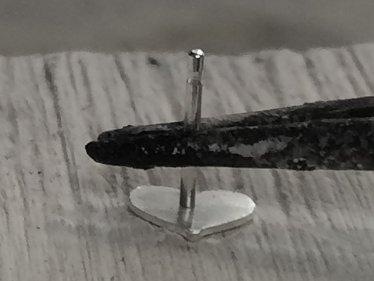
- Use a 3rd arm and cross locking tweezers to hold your post in place – Clamp your post about 1/3 of the way from the top. It allows enough space for the post to come up to temperature, but protects the end from melting.
- Flux it up! You can pre-place solder now, or pick solder later.
- Use a flame proportionate to the piece – If you’re soldering a post onto a tiny element, you’ll want to use a small flame. If it’s larger, scale up the flame to make sure the piece comes up to temperature.
Quench, pickle, and final clean up!
Soldering on earring posts really can be that easy! Remember to heat up the larger element first. Often times the ambient heat will transfer to the post during the process, and you won’t need to heat it separately. A good trick is to place your solder ball across from where your flame is – it’ll pull the solder to the other side ensuring a perfect solder joint!
Tools for Earring Post Soldering (h3)
- Torch
- Solder surface
- 3rd hand with cross locking tweezers
- Tweezers
- Flux
- Solder
- Pickle pot with copper tongs
- Quench bowl
- Solder pick
Now that you’ve got the basics down and have practiced a few times, continue reading for more advanced tips and tricks!
7 Tips to Master Earring Post Soldering
The tips below are universal. They apply to almost any earring post soldering job you’ve got.
1. Don’t overheat – Earring posts are thin, and often smaller than the rest of your piece. This means they’re really easy to overheat and melt. Keep your flame moving and make sure to focus heat on the earring itself. The earring is usually larger, or the soldering board is pulling some of your heat. The post will come up to temperature because it’s in close proximity. Use medium or easy solder for your posts. The lower melting temperatures will help make sure you don’t overheat the post.
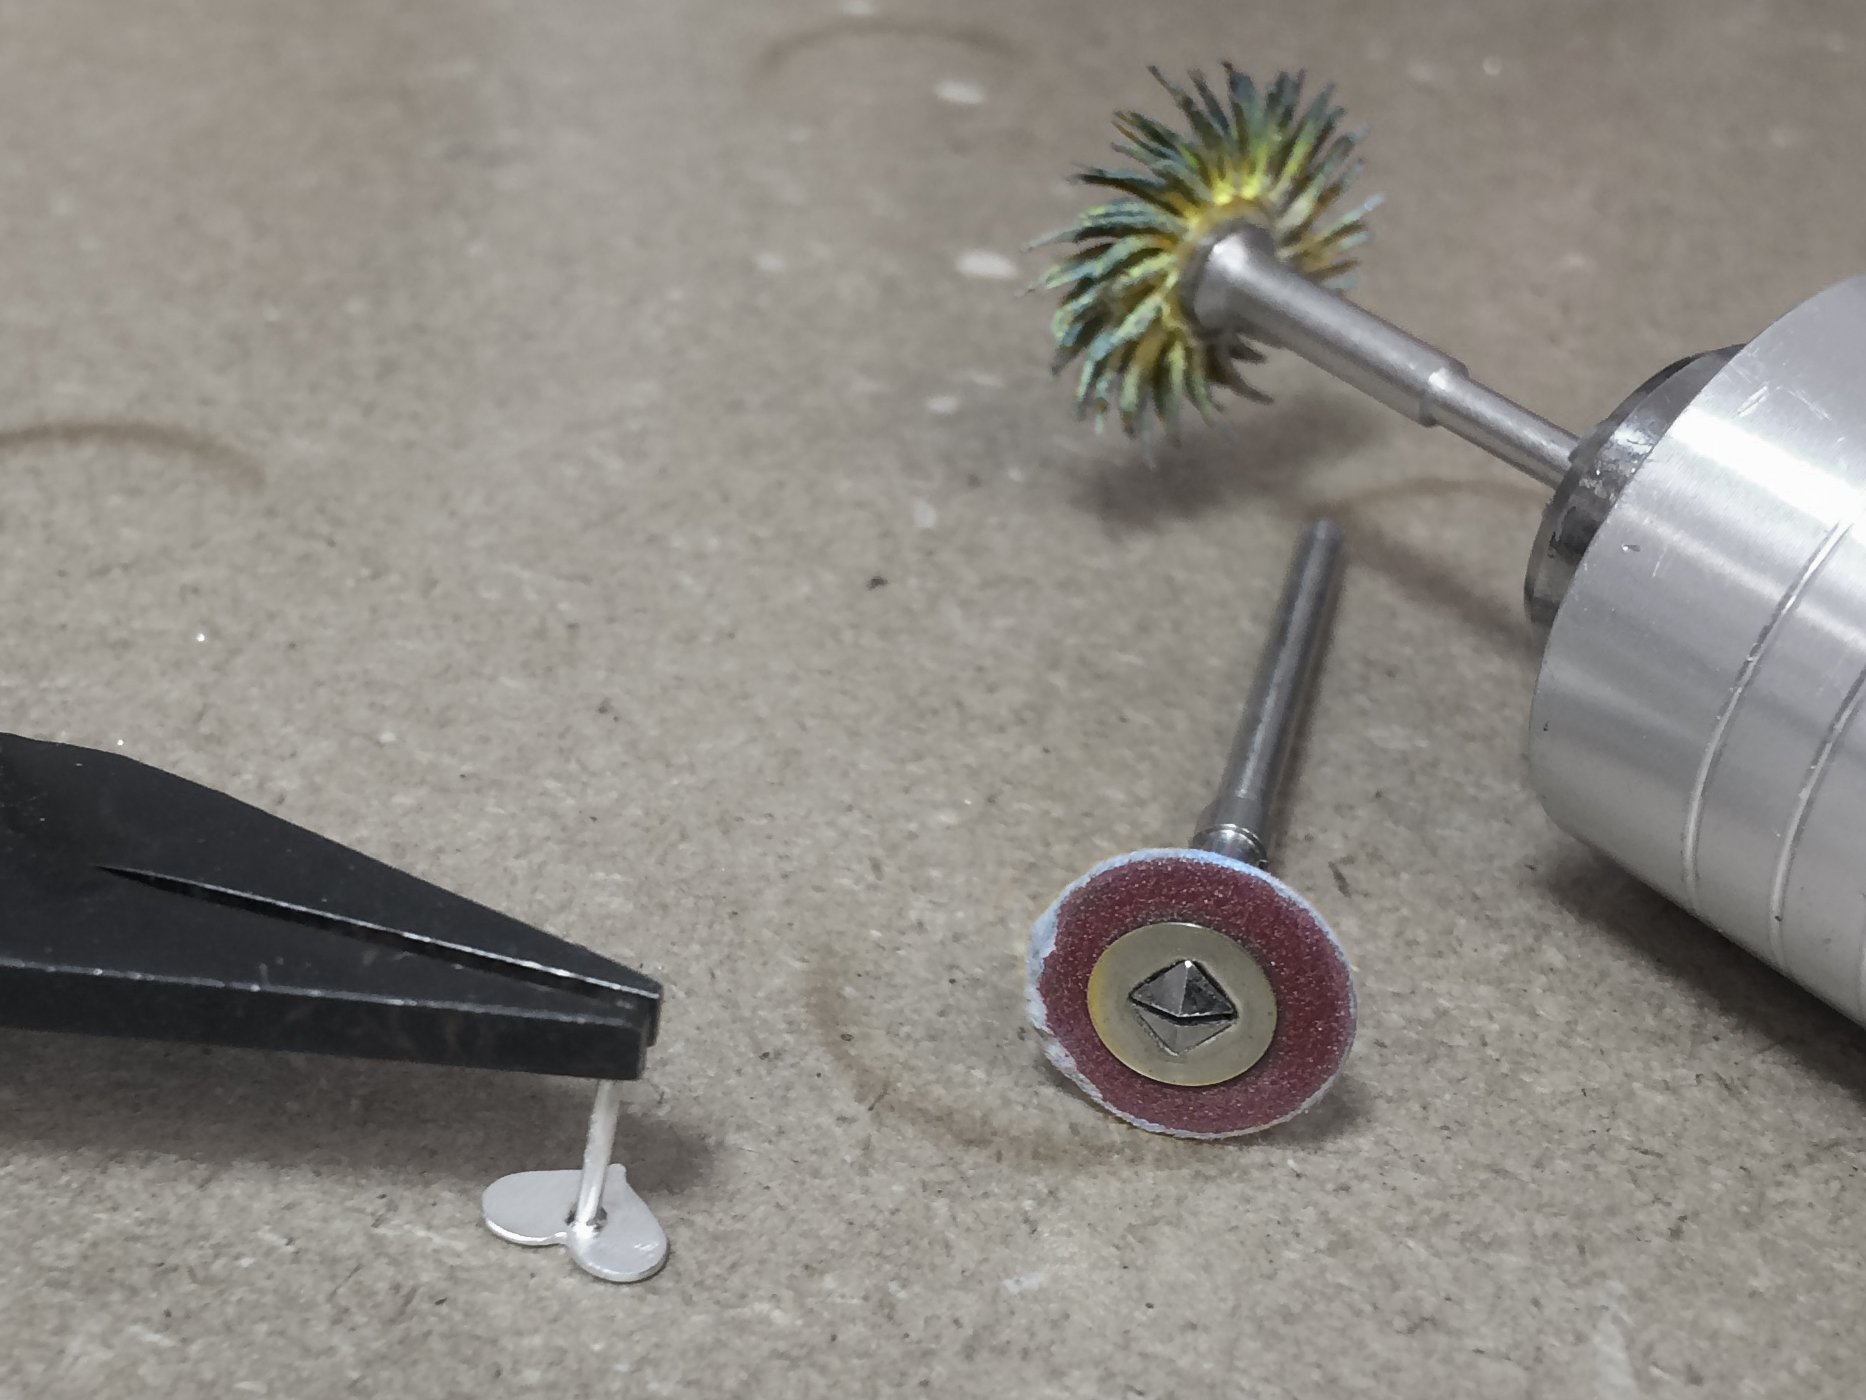
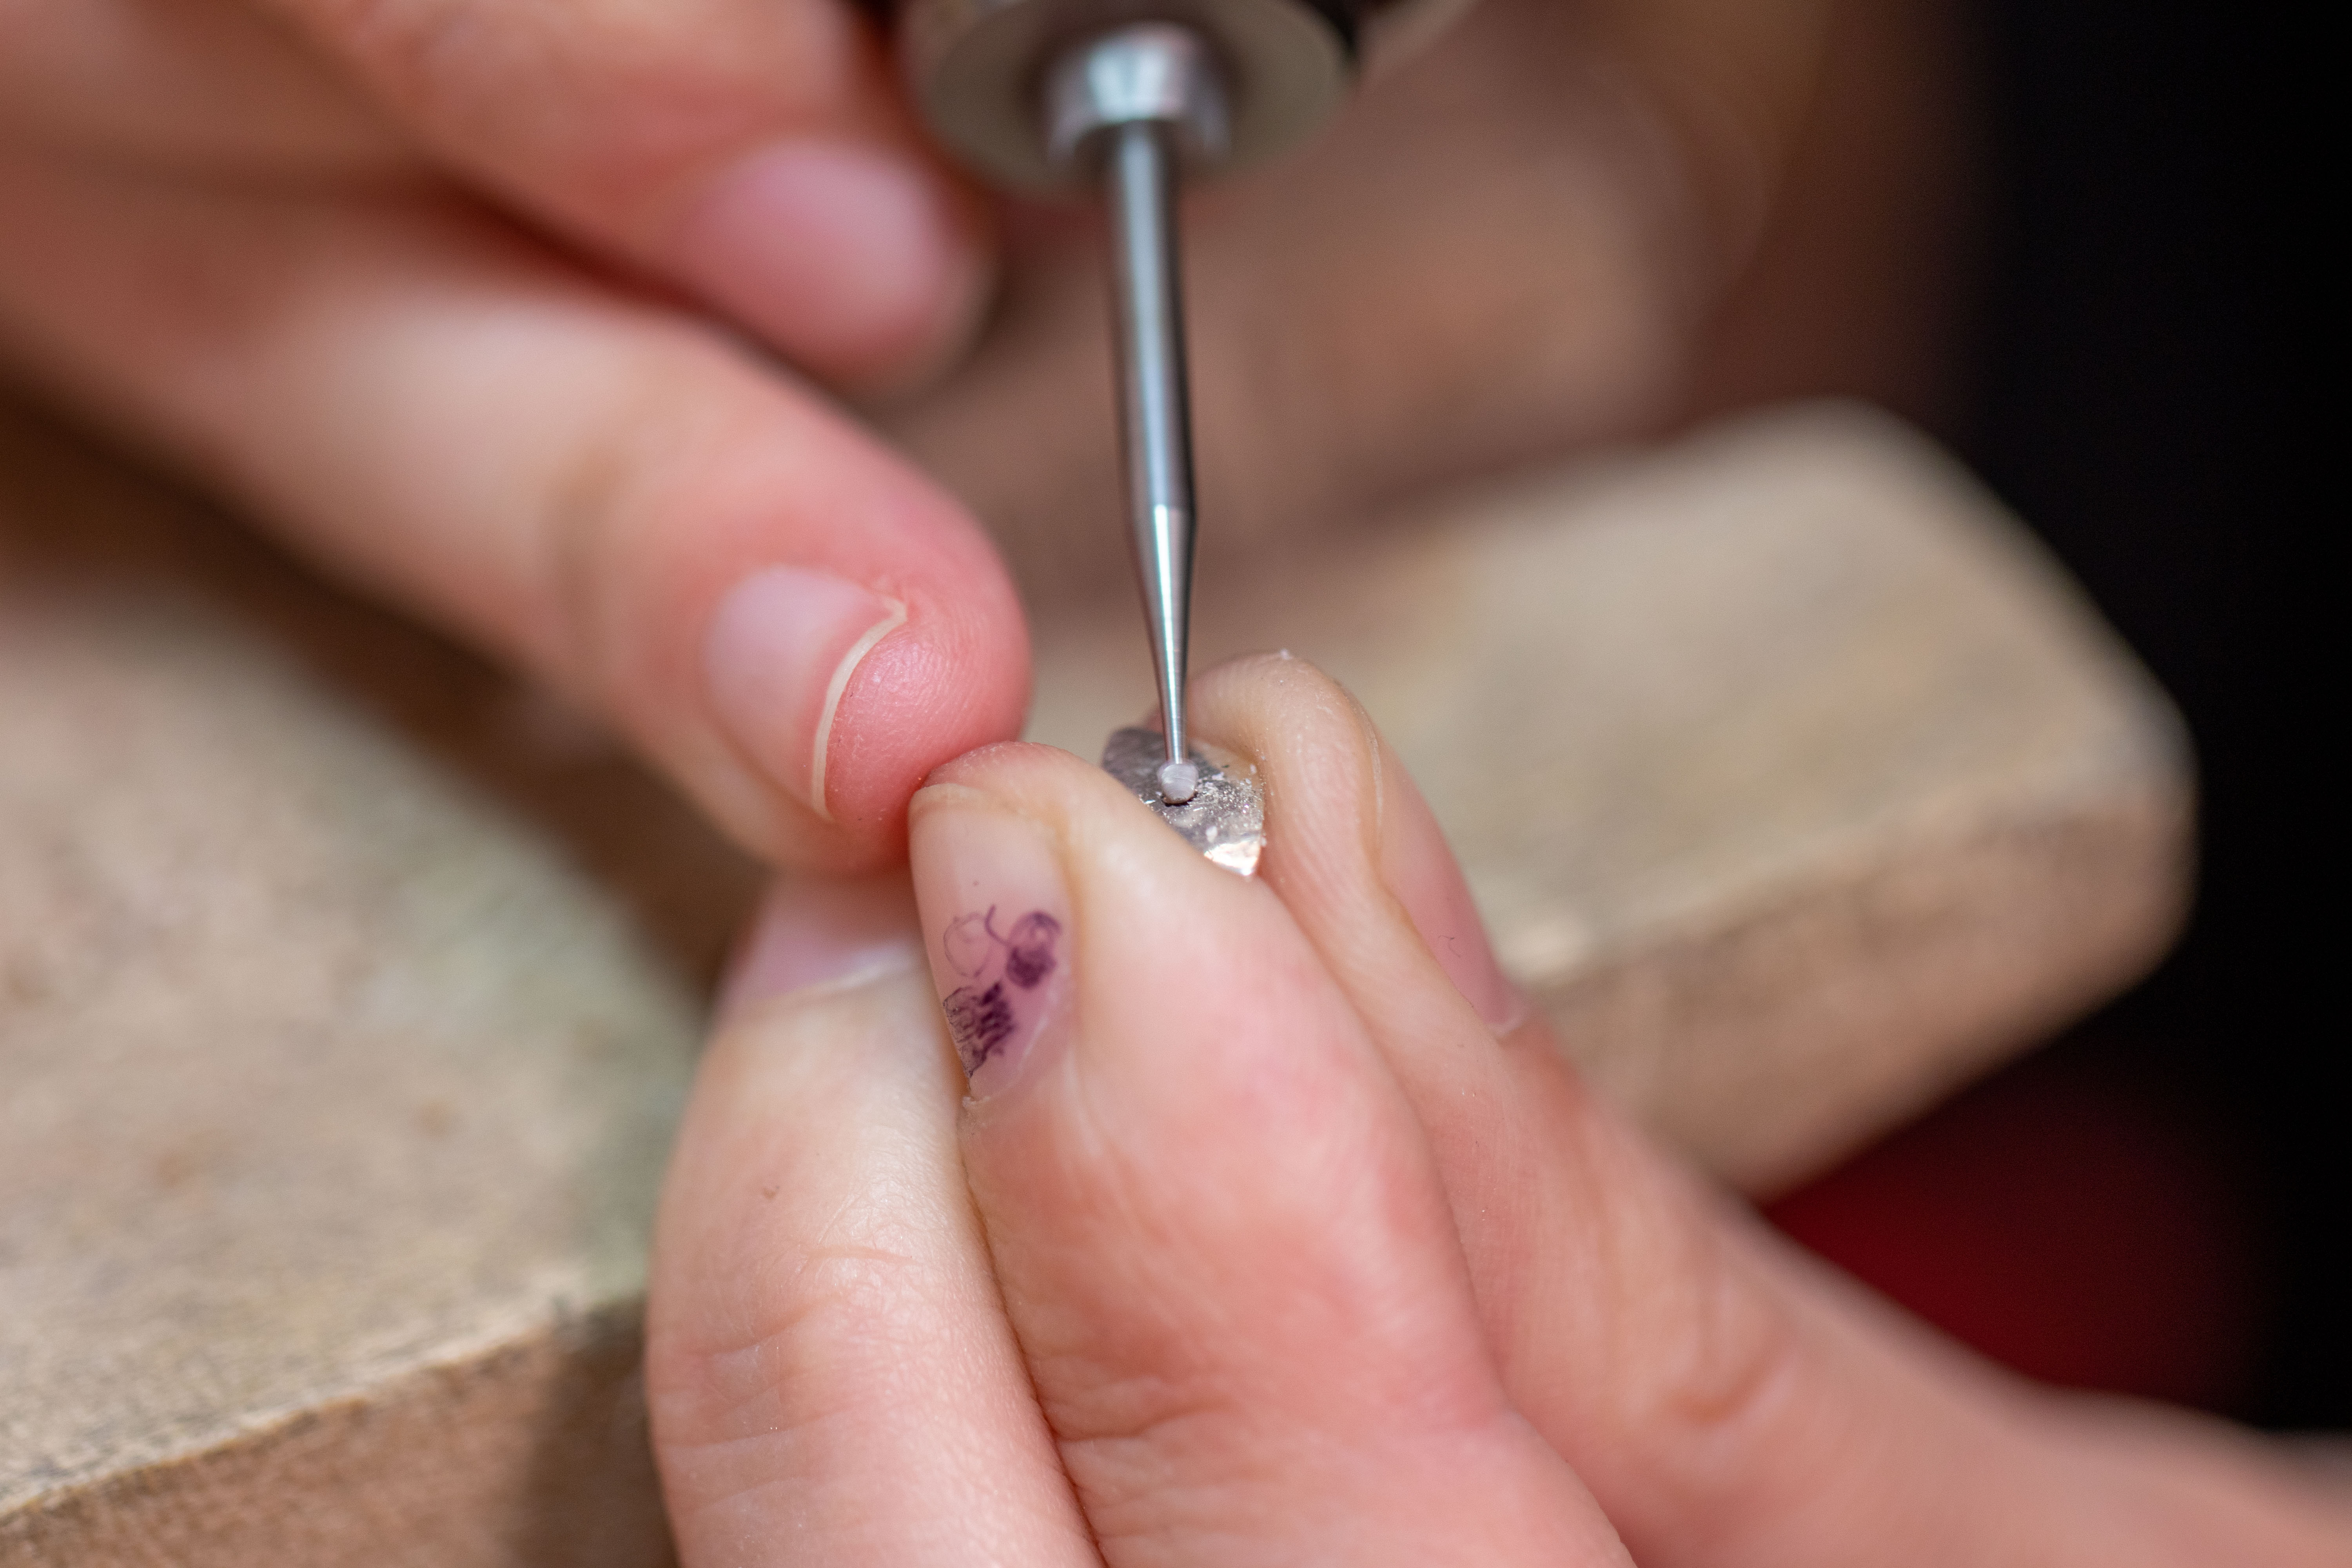
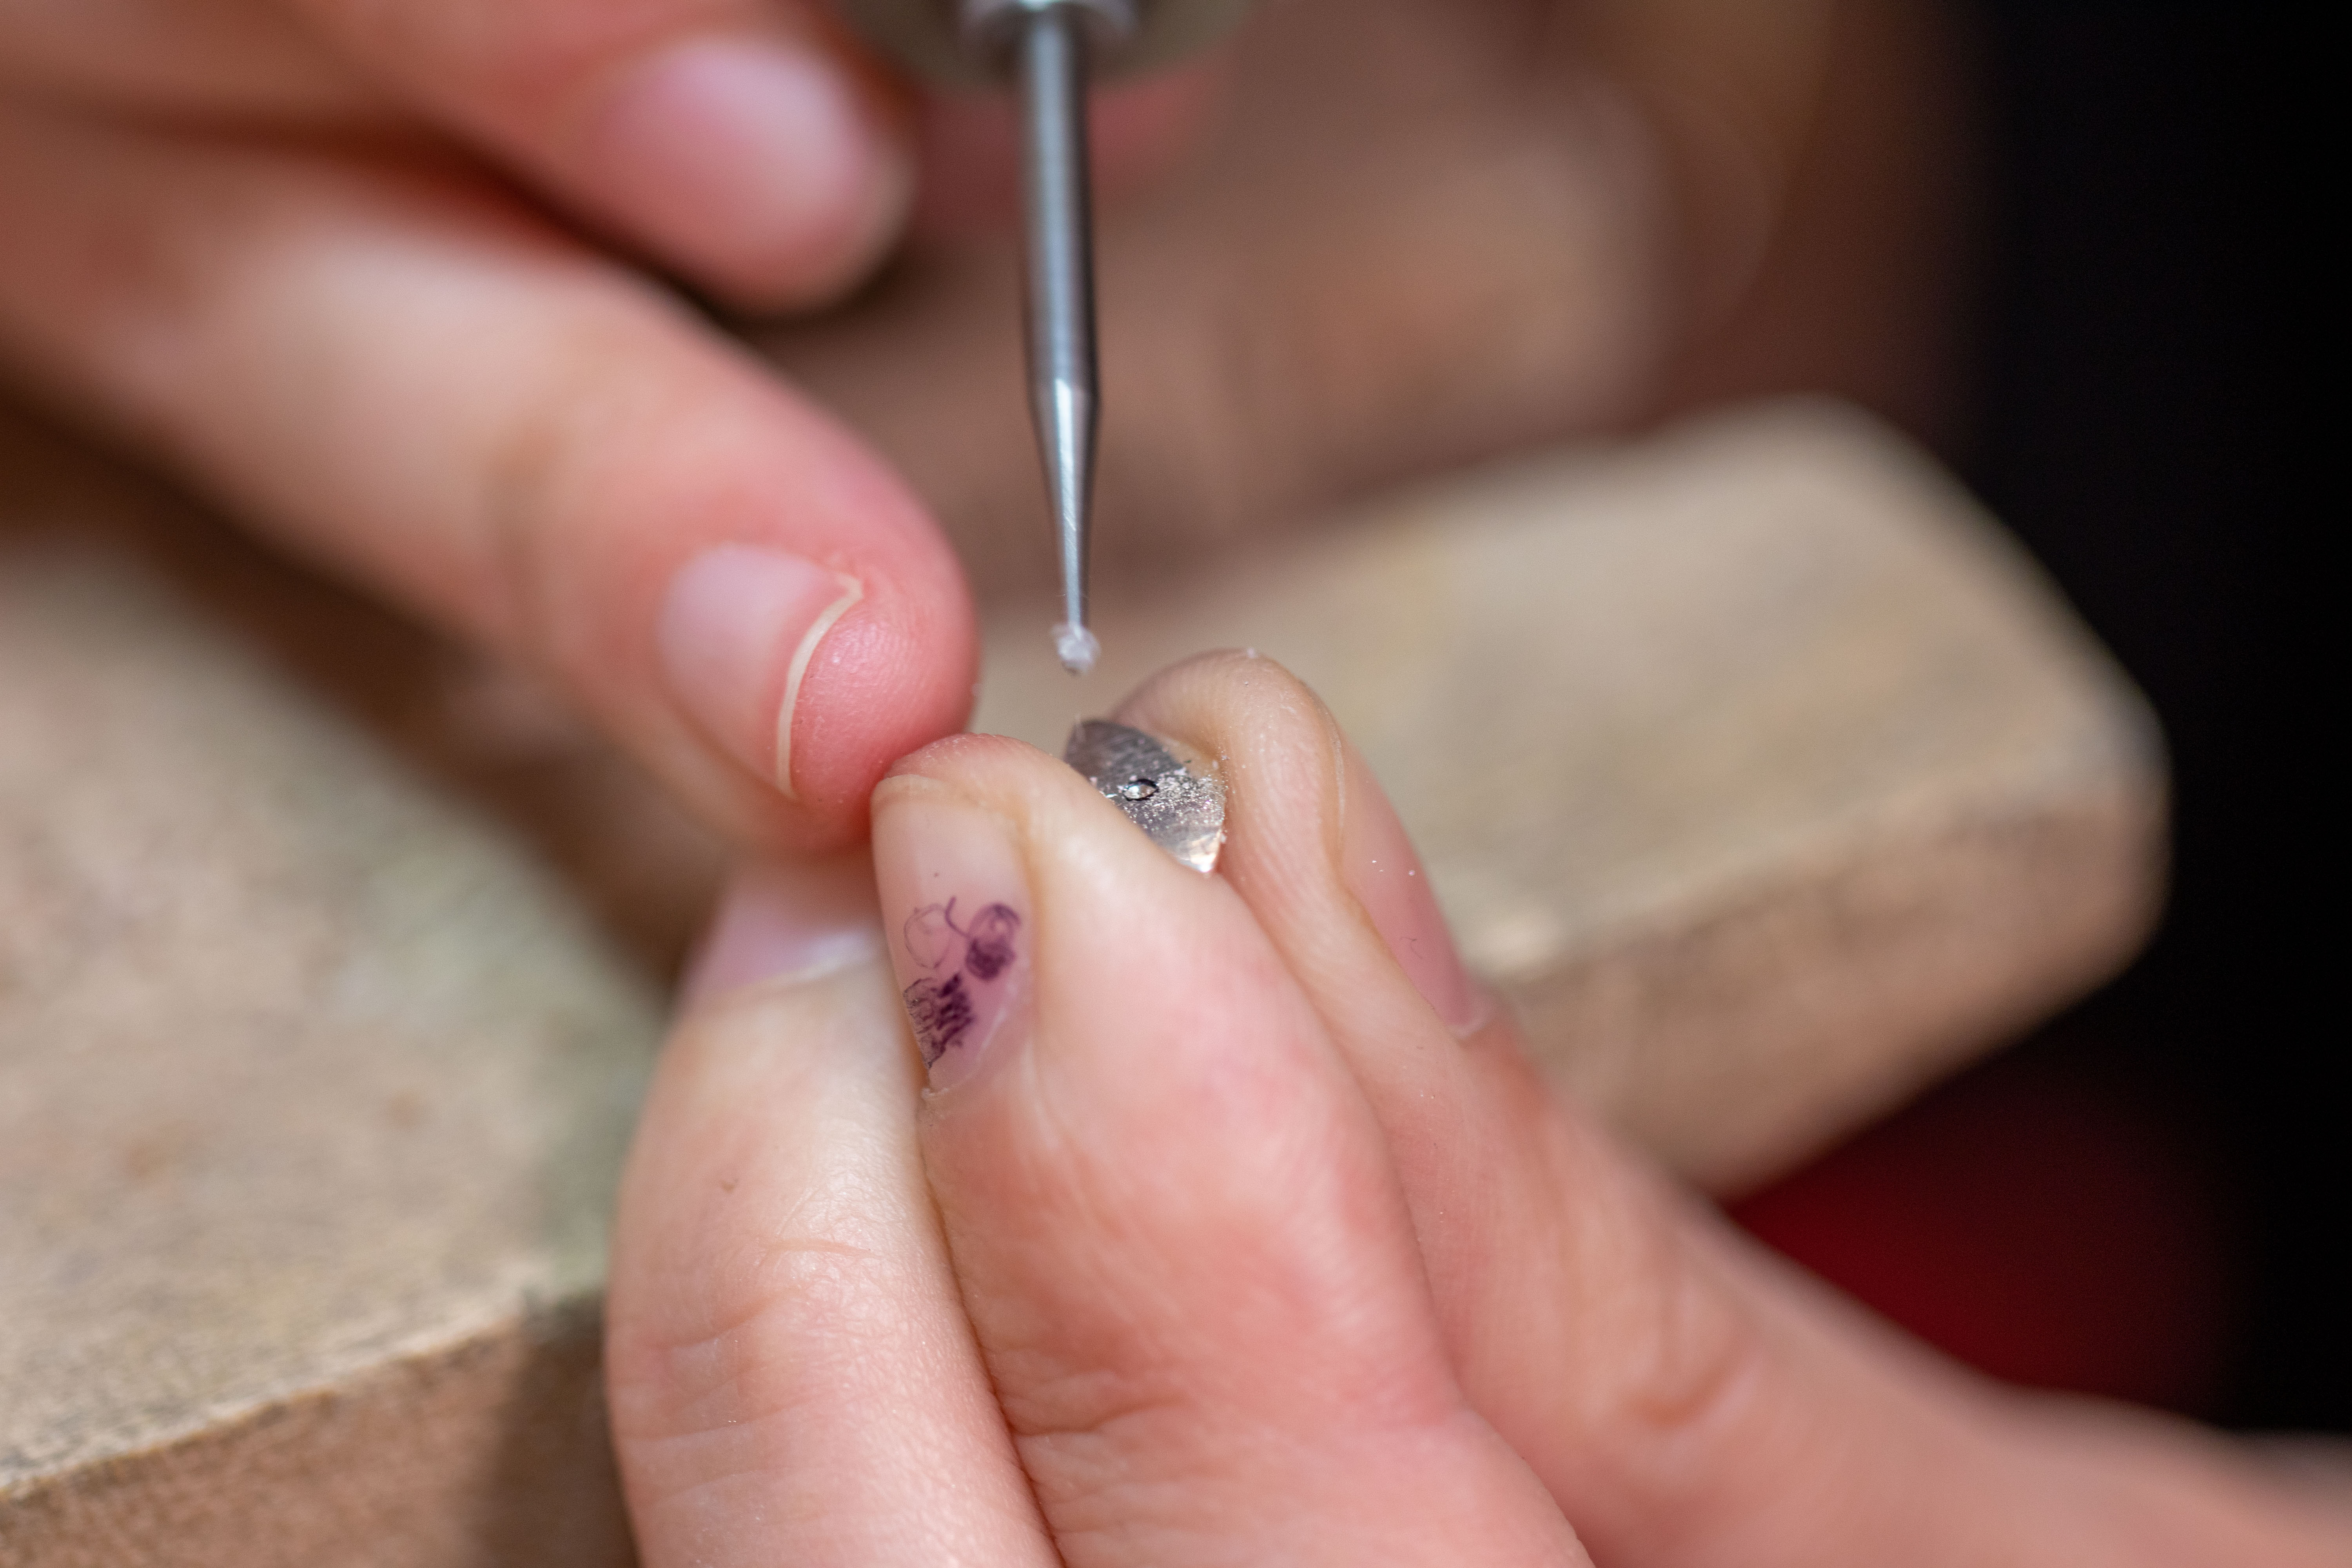
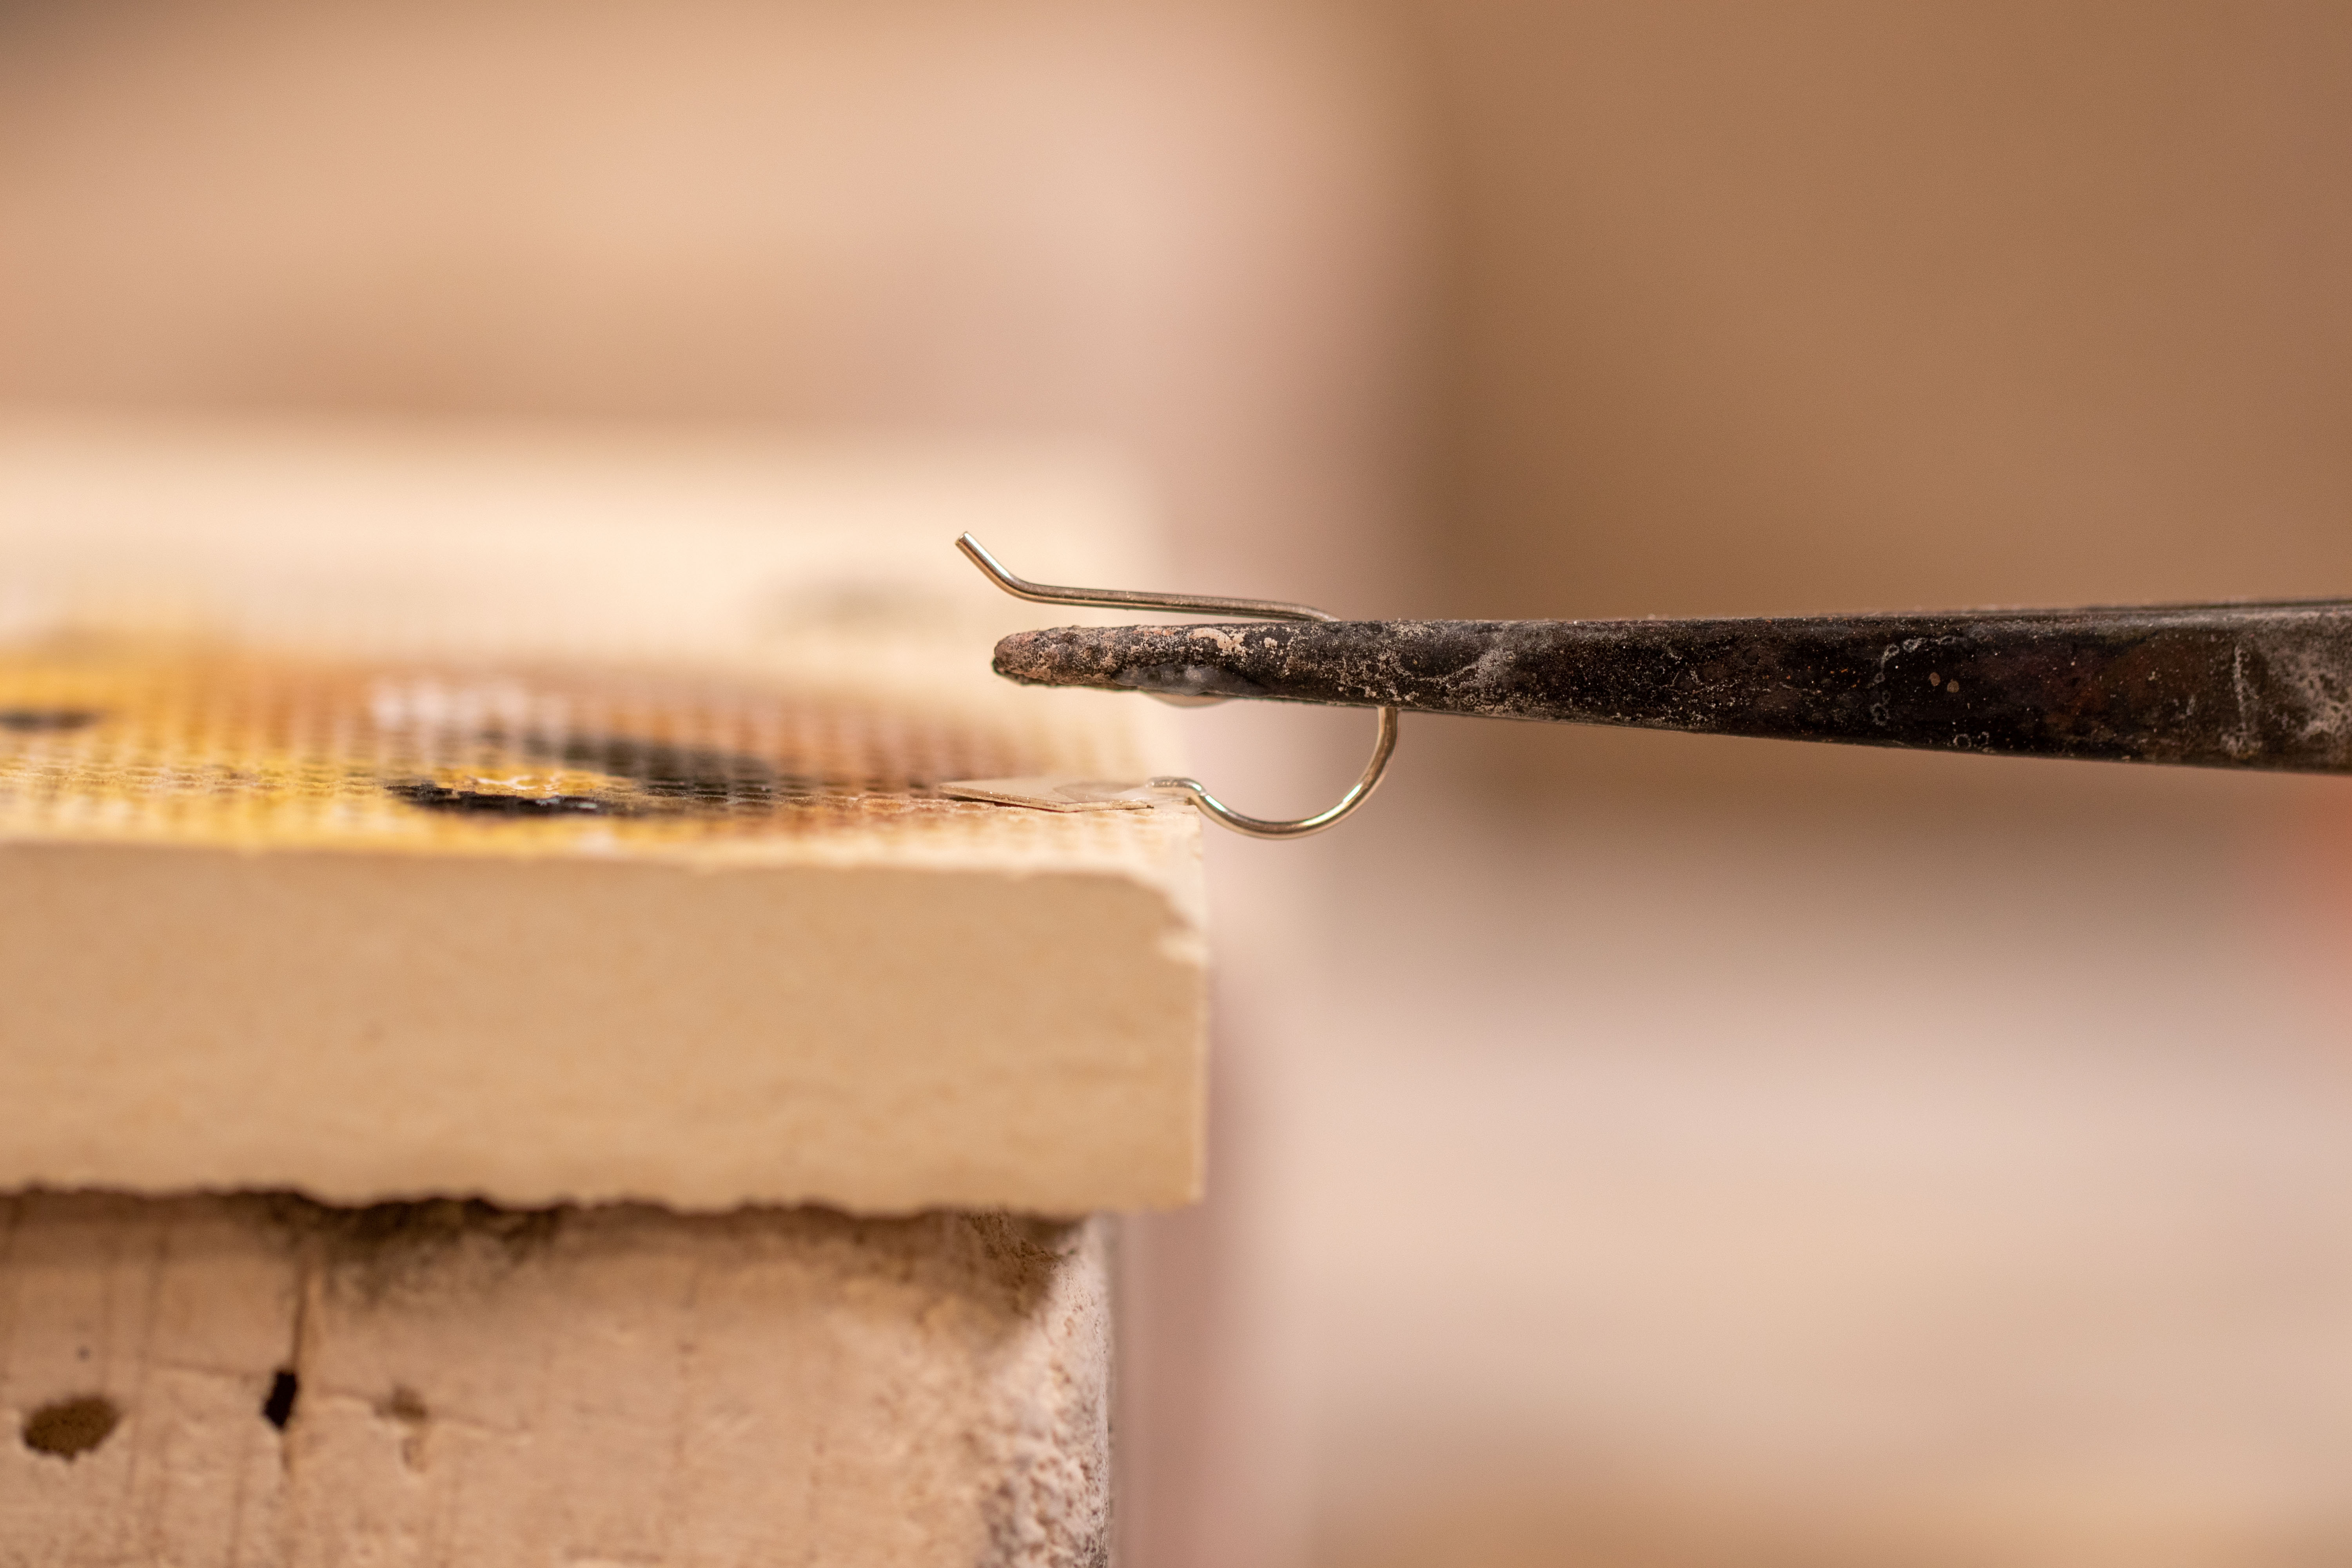
2. Mark your earring with a ball bur – When marking where you want your post to go, use a ball bur. This creates better contact with the piece for a stronger joint. It also won’t burn off and disappear like a sharpie mark will!
 |
 |
3. Let the solder set – After your solder flows, it takes a few seconds to full solidify and set. Make sure you wait to move your piece until this happens, otherwise you risk moving your post from its perfect position!
4. Less is more – Use only the amount of solder you need. Earring posts are often the last thing to get soldered on. If you use just the right amount of solder, you’ll have less cleanup in the end. Complicated designs can have nooks and crannies that can be difficult to get into once a post is attached.
5. Use a clean solder board – Using a new or clean (and flat!) soldering board is key. It helps keep everything aligned, and makes sure no stray pieces of solder melt to the front of your earrings during the soldering process. This tip is especially important if the decorative portion of the earring is flat – it helps you see right away if your post is straight or not.
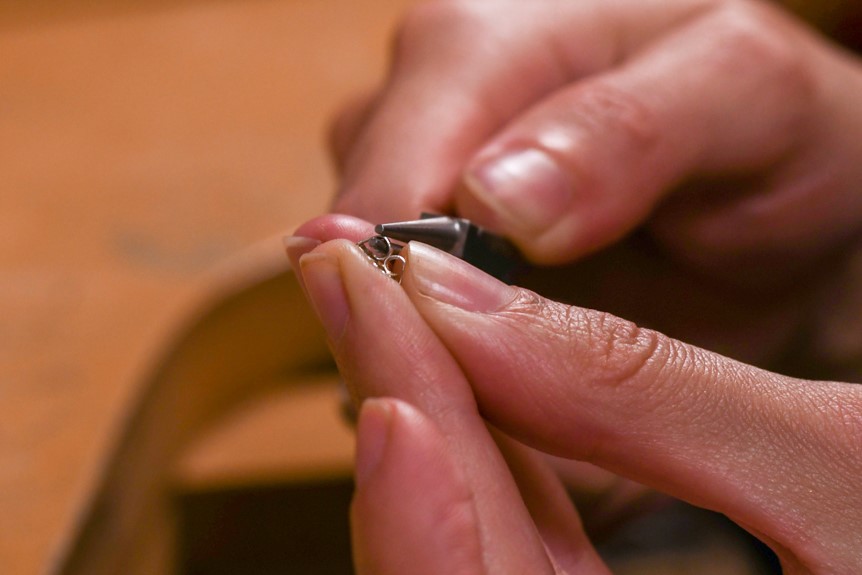
6. Use cross locking tweezers – set your earrings up with the decorative part on your soldering board and the post in a pair of cross locking tweezers. This makes sure everything is in exactly the right place when you’re ready to solder. The better the set up, the easier the soldering! (And that applies to ANY soldering, not just earring posts!) You can place your solder with a pick, or pre-place a chip right where the post meets the earring.
7. Work harden the post – Once your post is nice and secure, give the post a few twists with a pair of parallel or flat nose pliers. I like to twist twice in one direction, and twice in the opposite direction. When you are soldering, the heat is annealing the post. This helps reverse that so you have a nice, strong earring post. Using a thicker post will help minimize the effect of the annealing. You can also tumble your earrings in steel shot to help work harden the posts.
Conquering the Production Line
Sometimes you have more than one pair of earrings to add posts to. The idea of setting each one up individually with cross locking tweezers is A) daunting, and B) will take forever! Your time is money. Continue reading so you can stay on track when soldering many pairs of earrings.
1. Trust your hand – Don’t set each pair up in cross locking tweezers and a 3rd arm. Trust your hand to place the post where it needs to be. I use cross locking tweezers to hold the post to cut down on stress on my hands.
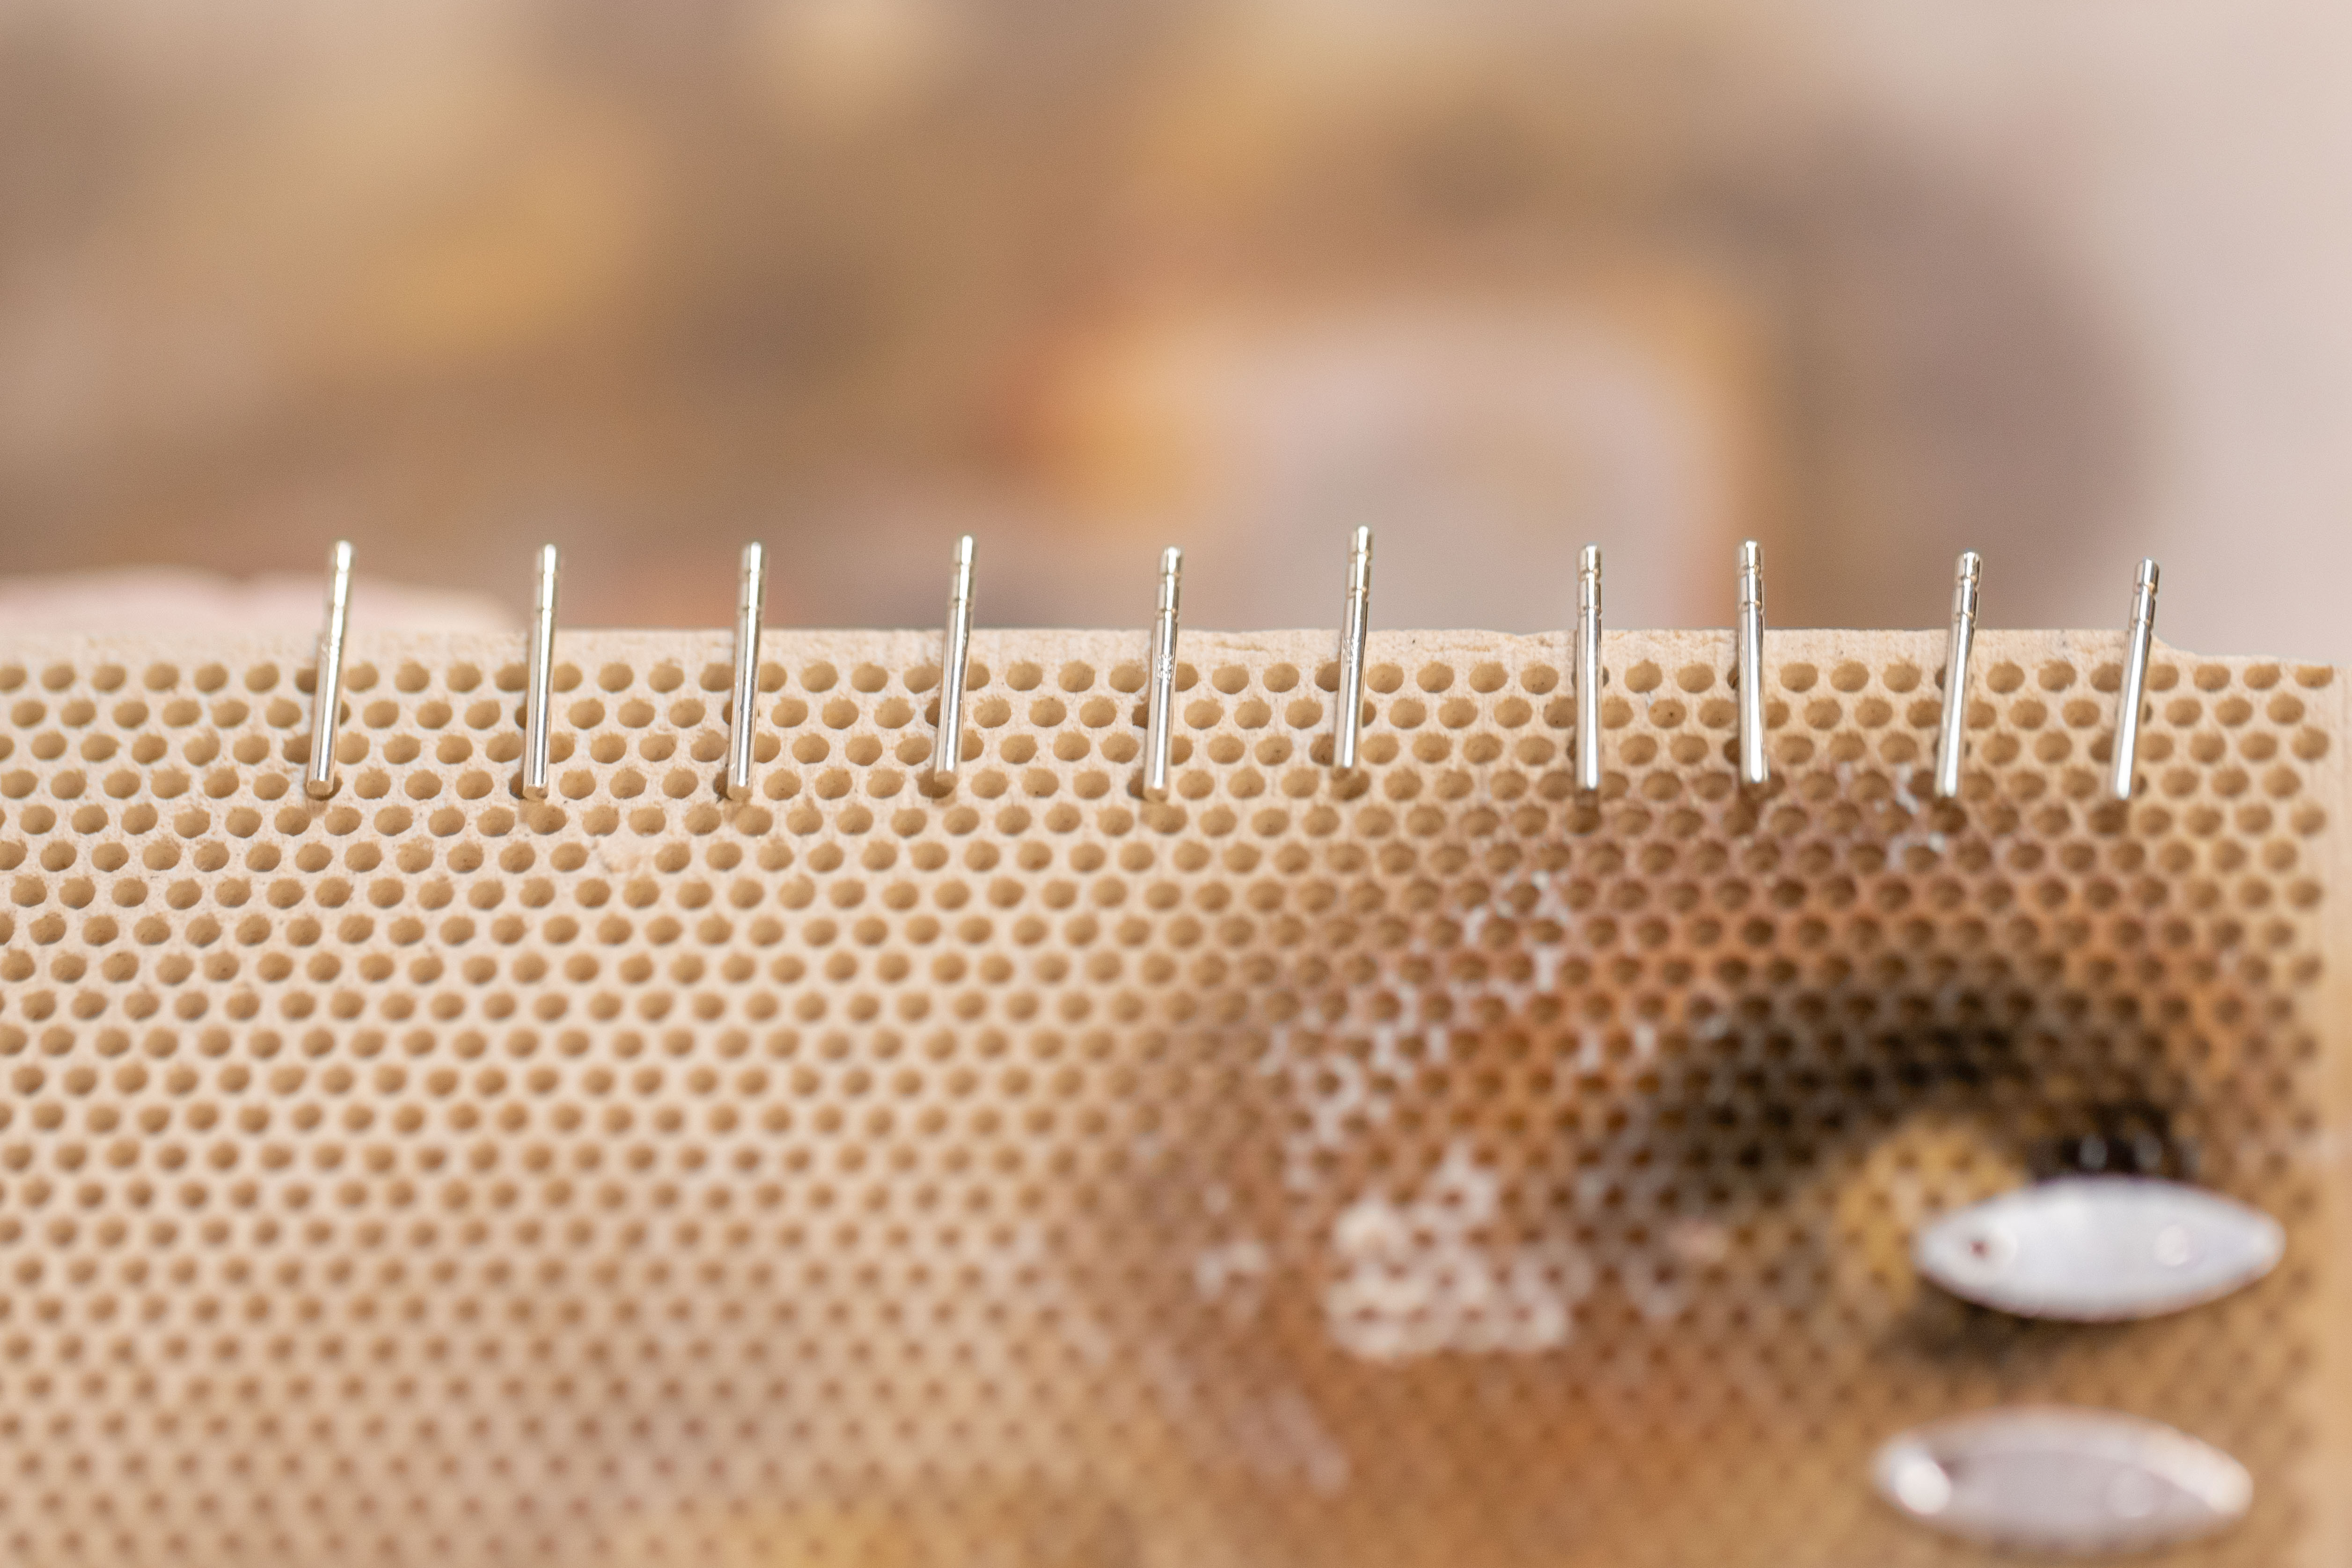
2. Hang posts off the edge – Line the earring posts up with the notched end off the edge of your soldering board. This allows you to grab the end of the post with cross locking tweezers without having to move it. Just grab and go!
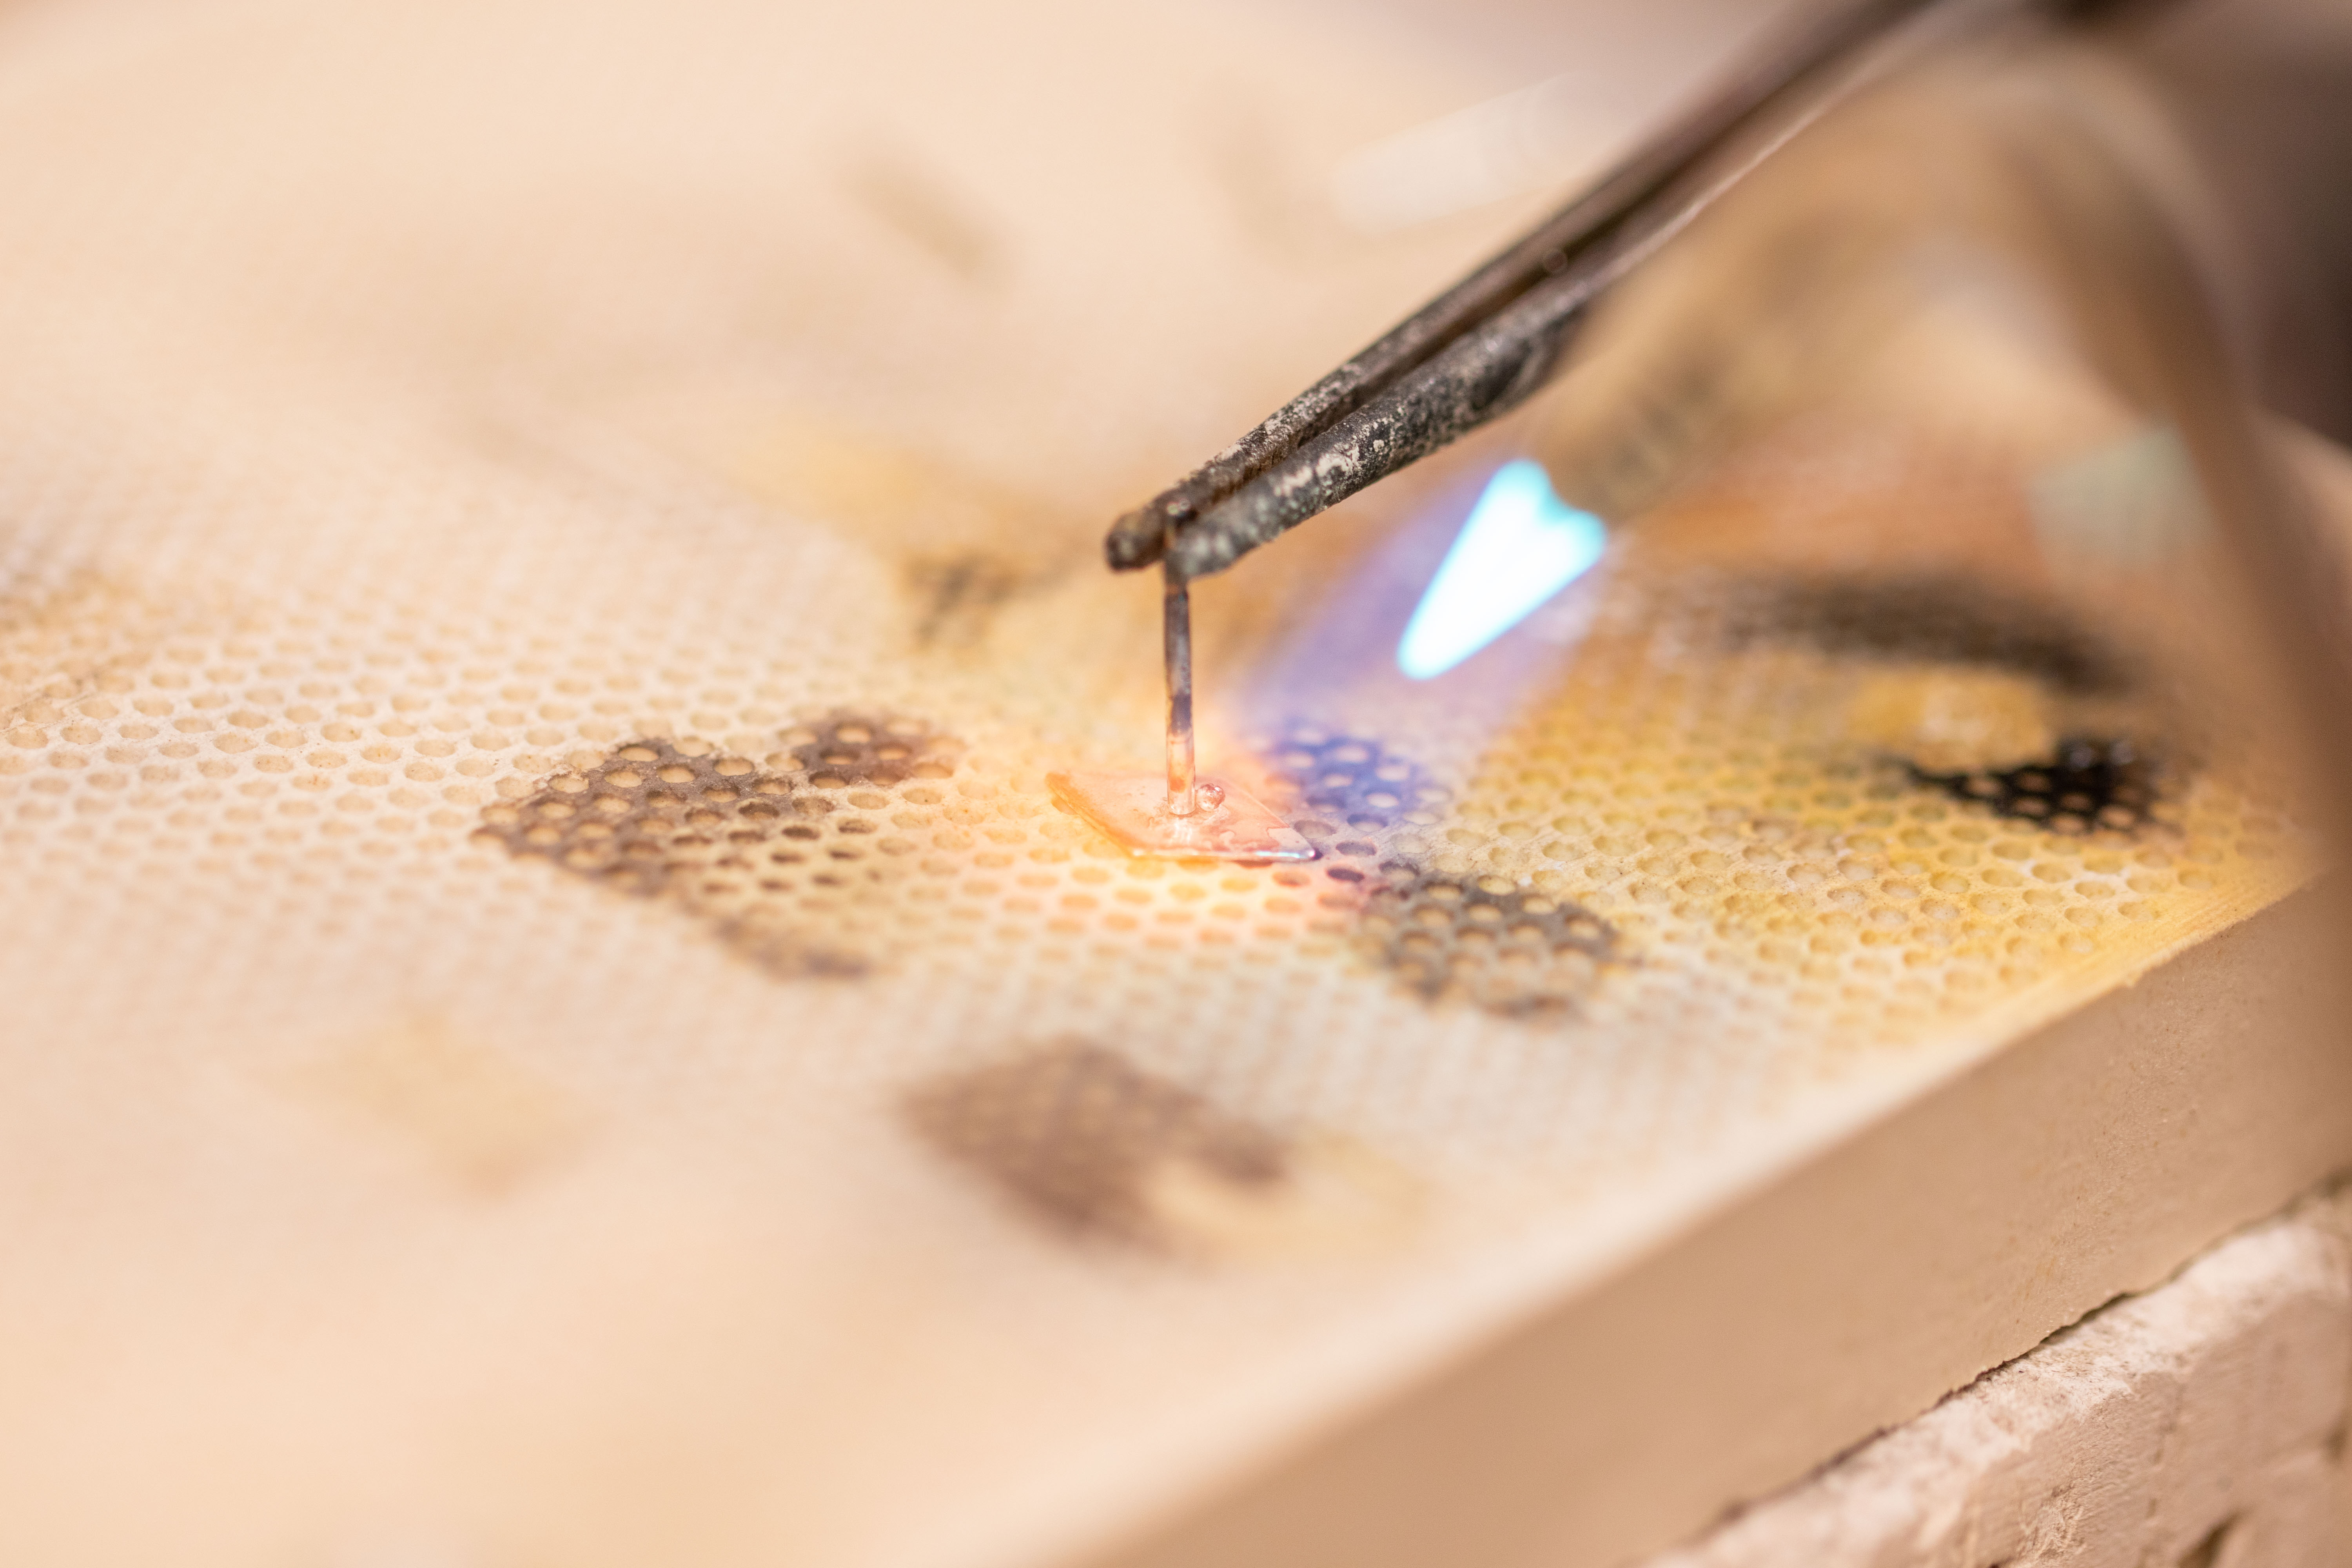
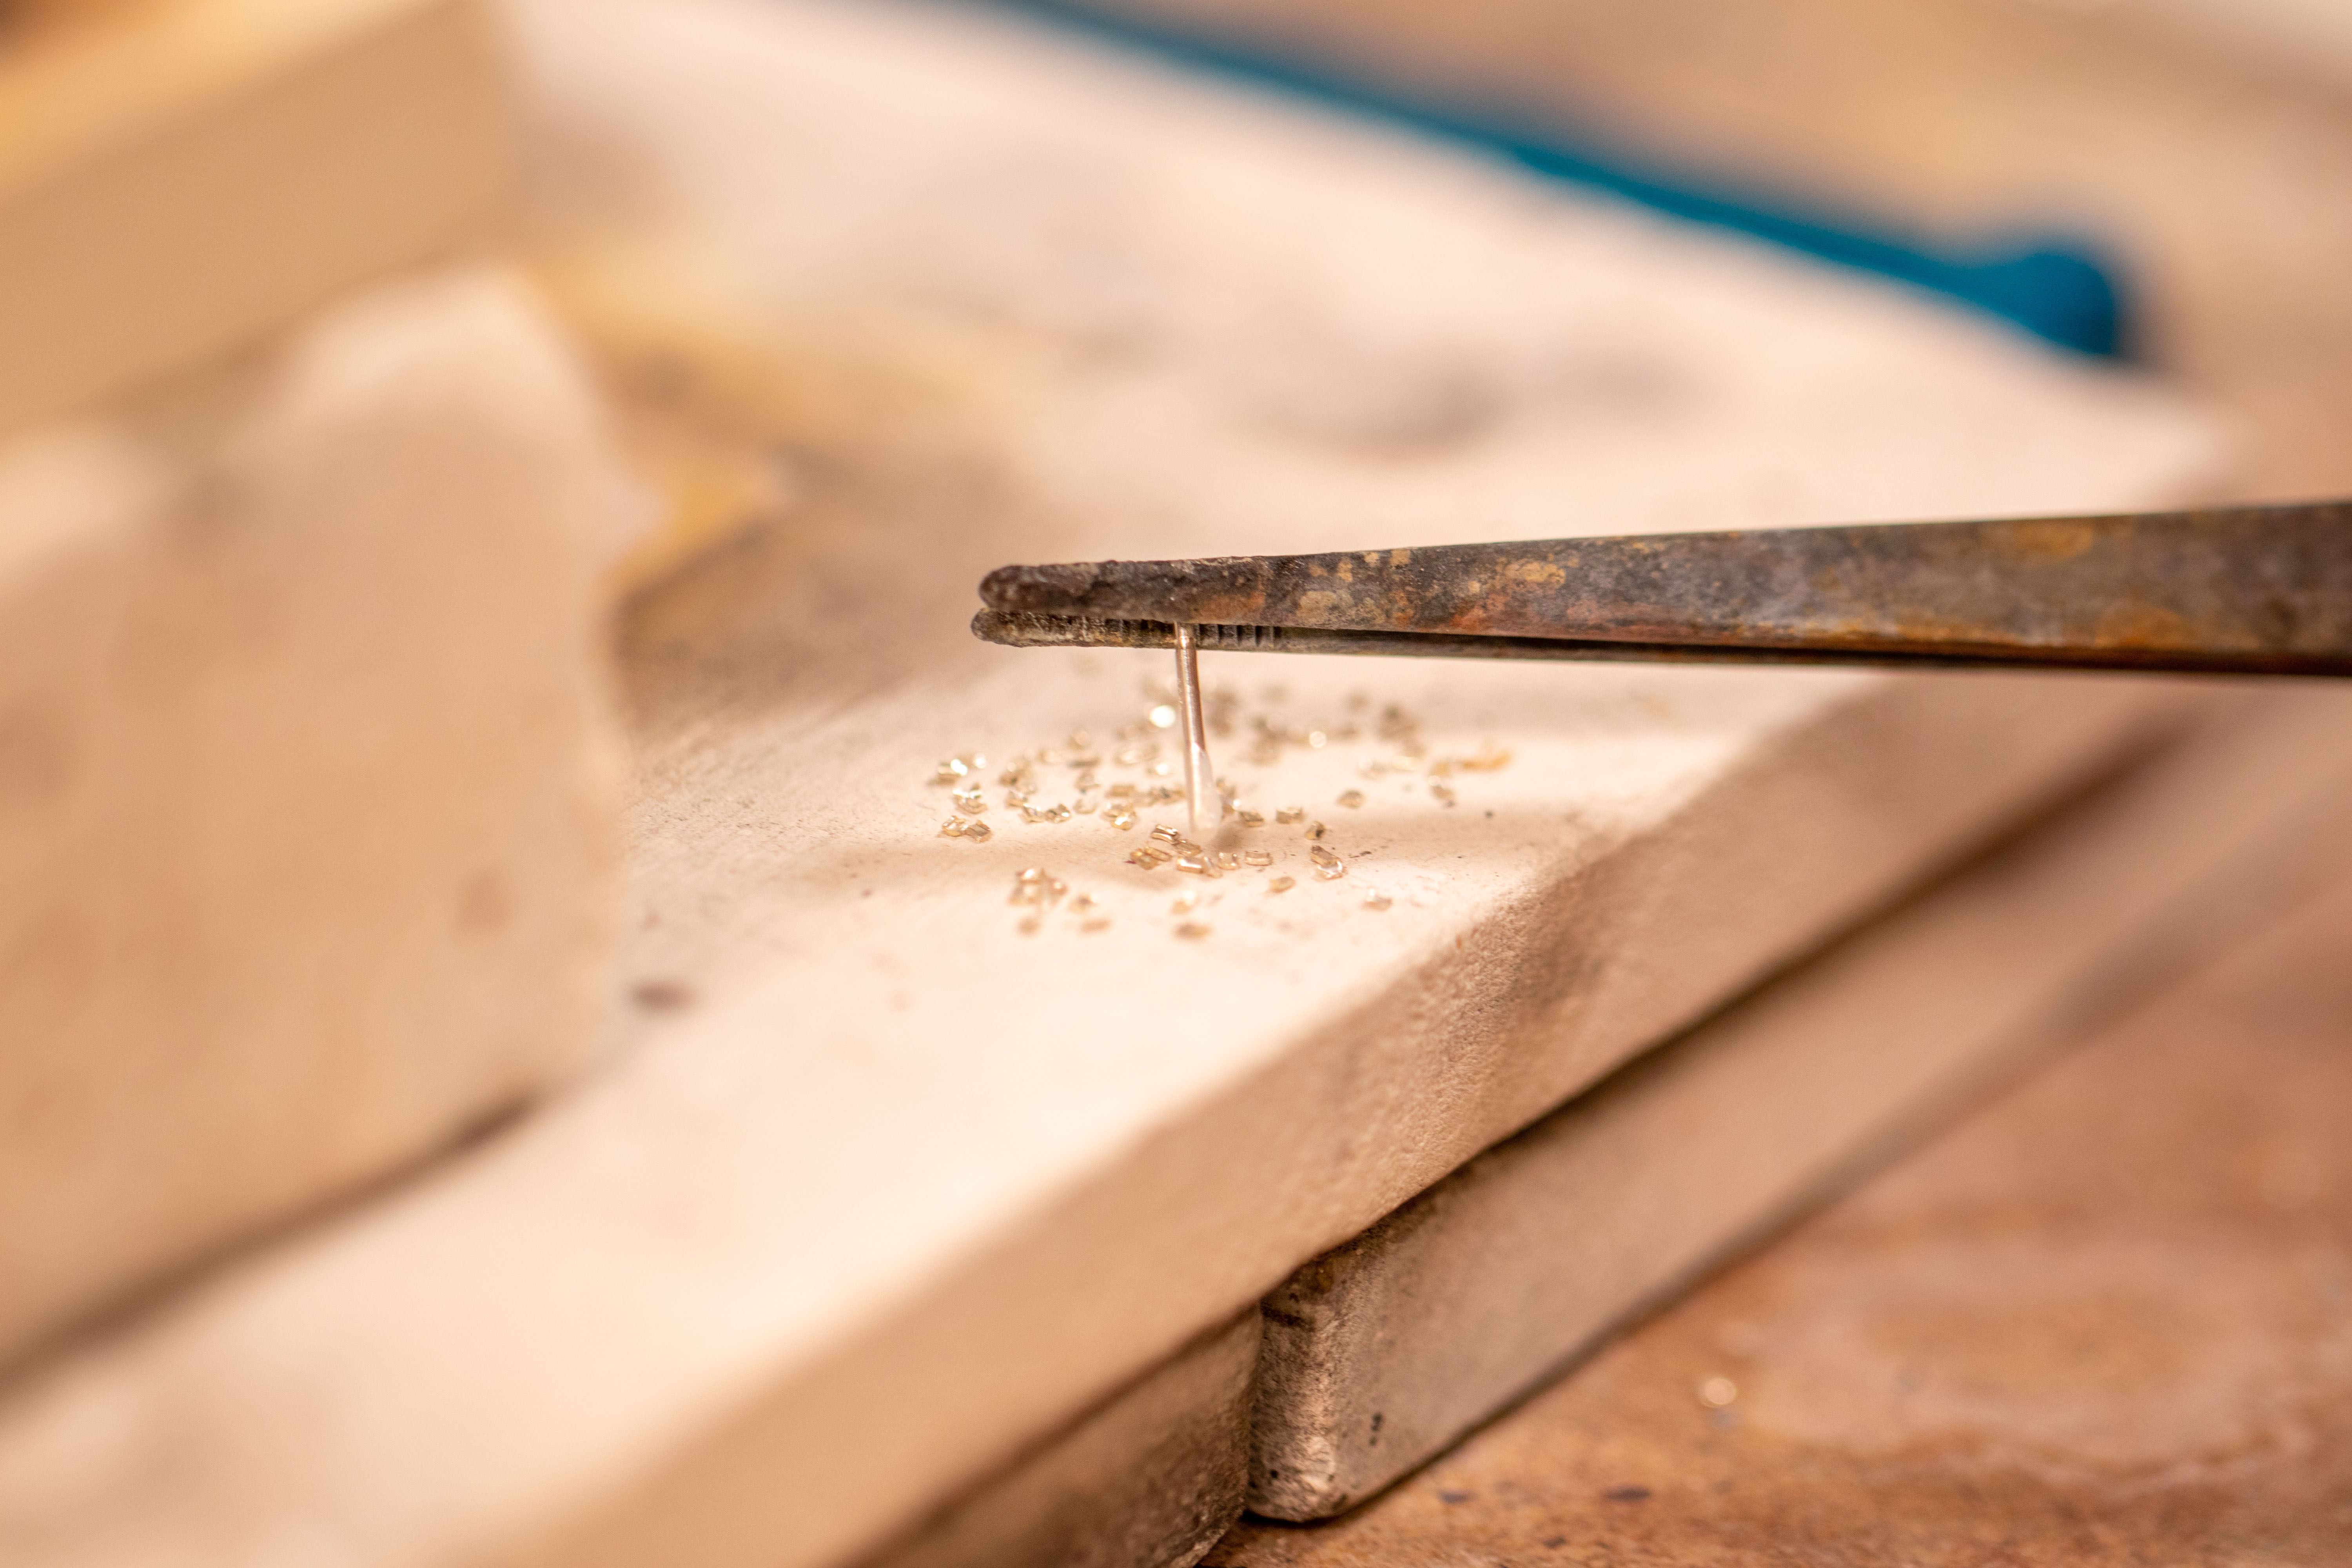
3. Pick solder with the post – Wait, what? You heard me! I pick the ball of solder up with the earring post itself. This keeps me moving quickly because I don’t have to place the post and then add solder in an additional step. I make sure to pre-flow the solder on the post before I place it where it needs to be. When your torch focuses on the decorative part of the earring, it will draw the solder down.
4. Stay organized – line your earrings up in rows or a grid. This helps you know exactly where to go for the next one, without having to really think about it. It can also help keep the heat concentrated in certain parts of the soldering board, helping prevent accidental burns.
Soldering Irregular Shaped Earrings
As your designs get more complicated and advanced, it’s likely the earrings you need to solder posts onto will not always be nice and flat. They’re not tiny. They’re not easy! The information below is great for soldering irregular shaped earrings, but in many cases, can be applied to other soldering jobs as well.
1. Set your post up in cross locking tweezers – by setting the post up first, instead of placing it while soldering, you ensure the post stays exactly where it needs to go. This is great for earrings with a dome or need an angled post.
2. Carve a divot in your soldering board – Carve a divot into a soft soldering board, like a fire brick or soft Solderite board, to rest the irregular shaped earring in. By creating a spot for the earring to sit snugly into, it helps prevent movement during the soldering process. You can also use pumice rocks to cradle your piece, although these can still move around.
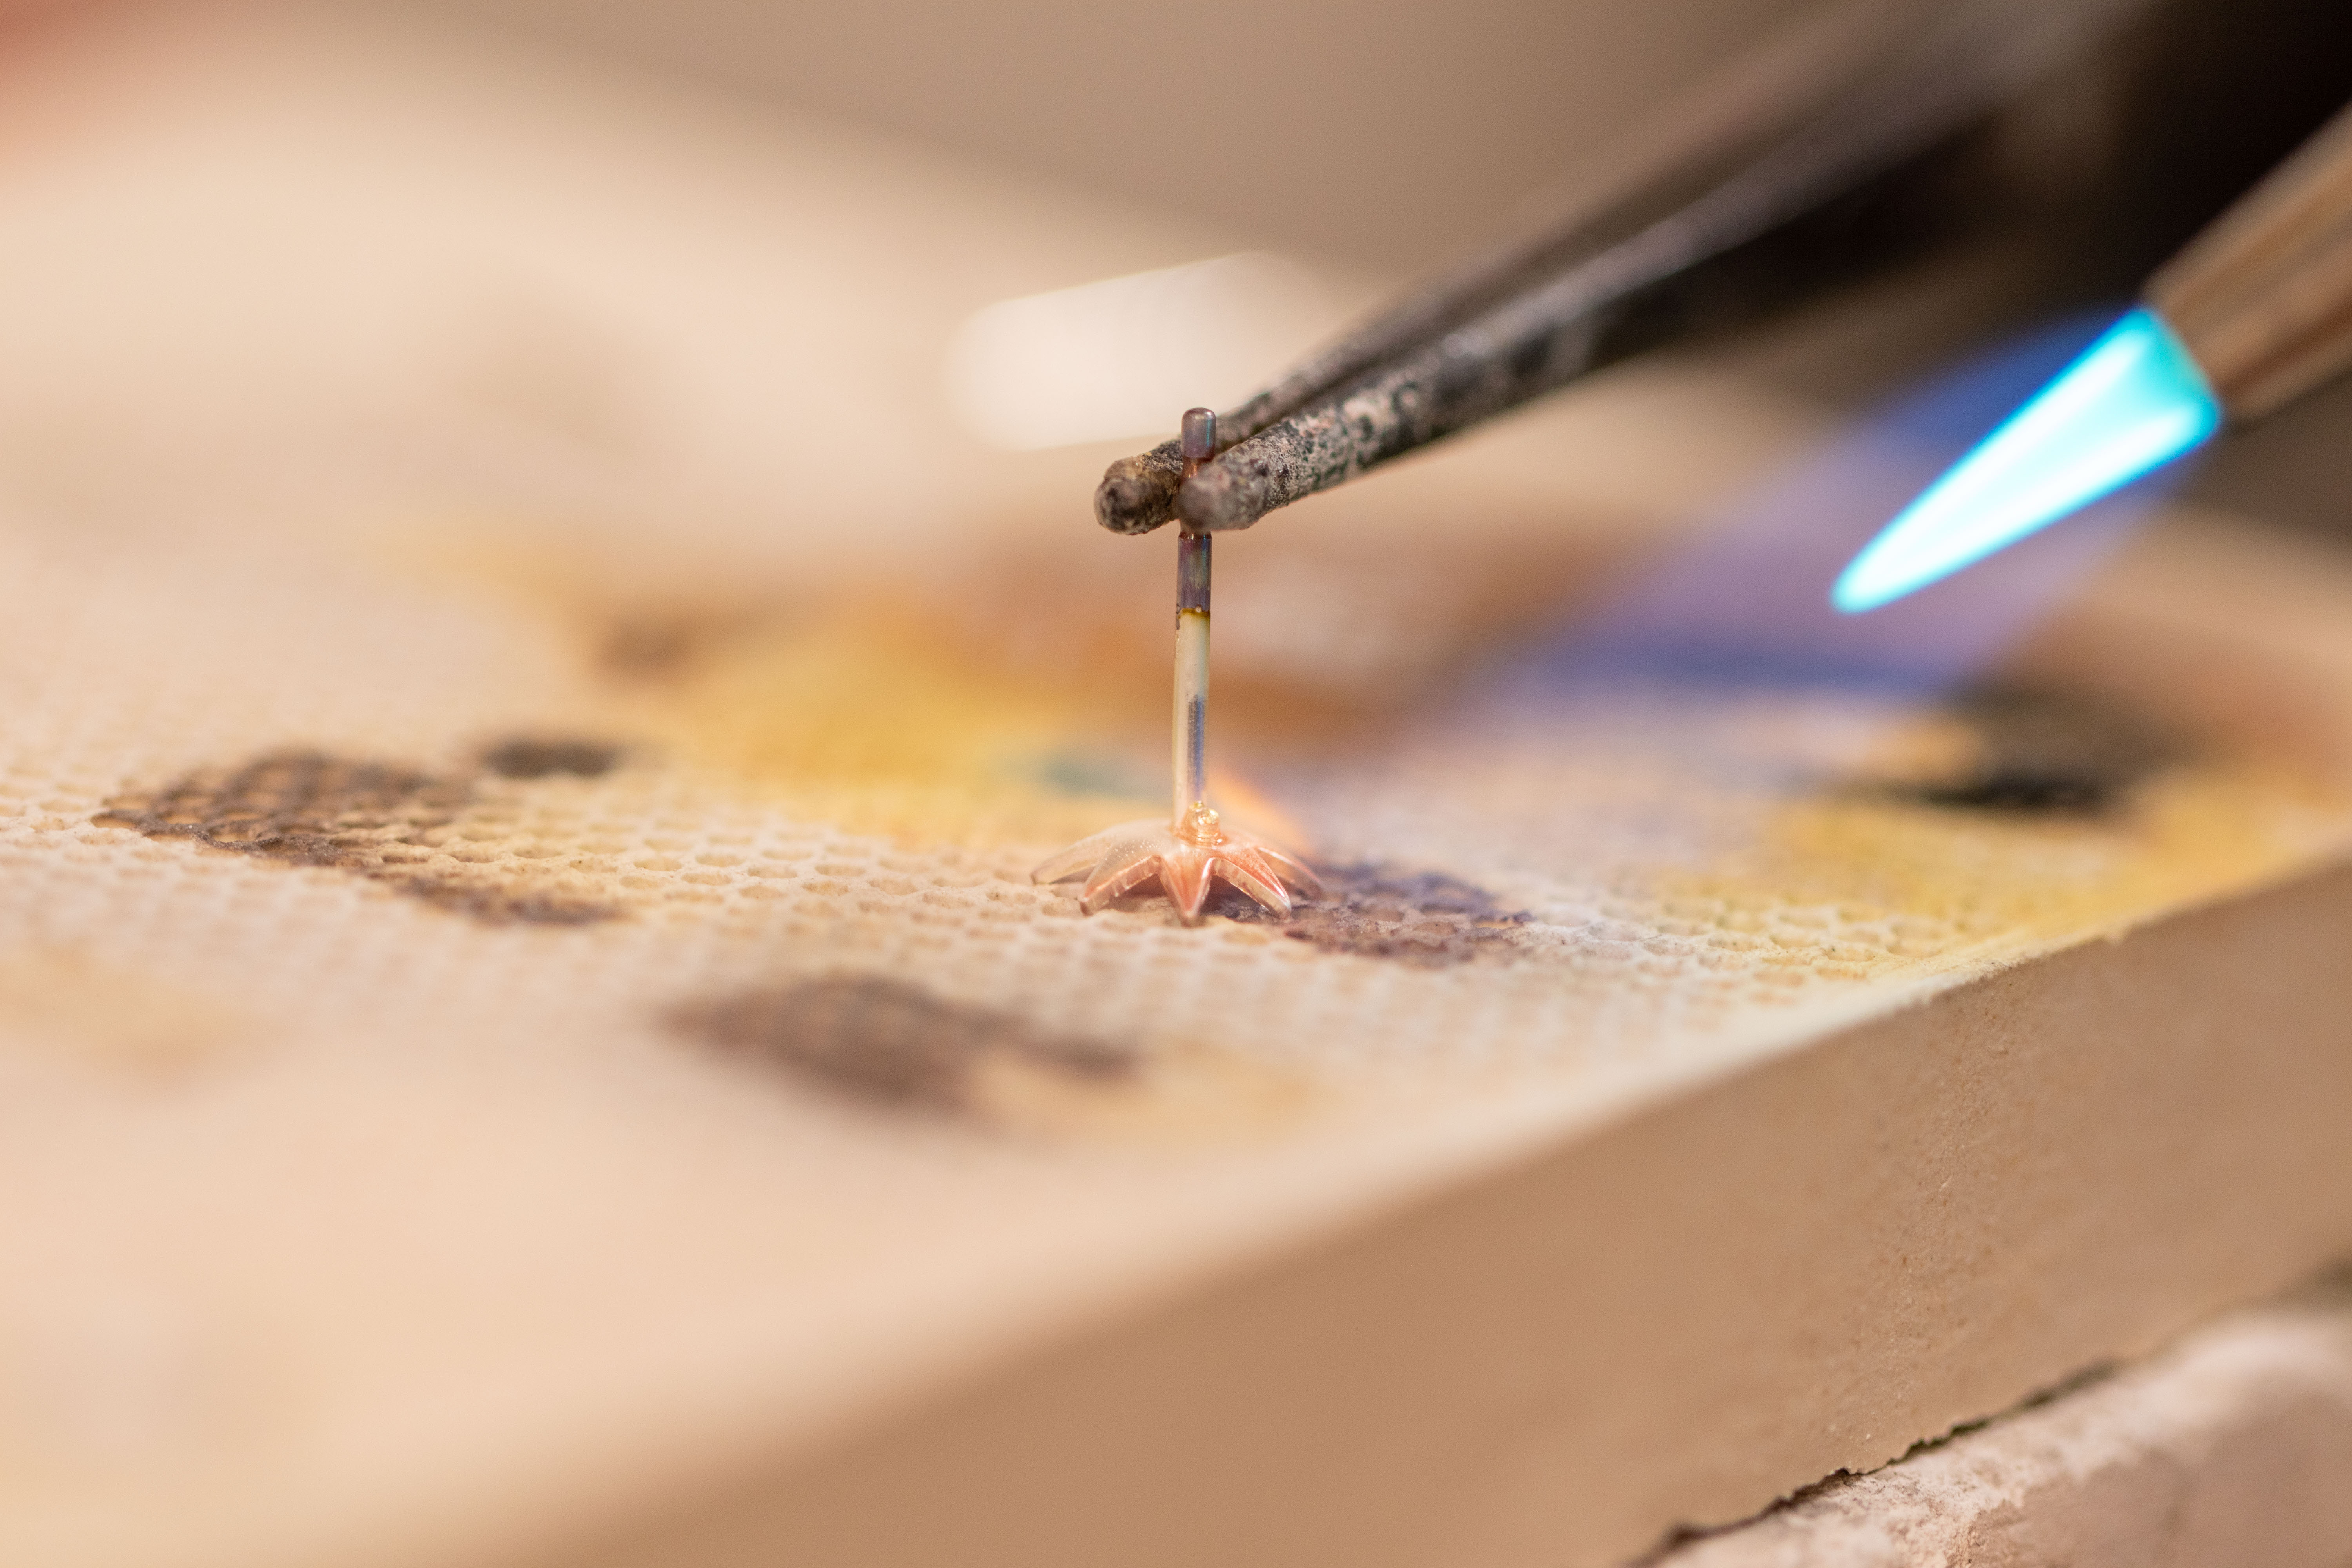
3. Pre-flow the solder – On larger earrings I like to pre-flow my solder onto the decorative portion. Because that part takes so much more heat than the post, I like to get it up to temperature first. Once the solder is on there and nice and hot, I then bring the post in. This helps so I don’t melt the post while trying to get the rest of the earring up to temperature.
4. Use the board – Use the edge of your soldering board to your advantage. You can hang parts off the edge of the board so the rest is perfectly aligned, and fully supported.
Earring Backs
Finishing touches – the earring backs! There’s a few things to consider when picking the perfect back, especially the first few times you use them. Read on to find out.
1. Size matters – When selecting the right clutch for your post, you want the hole on the earring back to be as close in size to your post. You don’t want a lot of extra wiggle room. For example, if my post is 0.8mm thick, like SF526. I want to use premium earring backs.
2. The first few times the post goes through the ear nut can be tight – it will open up slightly over time. Still too tight? Gently open the bunny ears with a pair of round nose pliers. Don’t open too much though, as you still want a snug fit.
3. Be proportionate – the larger the earring, the larger the back. Larger and heavier earrings need backs with bigger pads. This is for more stability and keeps the earring from tipping forwards. Larger backs are also great for those with larger earring holes for the same reasons.
4. Test it out – try the earring back a few times on the post before you put it in your ear – this makes sure you have the tension right before a customer tries it on!
Design Inspiration
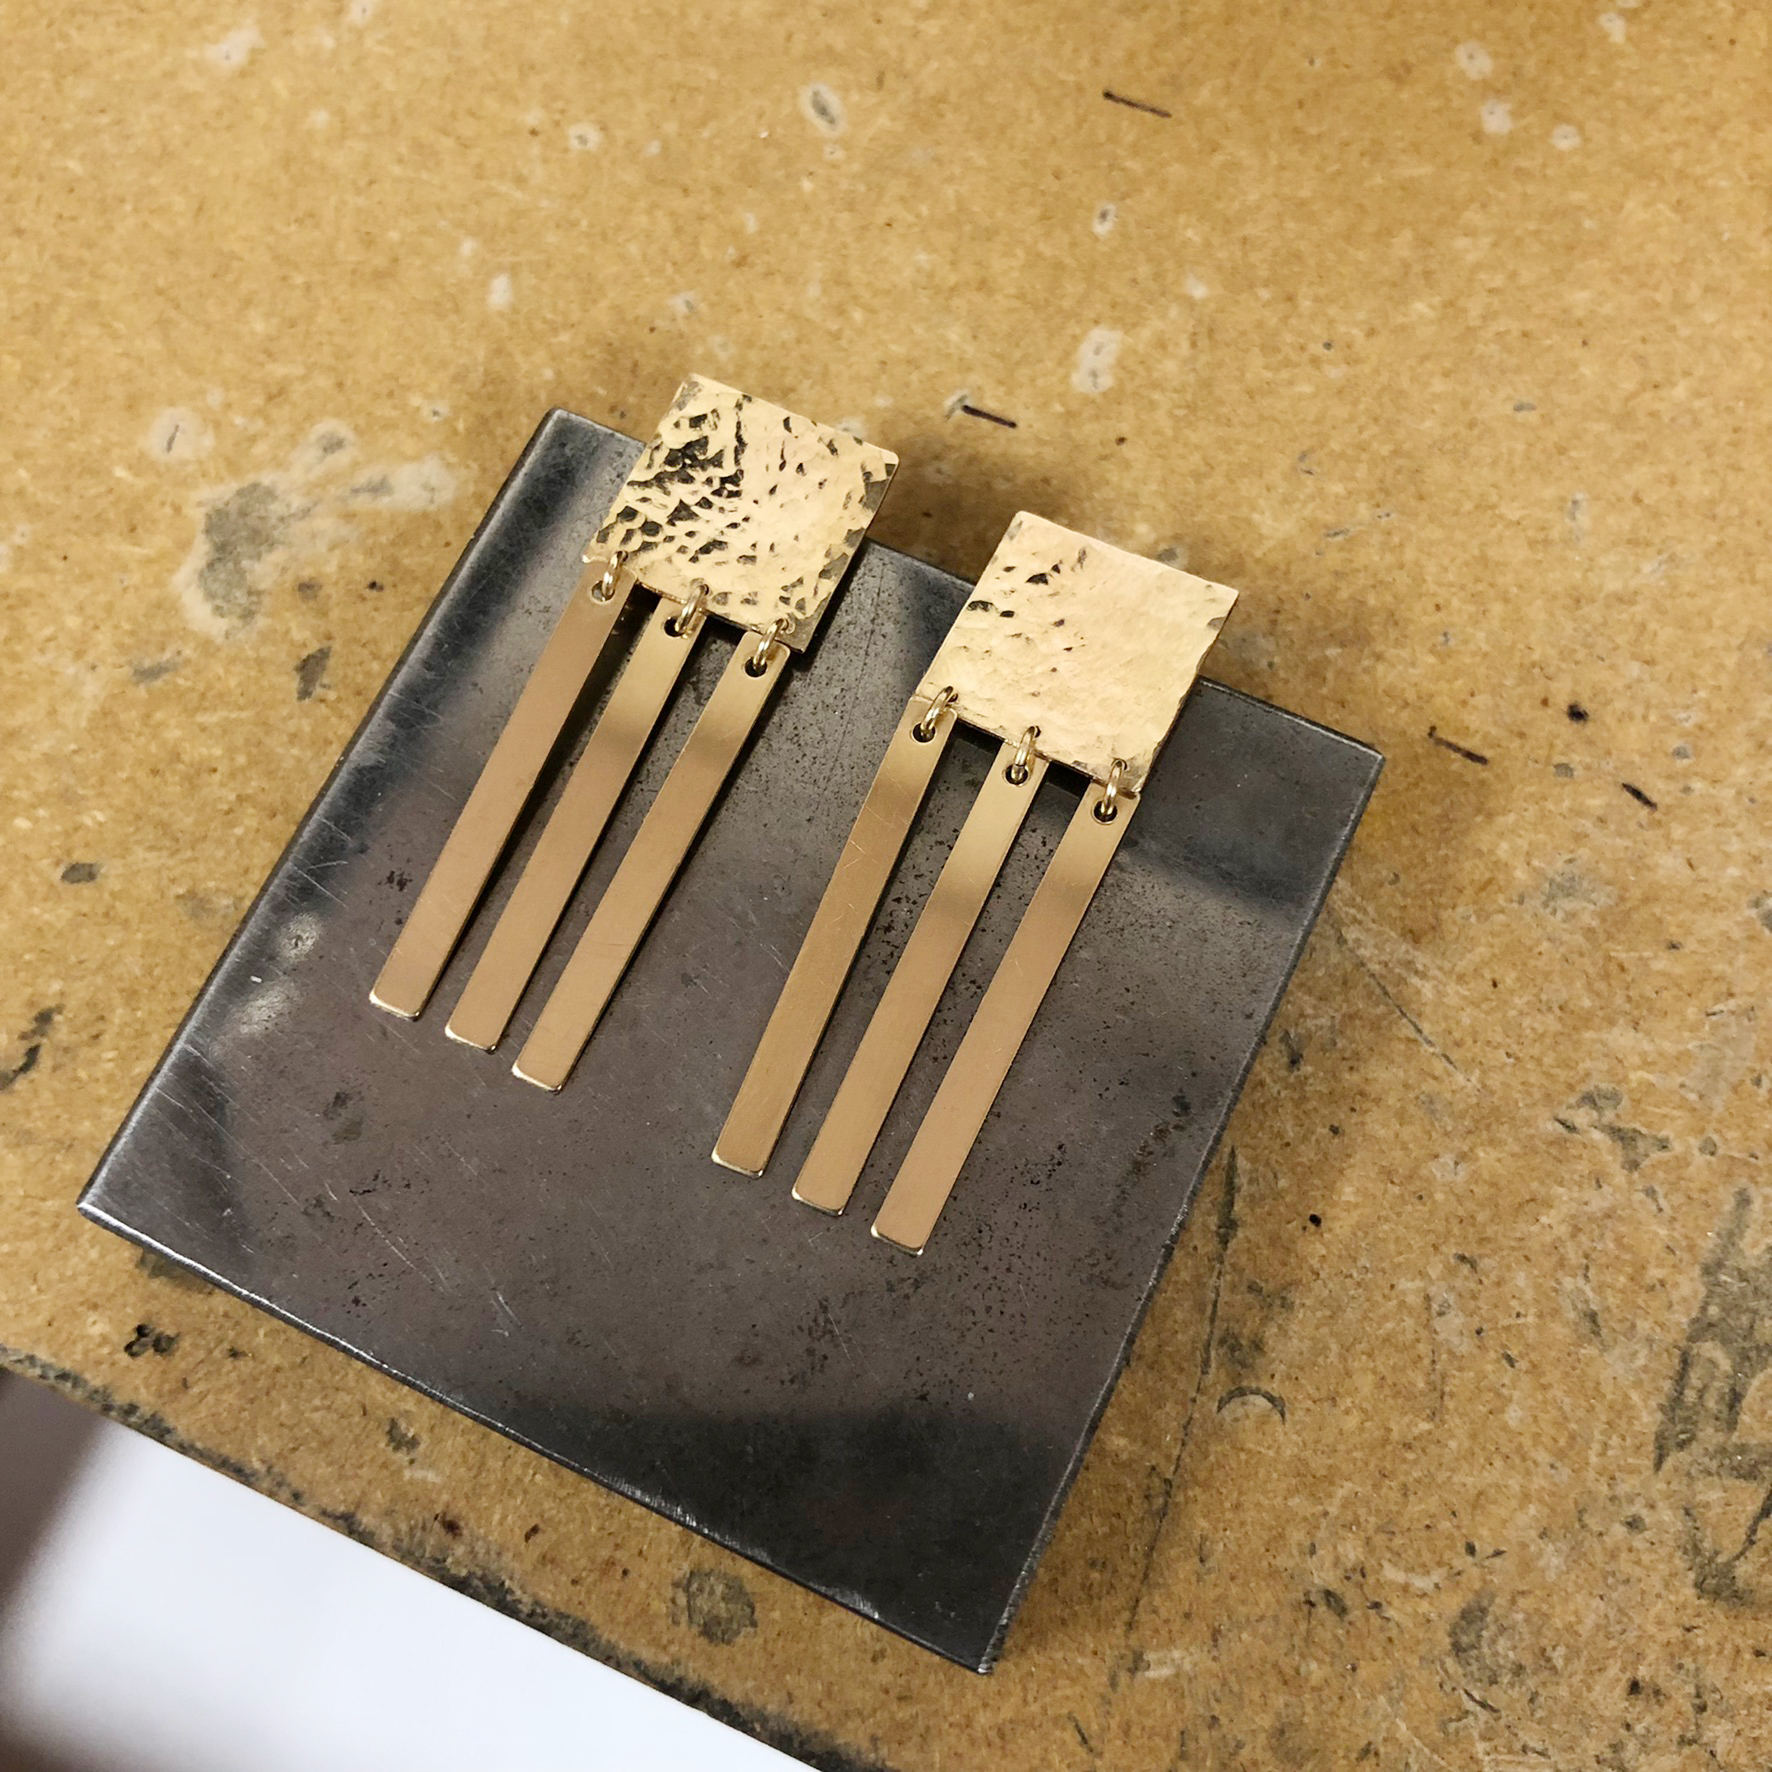
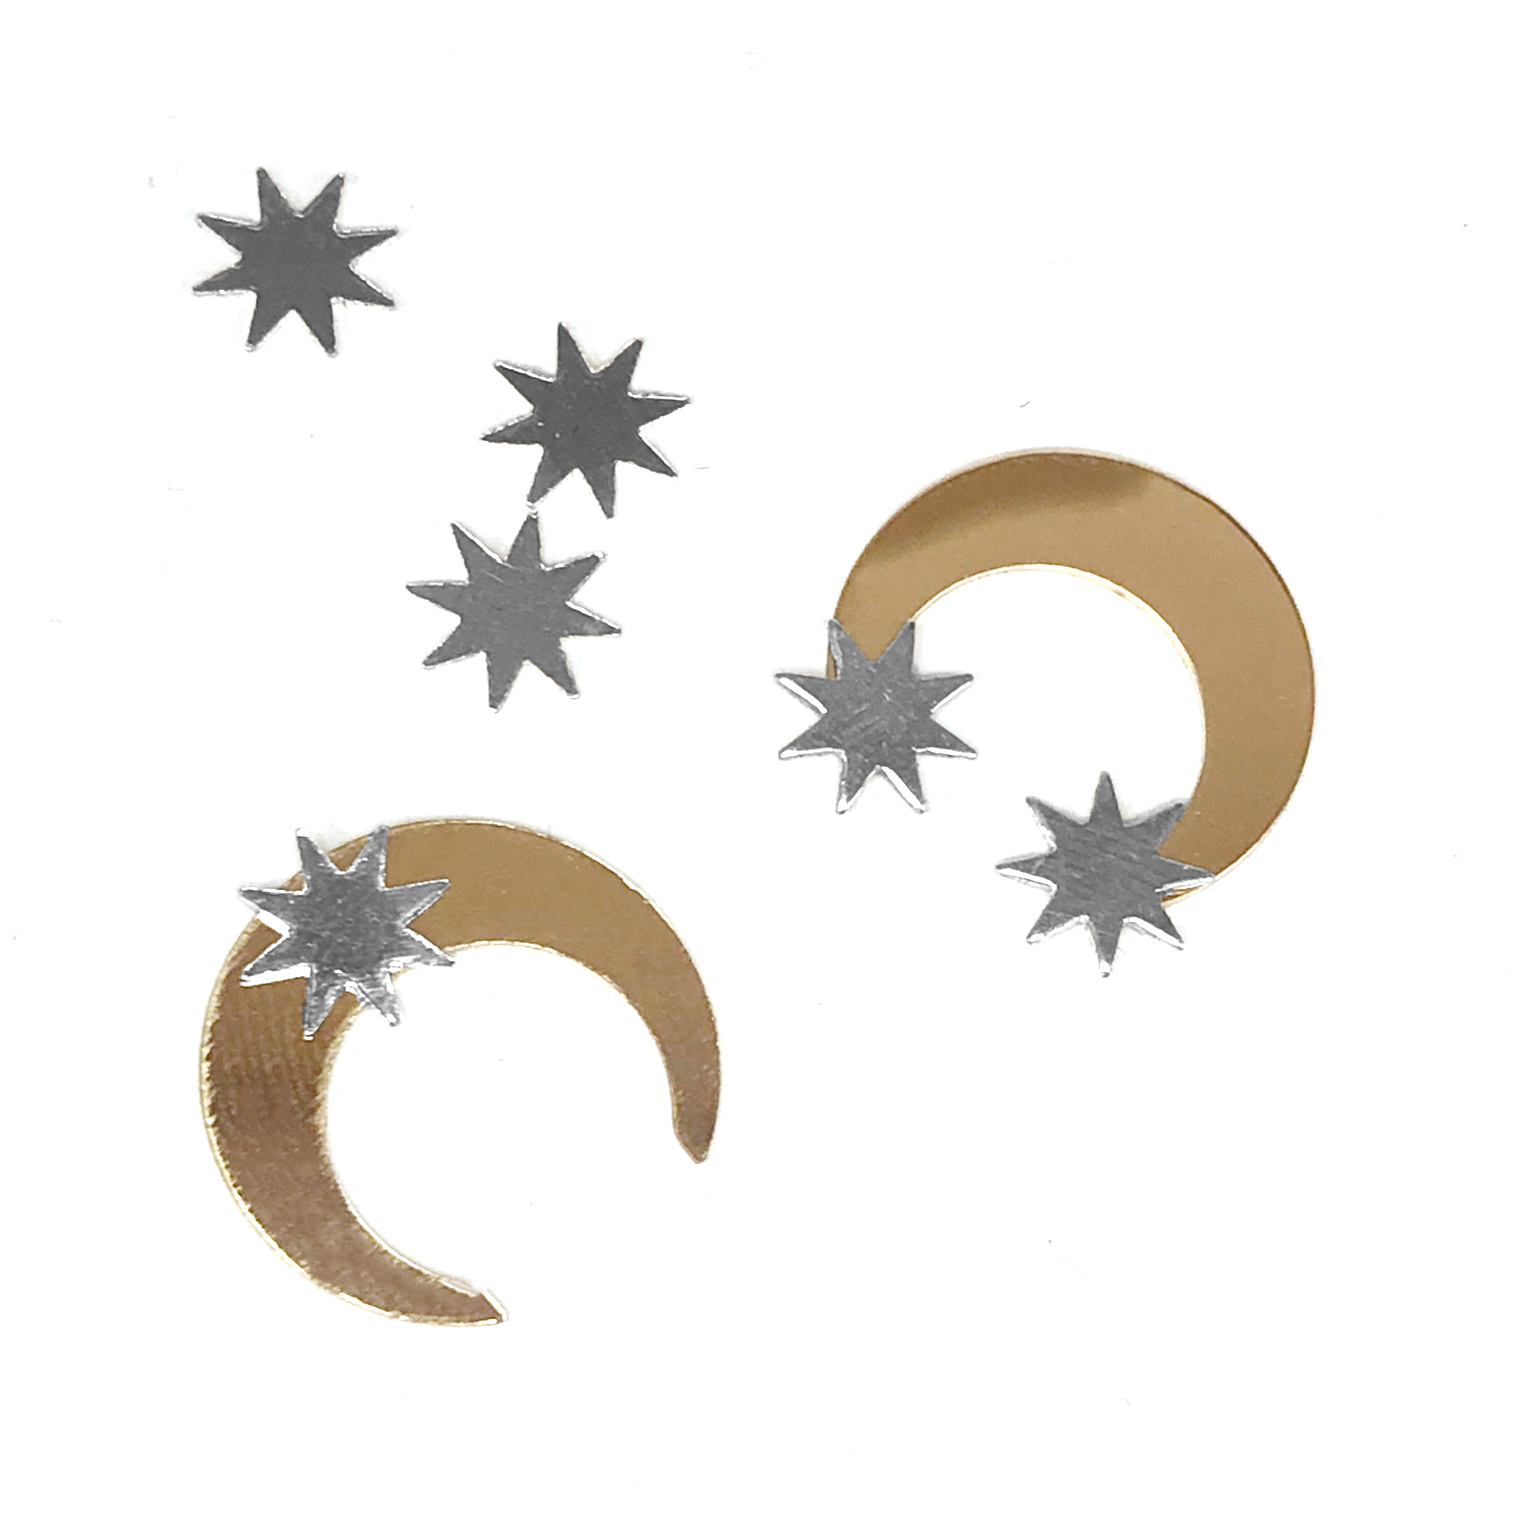
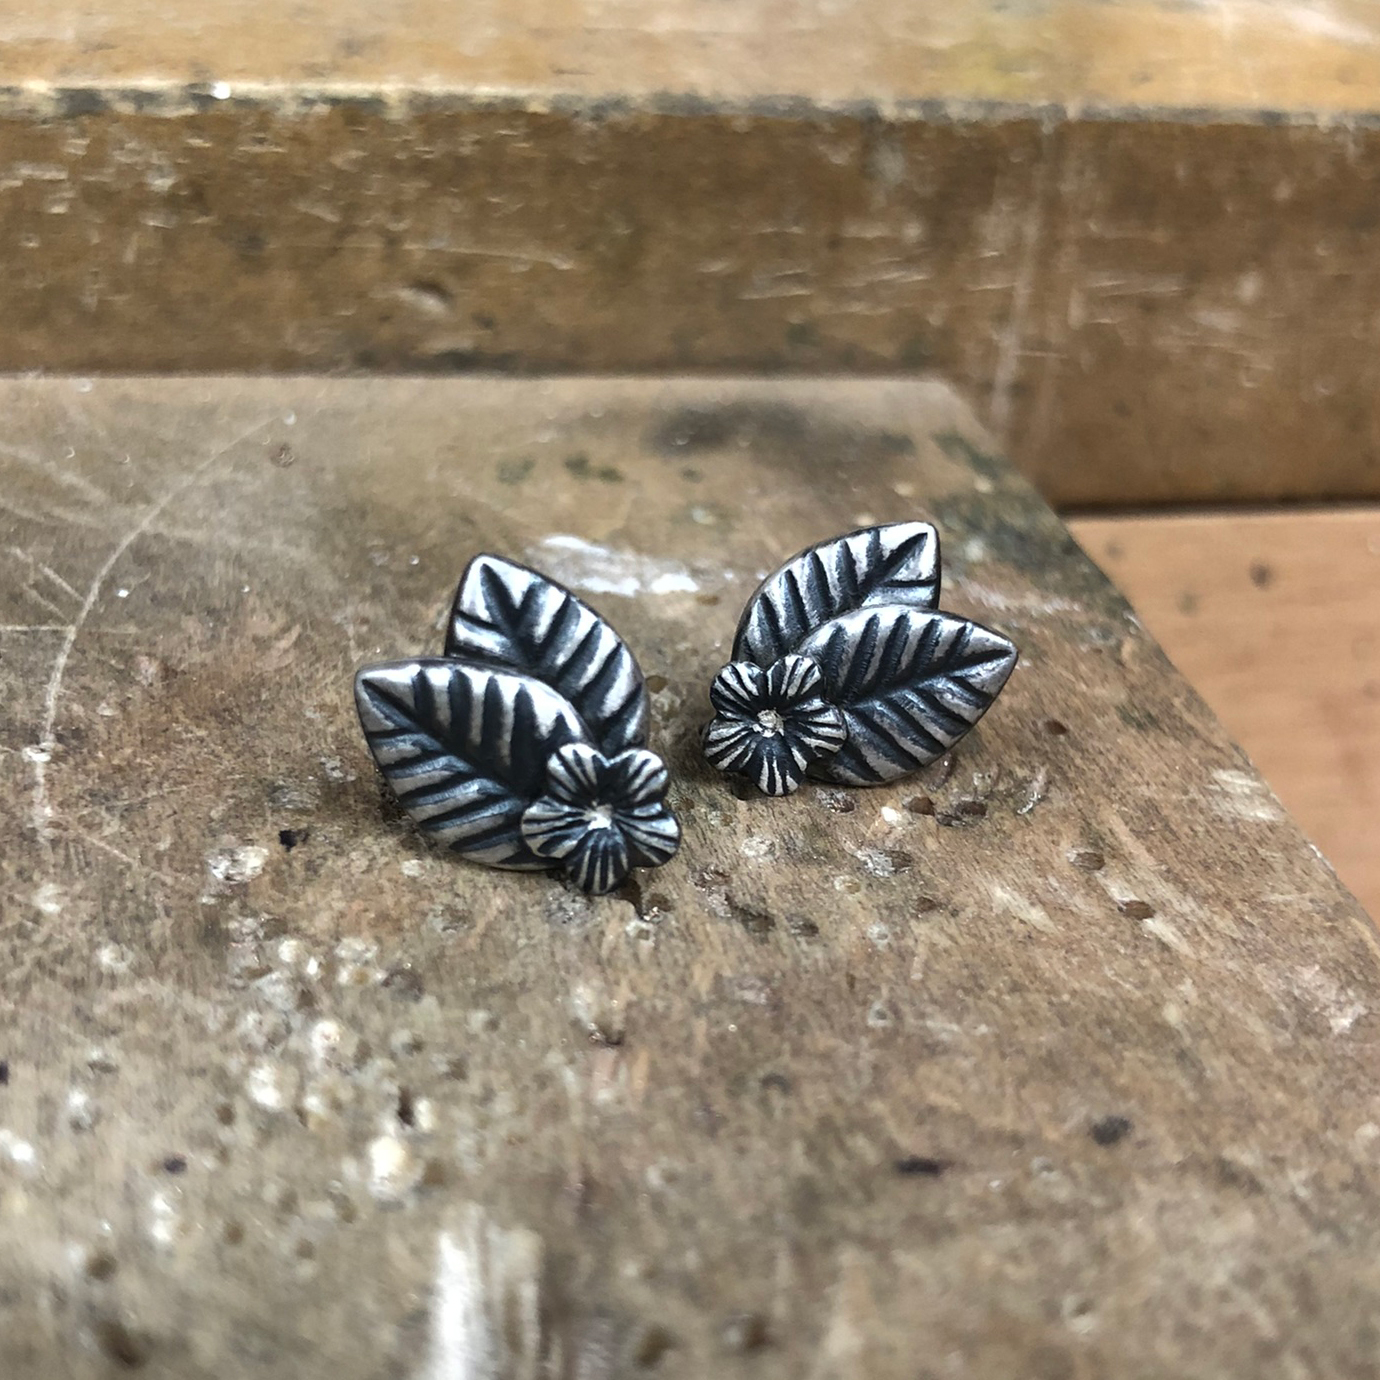
Because your skills are more advanced, you can match your designs to your skill level. Pre-made jewelry findings like solder ornaments or blanks are a great way to add interest to your designs, while still being thoughtful on time. Consider mixing and matching a few different ornaments in one piece. Leaves and flowers are great ways to create unique bouquets for your ears. Layering different materials can created bold effects, like the gold-filled and sterling silver components below. Soldering ornaments make it so easy to experiment and have fun with your designs, and can easily spice up a simple piece. Don’t be afraid to alter pre-made elements either. I’ve drilled holes in these square blanks to create a playful fringe effect.
 |
 |
 |
So now that you’re armed with some soldering techniques, there’s nothing holding you back from creating all the post earrings you want! Share your favorite soldering tips and techniques in the comments below.
Shop all of our earring posts and clutches to find the perfect match.

