


This blog covers important information – like how to buy the right material for making rings. But we’ll also discuss the fun stuff – design ideas and tips and tricks for creating one-of-a-kind rings!
There are a lot of pre-made sterling silver rings out there, but sometimes making a ring makes more sense. You may want a special shape for a ring shank, a specific thickness for a stone, or a personalized pattern. Below we’ll cover how to buy the right type and amount of material for your rings, including a handy formula. Plus, we’ll cover design tips and tricks so you can start making rings to match your personal aesthetic! We offer a ring making kit with all the material you will need to make about five rings with stone settings.
Purchasing Ring Material
Ring making material is really just wire. You can purchase round, flat, square, half round, or pattern wire for rings – there really is no limit! Round, flat, and half-round are your most common. You will typically purchase wire for rings in dead-soft hardness. That means you won’t need to anneal it before forming – you can just get started! Typically you’re material will be 18-12 gauge in thickness. Be mindful of going thinner than 18 gauge, as your ring could deform easily because it’s so thin. SHOP RING MAKING MATERIAL >>>
Measuring Ring Making Materials
Before you can purchase the right amount of silver wire, you need to know what size the final ring will be. In the US ring sizes go from 1 to about 14, with one being the smallest. Sometimes your customer will already know their ring size, or you’ll have to size them. For this you’ll use a ring sizing gauge. It’s a tool that has a bunch of different sized rings attached – you just slide the right one onto your customers ringer and voila! you have their size! There’s a few ways to get the length of material needed for the size ring. The two things you need, regardless of method, are the ring size and gauge of material you’ll be using.
You can use the formula below to easily find out how many inches or mm you need:
(Inner diameter of ring + thickness of material) x 3.14
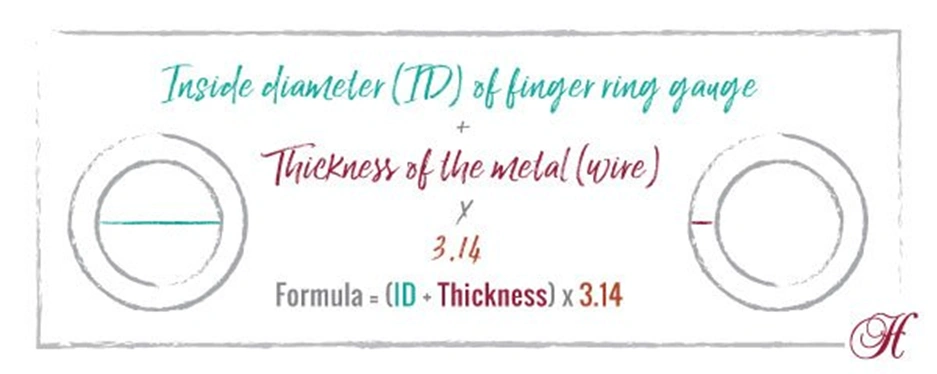
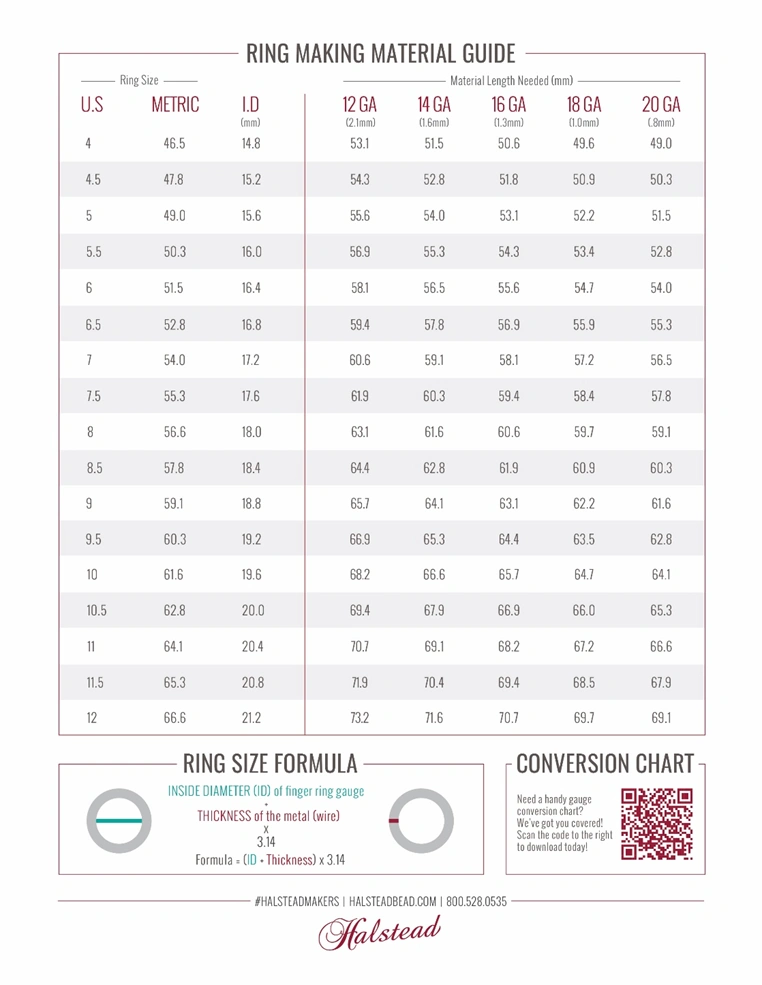
Make sure that your inner diameter and material thickness are in the same unit of measure! For example – a size 7 ring has an inner diameter of 0.682 inches. We’ll be using 18 gauge wire, which converted to inches is 0.0403 inches thick. 0.682 + 0.0403 = 0.7223 inches. Next we’ll multiply that by 3.14, resulting in 2.27 inches. So now we know that we’ll need 2.27 inches of 18 gauge wire to make a size 7 ring. The other way to can determine how much material you need is by using a handy chart like the one below!! It will save you a bunch of time.
Ring Making Tips and Tricks
When making rings, it’s totally up to you – let your creativity run wild! There are a few tips and tricks though to keep in mind that will make your life easier. Number one – use the chart above!!
- If using pattern or twisted wire, try to match the pattern up at the solder joint. It’s an extra attention to detail that will elevate your piece.
- Keep a gauge conversion chart on hand, like the one in Jeweler’s Resources – Conversion Chars and Reference. I use mine all the time.
- Cheap, plastic ring sizers are great to keep on hand to send to customers who are out of town. Every ring sizer is slightly different, so this will help you match their size to your ring mandrel for the perfect fit!
- Wide rings feel tighter on the ringer – always make sure to size them in the middle of the ring on your mandrel, not the bottom.
- Use a miter block or jig to file the ends of your wire flat for the perfect solder seam.
Ring Making Design Ideas
Below are a few design ideas for rings to get you started!
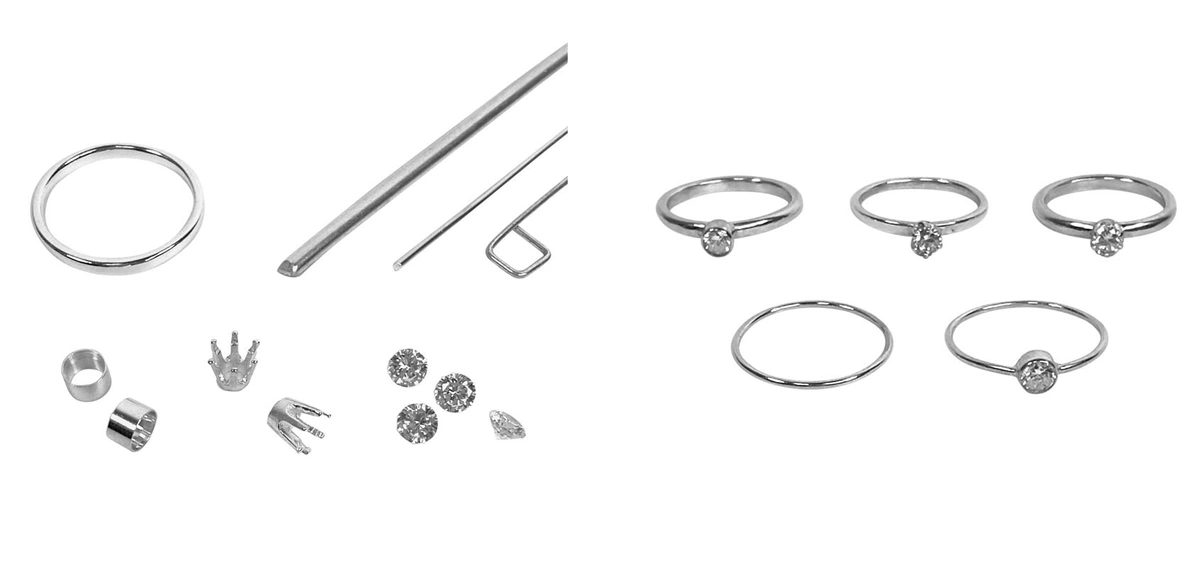
Ring Making Kit - Start with Halstead's ring making kit! This kit includes material to create 5 rings, as well as a few tube and prong settings to practice stone setting! It's a great way to get into making rings and become comfortable with the process before injecting your own style.
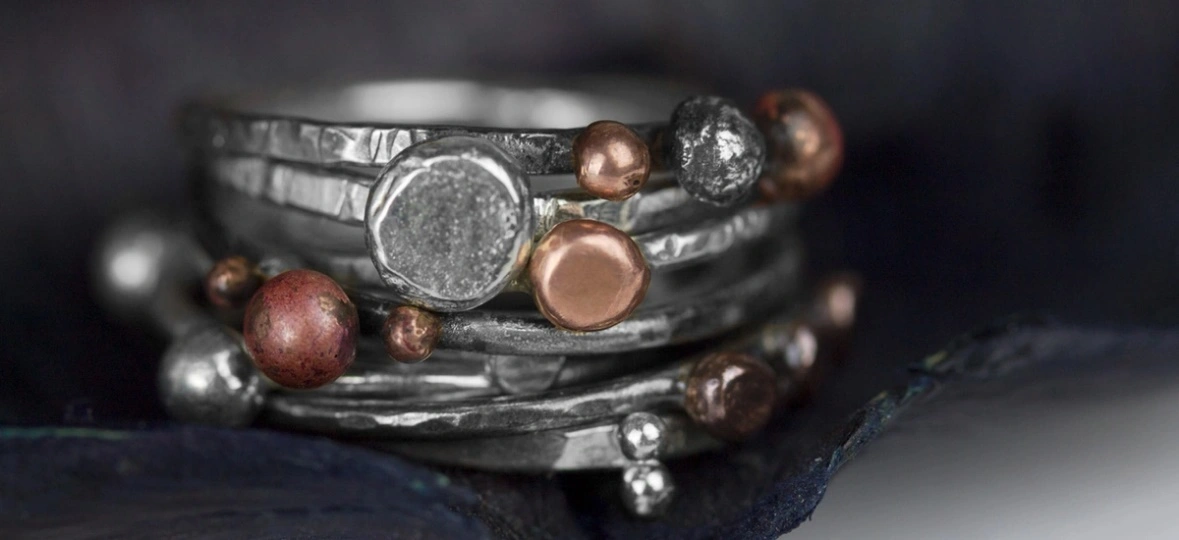
Granular stacking rings – Save your scrap metal to melt into tiny granules! Silver, bronze, and gold work great for this. You can then use them to create stacking rings, like the ones below, or add as decorative elements on rings with cabochon stones. Remember that gold-fill will not work for this – as you’d be melting the gold and brass together.
Patterned Material Rings – Pattern wire is great for creating unique ring bands on their own. But it doesn’t stop there – you can solder pattern or gallery wire to a wider band for a ring that has a big more of an individual voice.
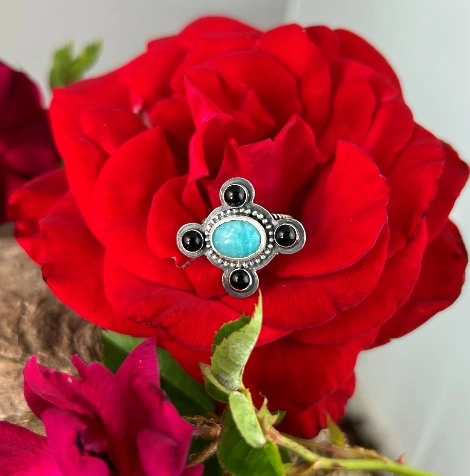
Stone Set Ring – Cabochon rings never really go out of style. Up your game by using multiple stones on one ring. This is a great opportunity to embellish with granules or soldering ornaments too.
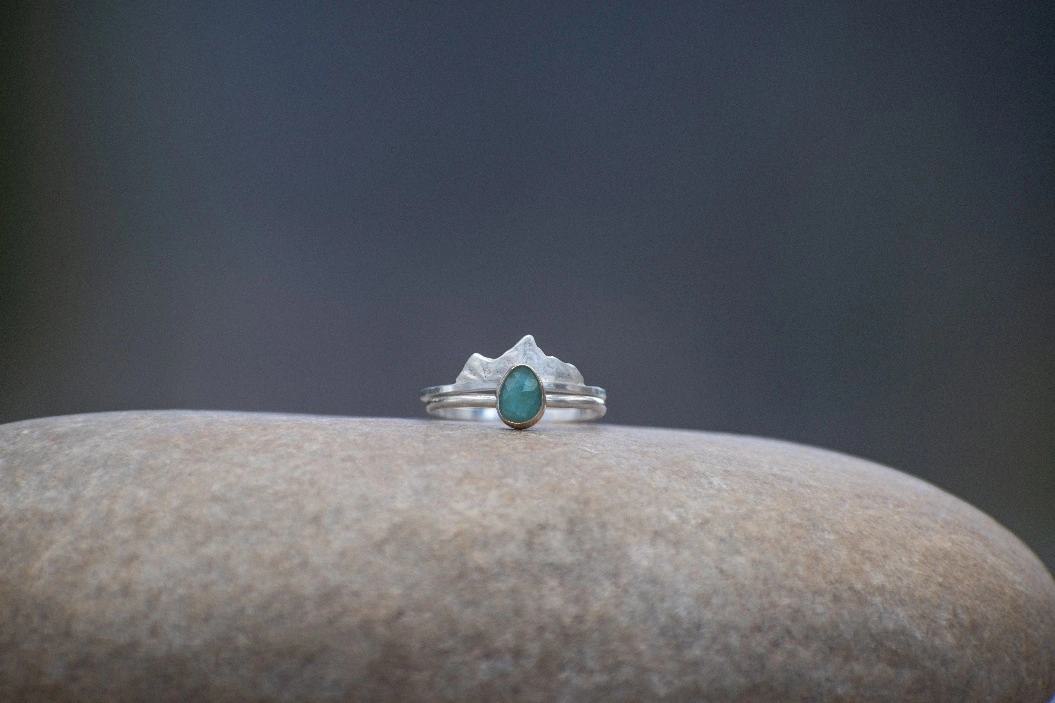
Stacking Rings – Stacking rings are typically made out of thinner material, 18-14 gauge, and meant to be worn in multiples. They can be plain, textured, or have small elements soldered on top. Having a variety of stacking rings available is a great way for customers to play around and build their own, unique stack.
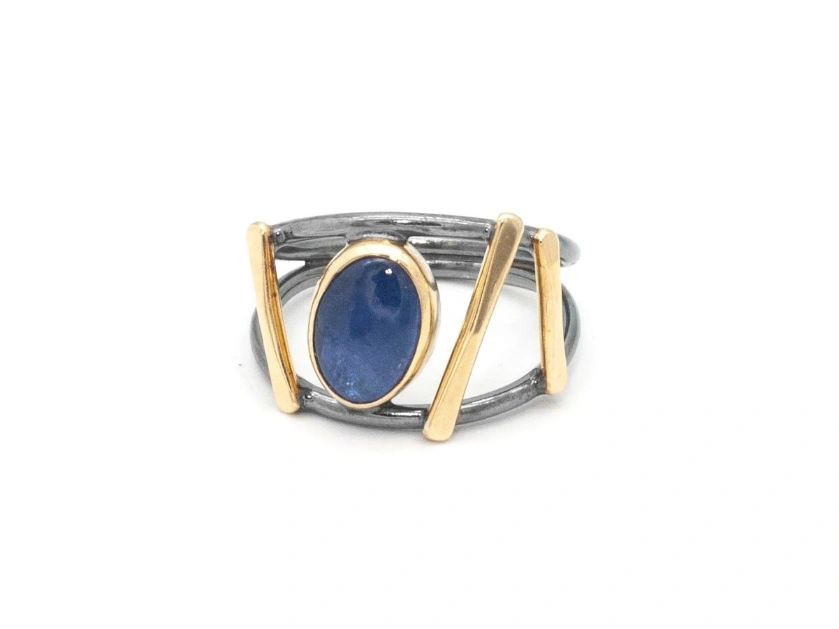
Mixed Metals – Mixing metals is a great way to set your jewelry apart from other and add a little extra spice. Silver and gold, silver and bronze, silver and copper, add three if you’re feeling wild! Sometimes just adding a patina to certain parts of your design can create this affect too.
Ring Making Time Savers
Of course, you can also purchase pre-sized ring bands to use for bases or shanks. Or, shop ready-to-sell sterling silver rings or gold filled rings as easy upsell items for your store.
More on Rings:

