


Increase interest and engagement on your website and social media feed with thesejewelry video marketing tips and ideas.
We all know how important photography is when it comes to selling jewelry. However, the consumer shift to e-commerce has accelerated in recent years and small businesses need to keep up. When people are home and unable to see the products they are wanting to buy, video is becoming an extremely valuable tool to show off your jewelry pieces. But making jewelry marketing videos can can be intimidating and at times a labor intensive process, so why should you take the time and effort to start making them when you have so many other things to worry about? In short - videos not only provide more information about your jewelry and business to your followers than a standard photo would, but they are much more engaging and will make it easier for your followers to make a personal connection with you.
With so many businesses and brands competing on social media, it can be hard to break through the noise to not only reach your current audience, but attract new followers as well. Remember, in their day-to-day life people don't go onto social media specifically to buy things, they go on to be entertained. That's why incorporating video is such a smart move - it allows you to express your personality and business in a way that can be both informational and engaging.
You also don't have to worry about making a huge production out of each video, even just whipping out your phone to capture different parts of your jewelry making process and putting the clips together with a snappy soundtrack can earn you huge engagement with almost minimal effort. Social media apps now incorporate basic video editing abilities so you won't even have to download a dedicated app to pull it off.
In this article we'll cover:
Why Videos Are Important For Jewelry Businesses
To highlight why video is so important, we interviewed two of our Halstead Grant winners - Christina Grace of TIN HAUS and Emma Elizabeth of Emma Elizabeth Jewelry - on how they utilize video for their jewelry businesses.
What do you use video for?
Christina: Implementing video has become an integral part of my marketing to promote my jewelry brand, TIN HAUS. In the beginning, I produced the usual meet-the-maker content and digital ad campaigns once or twice per season for new collections. Since the pandemic, however, I had more time during quarantine to experiment and have fun with the medium. My content creation became a bit looser and more relatable as well, by posting random funny skits, DIY’s, informational narratives, and my production process. Previously, my Instagram feed used to be a curation of art gallery-style photographs but pivoting to having more flexibility with the intention of providing value, humor, and quality content – instead of perfection – has made my audience more responsive. Watching my engagement grow has shown me how important connection is because it gave my audience the space to get a sense of who I am as an artist and as a BIPOC creative running a small business.
Emma: I use videos mostly for my social media accounts. Instagram kind of pushed me to do so when they added stories to their platform and now with Reels I have a great way to splice my videos and put them together creatively with music!
Where do you tend to use it?
Christina: I use video on my website which is directly linked to YouTube and Vimeo. I post video content across all social media channels, namely Instagram, Facebook, TikTok, Pinterest and sometimes LinkedIn.
Emma: I mostly use videos for Instagram and then share a link to Facebook or download the video from Instagram to then post on to my Facebook but the music isn't included when you do that.
Why/when did you decide to start using video?
Christina: I have a background of over 10 years working in the film and television industry – whether it be in production or on-camera – so I have been using video from the very beginning. My background in show business gave me the fundamental understanding of how influential programming can be.
Emma: A while back I downloaded a video editing app from the google store and created a 5 minute process video of a chrysoprase cuff from sketch to finished product. My motivation for doing so was so that I could share it on my IGTV. After sharing the post to IGTV, my Instagram feed and Facebook, I received a ton of good feedback. People really enjoyed seeing how it was made. I found that it added to the value of my pieces once my community really understood just how many steps there were throughout the entire process. Now, I am trying to find my voice with Instagram Reels by giving little snippets of techniques and processes that I use everyday.
Has using video made a difference for your business or for your customers?
Christina: Video content has, for sure, made a difference in my business. It has given context to everything that happens behind-the-scenes that customers were not aware of, in ways photography has not been able to do before. Videos broke barriers to any hesitation customers may have had to reach out or leave comments on my posts. Videos have made my brand overall more authentic, relatable, and approachable. My customers love watching the jewelry-making process, especially if it is a piece of jewelry they bought. Ironically, some were surprised to see that it was me making the jewelry. For some reason, people thought that jewelry designers only design and have someone else make the pieces. They did not realize that jewelry designers can be the makers, too
Emma: I also share a lot of random video and snippets throughout my workday on my Instagram stories so that my current customers can watch their pieces being made. One of the number one comments I get when a client receives their new piece of wearable art is that it was so cool watching me work on their pieces and that they loved getting a glimpse at how it was made. It really does add to the value of their piece and now they can share with their friends the story of how it came to be!
How To Shoot Your Own Jewelry Marketing Videos
If you've never created a jewelry marketing video before, where do you even begin? Or have your created lots before but are wanting to expand your repertoire? Fear not, for we will go over how to create amazing video content from the very basics to the more complex. Keep in mind that you don't need to follow every step every time. For example, some videos may require less pre-planning than others (i.e. if you find a social media template you want to use.)
We've broken down the steps you'll want to take to start making your own videos for your jewelry business. Below we'll discuss tips, tricks, and different ways to make the entire process easier for you to manage. Click on a step below to go directly to that section.
Step 1 - Concept
Unless it’s one of those spur of the moment "here’s what I’m making" or "here’s what’s going on" videos, I really cannot stress enough the importance of planning a shoot out. Knowing what you’ll need for the end product will cut down the time it takes to shoot, process, and edit the video while also reducing the need for reshoots.
This can be done several ways. We like to start off with looking at what we’ll be doing over the next week/month to see if there is anything that would be worth making a video about. Next comes deciding which platform would be best for posting based on the topic. That helps decide not only the length and style of the video, but also the format (horizontal shooting for Youtube and Facebook, square or vertical for Instagram.) How-to’s and tutorials tend to be longer and are more suited for Youtube, while Halstead culture (such as our office dogs or birthday lunches) and theme videos which tend to be shorter and more spontaneous work better on Instagram.
If you are just getting started in making videos, knowing what you want beforehand will help reduce the anxiety over beginning to work with a new medium. So instead of just saying you will start making videos for marketing, be more specific: "I'm going to make a behind the scenes view of my studio video to post on instagram" or "I want to show what goes into making my most popular pair of earrings." Once you know what you want to make, you can either get started or watch similar types of videos for inspiration.
For more complex shoots, planning is especially key. When it comes time for us to shoot these types of videos, we’ll even storyboard what shots we will want so that we’re not stuck needing reshoots or have shots go to waste. One example of where we did this was our youtube cover video. While we knew we’d want some b-roll shots left over for other uses, we didn’t want to come up short on content. A month before the shoot we planned what topics we wanted to show, what types of shots we needed, and we even did a few test shots beforehand to see what worked and what didn’t.
Before you just jump into making a video, you need to know what your video will be about. Even for short, spur of the moment videos it’s beneficial to know what you want for the end result - this way you’re not wishing you had thought of shooting something that has already happened.
One such instance may be you just filmed your studio cats chasing each other about - how cute! Maybe instead of posting the shot right away, you can make a compilation of all the videos of them chasing each other and post that instead. Not only do you still get to show off your furry little friends, but your audience will have a more engaging video to watch since compilation videos are a favorite on social media.
Videos that you will need to really sit down and think about are any videos that have some form of message to your audience. Exactly who is your intended audience? What words best get your message across? What visuals will enhance that message?
Here’s a few questions to answer before you begin your next shoot:
- What type of video are you wanting to shoot?
- What’s the topic of the video?
- Is this a fun video or is there a message? If there is a message what are you trying to say and who are you wanting to say it to?
- What platform would that topic work best on?
Jewelry Video Ideas
While there are many types of videos out there, these are the main types that you as a jeweler may want to implement on your website or social media feed.
About Me/Meet The Jeweler
These videos are great for your website! Many give a behind the scenes look at a jeweler's making process from design to the finished product being modeled. It mostly focuses on the jeweler in the studio. Often, the jeweler provides a voice over narration, giving the audience an insight to the jeweler's world and who they are. These videos often have a higher production cost and will take more time and effort, but they have a long shelf life. So you can make one and not have to worry about updating it every month or year.
You can also do short, fun ones made specifically for social media that are easier to produce and more off the cuff. Doing selfie style shots while working at your bench and then showing your other daily surroundings can give your audience a fun new look at a day in your life.
Process Video
Similar to the 'About Me' video in that it gives your customers a behind the scenes look at the process of making your jewelry. This type of video is less about making a long lasting piece of content and more about engaging your customers on social media. People love seeing how things are made and jewelry is no different, especially those who have no jewelry making experience themselves.
These videos are great for your social media and can easily be posted with regularity. They also don't require a lot of production and editing - most of them can be shot on your phone with jump cuts of the different steps in making the piece.
Product Videography
This is a great way to give online customers a more intimate look at your jewelry when they can't see it in person before purchasing. This could be a low or a high production piece of content. For posting on social media where you're showing off brand now pieces or how a set of earrings look while worn, all you need to do is shoot on your phone. For video that accompanies product images on your website, you may want the video to have a higher production feel.
Engagement Videos
Today's business world is all about making connections and interacting with your customer. So these videos are made specifically for interacting with your audience and making a connection with them.
On the business side, this might look like an update about your or your business with an element that gets your audience to engage in some way. For example, making a video announcing the release your newest collection where you ask the viewers to comment with their favorite piece or if they have an experience that the collection reminds them of.
On the fun side, you might consider making a video that gives your audience something to laugh about or create a spark of joy when they watch. Let your creativity run wild! Maybe a "Day in the life of (studio pet)," a music video parody, or a mock "in-depth interview" with yourself. Think of anything that is both fun for you to make and fun for your customers to watch.
Step 2 - Prep
You know what you are going to shoot, now the question is: How are you going to actually get the shots?
Let’s say you will be having a party celebrating the 5 year anniversary of opening your studio. You know you’ll want to get some video to post to social media, but you also know the lighting isn’t the best even in the daytime and the party will be at night. What will you do?
Will you bring in some of your photography lights to brighten up the area? Maybe you have extra lamps at home, but will they look weird with your studio decor? Could you string up some extra Christmas lights above the party to give everything a nice even glow?
Here’s another scenario: You love posting work in progress videos to social media, but no matter how you position yourself or your lamp, the lighting just never looks right. Do you try rearranging the studio so your bench is by a window? Do you invest in some studio lights and just leave them set up permanently by the bench so they are only just a switch away from being there for your video needs?
You can see that even spontaneous type shots can require some forethought into making sure they look good. The more videos you make the better you will be at recognizing and preparing for any shortcomings beforehand.
After you’ve answered the questions in the previous section, your next step will be to answer these:
- Will your video need props or special setups?
- What equipment will you need? Is your phone and your studio lights enough or will you need more specialized equipment?
- Is this something you can shoot yourself or will you need help?
- If you are shooting something like a process video and you tend to do production work, will you make just one instead for the shoot or plan to break up the shoot to cover the production batch process?
- Where will you be shooting? What will the setup look like?
- And finally - is there anything you do NOT want to show? For some this can be their making process, or a supplier, but if you do not want something to be on camera you’ll have to plan camera angles or making sure to remove items before the shoot.
Now let’s do another exercise: 360º shots on your social media are extremely popular so now you are now wanting to include video to accompany the product shots on your website. Your plan is to have the video match the current product photography in both lighting and setup with plans in the future to shoot the photography and video during the same session.
How will you have to change your current photography setup to not only seamlessly integrate videography, but allow for 360º shooting of your items? Will you need to invest in new equipment, or is there a way to modify what you currently have?
Step 3 - Shooting Your Jewelry Video
Yay! After all that conceptualizing and planning you finally start shooting your video!
Right?
Almost. If you are new to videography or are even testing out a new shot or style, take the time to get some test shots first and analyze them. Look at the video closely: are you able to see the subject clearly? Do your hands get in the way of the shot? Is the subject well lit? Is there an object in the background that’s too distracting?
You really don’t want to be at the editing process when you discover issues with the footage. Not only that, but maybe the shot that looked so perfect in your head just plain doesn’t work. Now you’ll have to go back to the conceptualization stage to rethink the shot to make it work.
Setting Up
Much like with photography make sure whatever device you’ll be shooting from is set up for capturing in one of the highest quality formats as possible. This will allow you to be able to use the shots on a variety of mediums.

Keep it Steady, Stupid
What’s an easy way to tell the difference between a professional video and an amateur? How steady or smooth the footage is. After lighting and setup your biggest worry will be how to make sure your video is as smooth as butter.
Still Shots
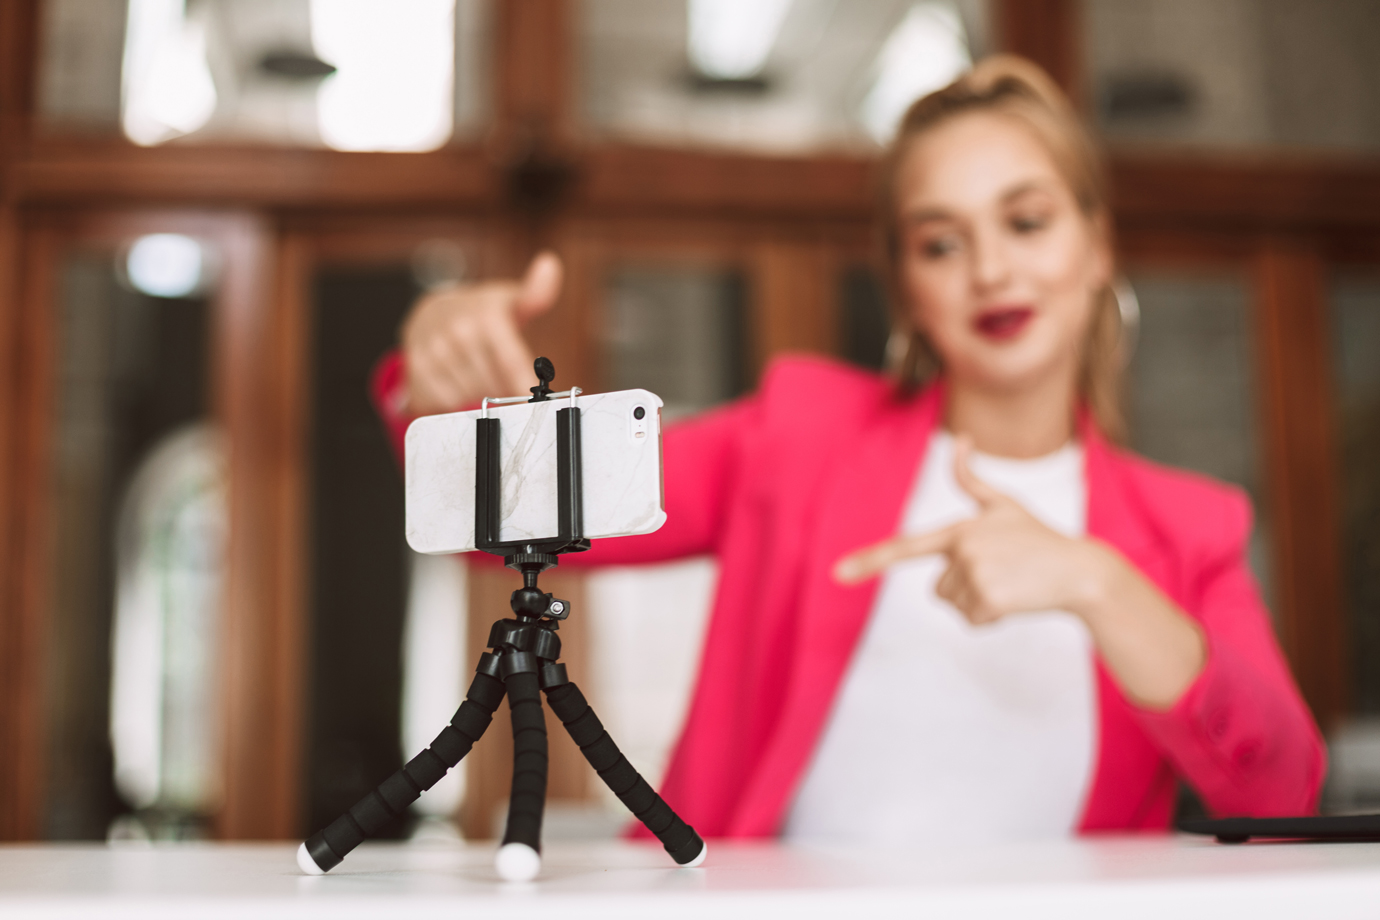
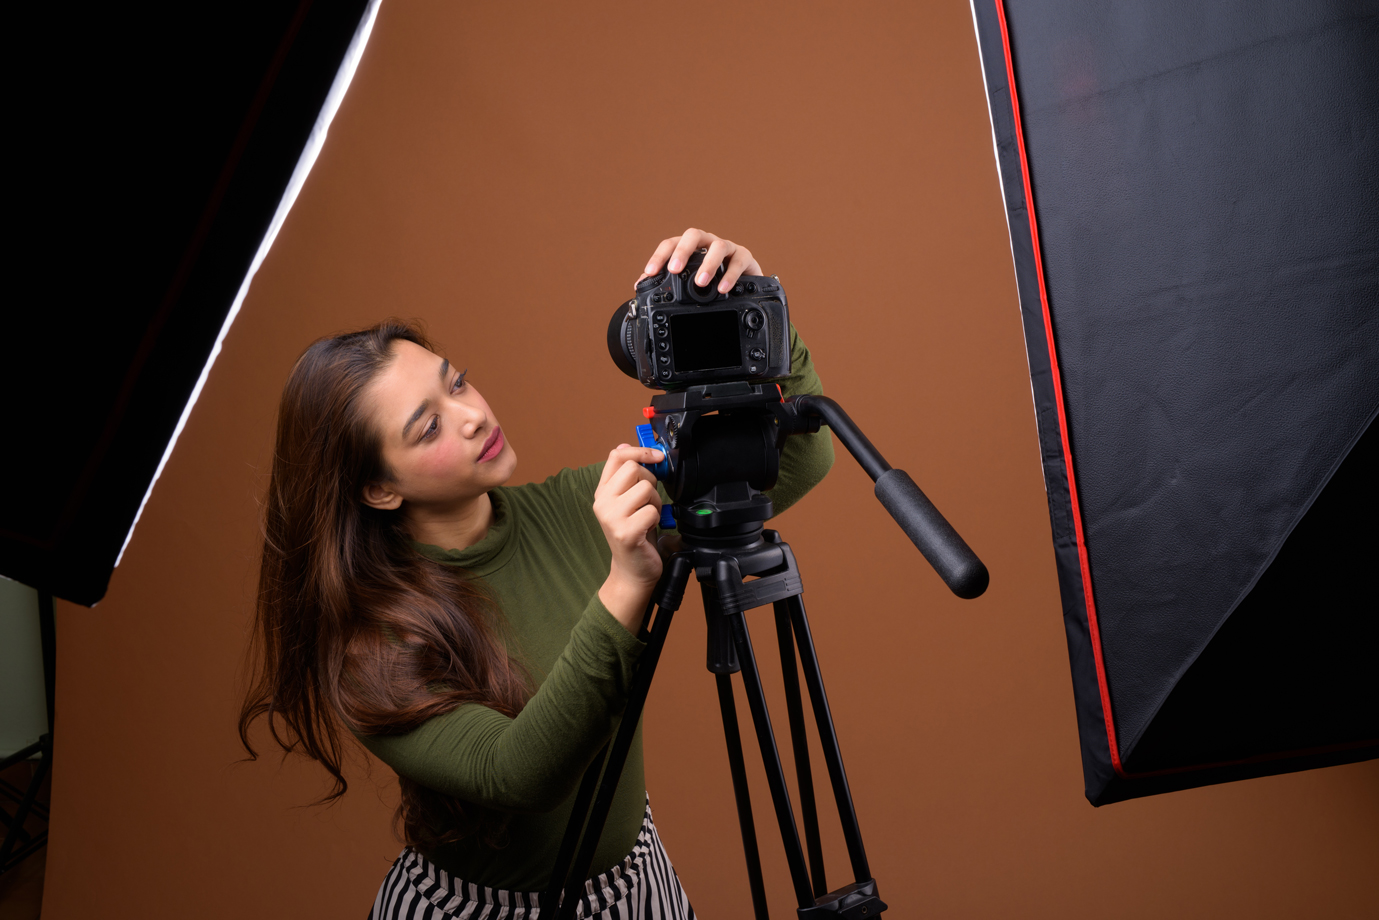
For shots with no camera movement in them, the answer is simple: Use a tripod.
Even with a tripod, you fiddling with the camera can create unsteady video so make sure to begin the action a couple of seconds after recording starts so you can cut out the camera shake. Otherwise invest in a remote shutter release so that you don’t have to worry about camera shake and you can control when the camera starts and stops from your work bench instead of having to get up over and over again. Just make sure you know your camera is actually recording, you don’t want to get through the entire process just to find out that it had been recording before you started and you ended up stopping it when it should have been rolling.
Moving Shots
Maybe you’re beyond still video shots and are looking to add in camera movement - a great idea since it adds more visual interest for the audience. How do you achieve incorporating a moving camera while still keeping the footage nice and steady? There are a few ways of steadying a camera, but no matter which you use, you’ll still need to add some extra stabilization through the editing process so be prepared for that.
Tripod + Wheels
If your shoot area has a bit of floor space and all you need is a pan or zoom in shot, setting up your camera tripod on an object with wheels is an easy, low budget way to achieve this look. Make sure your tripod and camera is secure - you really don’t want to end up with a broken camera trying to get a shot. Also, make sure that the wheeled object is sturdy and offers a smooth ride - small wheels on a tiled surface will not only create jarring movements in the shot, the wheels may also catch on the tile. Larger wheels will offer the smoothest ride, but they may not work in your space.
Gimbals
These devices are a favorite of mine, but can be pricey. Make sure that the investment is worth it to you - only get one if you know you’ll be making video regularly with it. A smartphone one is a great option, good ones can be found for under $100, but for a DSLR one it can run into the several hundreds. I would suggest sticking to a professional to get these types of shots unless you are really invested in making your own videos.
What makes these devices great is they offer many more shot styles, a wider range of movement, and with the added bonus of taking up much less space. Many also come with an app that blows open your creative opportunities for video. How would you like to shoot a moving hyperlapse? Not only is that type of shot unusual and highly engaging for your followers, but it barely takes any effort on your part to set up and go.
Composition
Composition in videography is just as important as it is in photography, but now you’ll have to plan for parts to be moving.
The Rule of Thirds
Still shots can be set up the same as you would a photography shot. But when it comes to the moving shots you’ll want to move things based on either their horizontal or vertical lines: think a jeweler (vertical) at their jeweler’s bench (horizontal). The jeweler would either be centered or placed at one of the vertical lines while the jeweler’s bench would be placed to match the lower third line. Then, depending on which you prefer, the camera would pan vertically or horizontally along the same line as the bench or the jeweler.
Depth of Field
Nothing creates a more engaging composition than showing depth. Getting a shot with a blurry foreground object blocking out part of the scene is a great way to draw a viewer into the space. You can also create depth by having the main subject (let’s say the jeweler at the bench) in focus with the studio in the background blurred out. It’s not only much more cinematic to the eye, it helps the audience focus on the subject by blurring out distractions.
Establishing, Medium, and Close-up Shots
You can probably guess as to what a medium and close-up shot are, but what exactly is an establishing shot and why is it important? Think about the beginning of the Sound of Music. It doesn’t just start with a close-up of Julie Andrews singing, it establishes the setting of Austria first by flying through the mountains and valleys before zooming in on her. You can use this same principle when it comes to your videography. Doing this helps creates a nice transition and helps to draw your audience into the video.
How would you do this? Here’s a couple of ways:
Let’s say you are shooting your About Me video. The establishing shot would be of the outside of the building or showing the entire studio space. Medium shots would be of you working at your bench. The close-up shots would then be of a piece you are working on.
Maybe you want to apply this concept to a process video. Well the establishing shot doesn’t need to be of your business or of the studio, it can be of your bench. The medium shots would be showing your hands as you worked on the jewelry piece. The close-ups then would be an extreme detail shot of a certain process - such as setting a stone or of a soldering bead melting.
Shoot with Transitions in Mind
How do you plan to cut between the different clips in the video? Shooting your video with the transitions in mind is a great way to not only make your video seem more seamless, but more engaging for your audience.
If you are new to video this can seem like a daunting task, how exactly does one shoot with transitions in mind?
First, watch other social media videos from jewelers and especially social media influencers. Watch the timing of the clips as well as how and when the cuts are made.
So how exactly does one shoot in a way that creates natural transitions for your video? Think of doing a pan shot of a piece that’s in progress on your bench. You want it to be an overhead shot that pans from left to right. To add in a natural transition to both the beginning and end of the cut simply make sure the camera starts and ends behind an object, i.e place two objects that will be extremely close to the camera when it starts and ends so that the camera starts and ends in black.
Here’s a few transitions you can utilize to spice up your videos:
Foreground Object
As described above, for this type of transition you’ll use a nearby foreground object that will fill the entire shot at the beginning and/or end of the shot. If it’s at the end, you’ll want your next scene to begin with an object that also fills the frame.
Movement Transition
This type of transition takes a little bit of planning. In short the transition is based off the camera movements. So if one scene ends by the camera moving left, then you’ll start the next scene with the camera coming in from the right. Let’s say you want to do more of a ‘first person’ perspective of how a piece is made from start to finish. You end the soldering scene with the camera following the piece as it is picked up and dropped into the pickle pot on the right. You’ll then start the next scene by the camera panning left to right.
This way the last scene exits stage right and the new scene enters stage left, a nice flowing transition.
And remember, the movement doesn’t have to be only from the left or right, you can also twist, zoom, or flip up the camera to create a huge variety of transitions.
Pop in and out
This type of transition is a mix of both the foreground object and the movement transitions described above. It’s a great way to show steps or progress and is great for quick short videos. We’ll continue with the example of showing the progress of a piece. First you’ll lay out the materials and start filming with the camera right up against them so that all it shows is black. You’ll pop the camera out so it captures all the pieces, pause, then drop it back down so it only shows black like how it started. Then at the next stage, all the pieces are cut and ready to solder, you’ll do the same thing - start the filming while the camera is on top of the piece, pop out, pause, then back in. Keep doing this at every main stage of making the piece, then trim and cut everything together.
Snap & Done
This is a fun and easy transition to do. Show the pieces that will be used to make the jewelry piece and end the scene by snapping your fingers in front of the camera. You'll start the next scene with your fingers finishing the snap then take your hand out of the frame to reveal the finished piece. There's a few ways you can spin this take as well: throw the components and they land as a finished piece, snap your tongs or use some other jewelry tool in lieu of your finger snap, shake a tin that the pieces are in, there's so many possibilities for this one!
Multiple Takes
Never expect to get the perfect shot in a single take. If at all possible try to take multiple, sometimes you don’t know until you’re in the editing phase that a shot has been ruined by something or other. By already having multiple takes you won’t have to worry about setting up everything again to reshoot.
You can also use this opportunity to shoot the different takes in a variety of ways. Maybe in one take you pan, and in another you slowly zoom in, and in a third you just hold steady. Having multiple options when it comes to the editing stage is always a bonus!
Step 4 - Editing Your Jewelry Marketing Videos
Now is where you turn all the clips you shot into a work of art. Just like with photography you’ll want to fix things like brightness, contrast, white balance, and vibrancy, but unlike photography your editing journey doesn’t end there. Now you’ll have deal with transitions, music, voice overs, lower thirds, and exporting it all for social media.
The Basics
Organizing
Start by saving your files in a special folder. Getting into this habit will save you so much time and brain power in the long run by keeping things organized from the get go. Once everything is organized, go through and filter out what’s good and what isn’t. Here at Halstead we tend to tag good and great clips and just leave the rest unmarked. We tend not to delete even the bad takes until we are done and the video is uploaded and we never delete the good and great takes because they can still be used in other ways down the road.
Base Edits
Once you have all the files separated by good vs bad and know what you'll be using, now you'll apply your basic edits. Why would you apply the basic edits now before you've even began to cut and place everything together?
The problem with attempting to apply edits such as brightness, contrast, white balance, and vibrancy after you've cut and pieced the video segments together means that you may apply various edits to different segments of one shot. So in short, make sure all the files you'll be using for final video look good before you start piecing them together.
Adding it All Together
Before you go chopping and slicing your clips together, there's a couple of things you need to think about to optimize your videos for your audience. When trimming the clips, make sure to only the most important bits of the video are shown (think starting up the torch, no one wants to see the 5 attempts it took you to get the striker to spark, just the one time it did work.) But maybe you want to show the entire soldering process. Again, no one wants to sit around for 5 or 10 minutes watching one thing happening, so in this scenario you would speed up that part so the 5-10 minutes is now sped up so it only lasts 10-30 seconds.
If you have a message based video, make sure the start captures your audience's attention. It has to be good right off the bat to not only get their attention, but to keep it.
Remember, the end result is all about your audience enjoyment. So once you are done making the video, wait a bit, maybe an hour or a day, and watch it with fresher eyes. You'll be able to see better what clips are too long, or where a transition feels awkward.
Music
Depending on how you plan on putting your video together you may need to decide on your music before you begin cutting and splicing. For videos that flow and match the music, you'll need to decide now what song you'll be using. For videos that aren't timed on music you can add it after you have put the shots altogether.
The main thing you need to worry about with music is this: Do you have the rights to use the music?
You can't just grab any old (or new) song from the internet and slap it on your video, especially as a business. Either look for royalty free music or expect to pay for the use of the song. Youtube also offers royalty free music you can add right before you
Certain social media sites and apps (such as Instagram and Youtube) allow you to add music through their service. These should be royalty free, or at least free to use via their service, so you shouldn't have to worry about liability while using them via the app.
Lower Thirds
Lower thirds are the graphics, generally with copy or images, you see pop up throughout a video that give the viewer information about what's going on. You've seen plenty of them while watching the news: describing the segment, introducing the journalist, even saying what area the video is shown from. Unlike what the name implies, these aren't just seen on the lower third portion of your video, they can be placed anywhere on the screen.
Since most social media platforms don't play music unless the user allows it, your video will show with no sound. If there is any important information you want to convey, you'll want to add it as a lower third. That way no matter what way your audience watches your video, they will still get whatever your message is.
Branding
Videos, no matter what type, are all about enhancing your brand in some way with your customers. So when you are making them keep your branding in mind. This doesn't mean you have to slap you logo on every video, but when choosing lower thirds styles or even your music, try to keep within your brand.
Step 5 - Posting Your Jewelry Videos
Once you are satisfied with your video, you are almost ready to post! If you have done all this on your phone it should be good to post right away. However if you were editing on a computer you need to make sure the video is exported specifically for social media.
Be sure to rename the file as well before posting it, especially to your website. Search engines can't search via video content, so the file name is one of the main things that will make the video not only searchable, but will add SEO points to your website as well.
On social media, be smart about your tags and captions, all of which are now searchable. Videos aren't just for your current audience, but for drawing in new followers so how you tag it can make a huge difference in your reach.
If you talk at all during your video, you'll also want to enable closed captions. This not only makes your video accessible, but allows users to understand what is going on without the need for audio.
Check out more of our photography blogs!

