


Ready to wire wrap? Get prepared with this article! We've covered the studio area, gauges of wire, beginner tools and some materials that you can use when wire wrapping.
Have you ever thought about wire wrapping before, but not sure where to start or what you need? We’ve got you covered! Wire wrapping is a great technique to get into because you don’t need a lot of specialized jewelry tools. Another perk is that you can wrap all kinds of things – found objects, semi-precious stones, and of course, beads. Below we break down the tools, work area, materials, and other important information to help you get started. Be sure to shop at Halstead to stock up on jewelry wire. This article will explore the tools and materials you need to begin. Checkout our separate article on How to Make Wire Wrapped Jewelry to learn basic techniques.
Wire Wrapping Tools
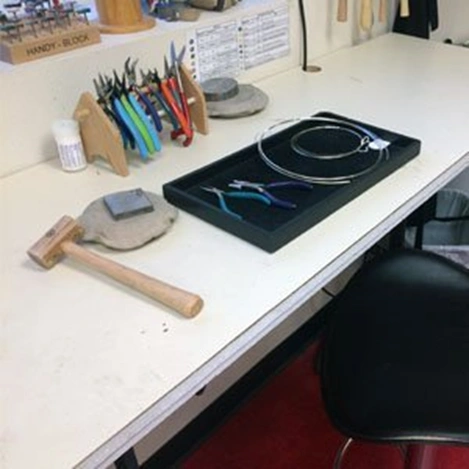
Don’t be overwhelmed! Setting up a work area for wire-wrapping is simple. All you really need is a work surface, like a kitchen table or desk, and a comfortable chair! You’ll also want some storage to keep your tools and materials organized. These could be file folders for different sizes of wire, bead boxes for jump rings and stones, and plastic storage bins.
The tools you need to get started are fairly simple and minimal. The more advanced you get, the more you can upgrade and purchase specialized pliers and tools for more intricate techniques. We’ll dive into the basics, though.
Basic Wire Wrapping Supplies
- Ruler
- Wire Cutters
- Permanent Marker
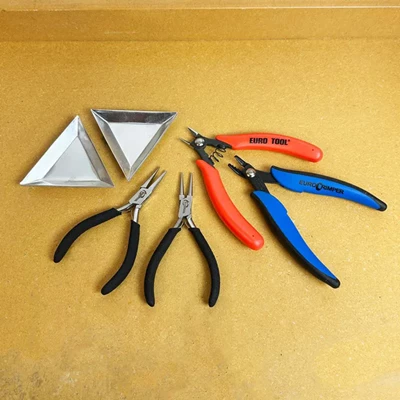
- Round-nose pliers
- Chain-nose pliers
- Small jewelry files
- Rawhide hammer or nylon hammer
The above tools are the ones you definitely want to have to start off. The following tools are helpful and recommended, but not necessary.
Suggested Supplies
- Ring mandrel
- Pin vice/ Vice
- Tiered Mandrel
- Steel bench block
- Magnifying visor
- Bent-nose pliers
- Measuring gauge
The pliers are used to shape and bend your wire, and tuck then ends back into the design, so they aren’t sticking out. You can choose to purchase all nylon-tipped pliers if you like. This means the plier tips are coat in nylon, so they won’t mar or dent your wire. This can be super helpful, but also limits how fine the ends of the pliers are. You’ll want fine/tiny plier tips if you’re working really small. The file is used to smooth out the ends of your wires after you snip them. Check out our blog post types of jewelry pliers to outline the different kinds you'll see and what they can be used for.
Any hammering you do will be done with the rawhide mallet on the steel block. Rawhide mallets won’t mar or stretch the metal, so they’re great for flattening out designs. You can also purchase a planishing hammer if there are areas of wire that you’d like to flatten out. The mandrels are for shaping and forming components of your wire-wrapped designs. And lastly, the vice is used if you want to twist any wires together – just clamp the two, or more, wires in the vice and twist! It’s also great for holding wire to braid.
You can start by purchasing Halstead's beading tool kit - a lot of the tools overlap! It comes with round and flat nose pliers, snips, and small trays to hold elements and keep them organized while working. All you need to do is round out your tools with a rawhide mallet and files!
Materials
Wire Wrapping Wire Options
There are a variety of wires you can choose from to get started, but you’ll mostly want to work in copper wire and sterling silver wire. Copper is very malleable, meaning it moves easily. That’s great for first starting out because it will be easier to move and wrap the wire into your design. It’s also fairly inexpensive! Next you can move onto sterling silver, which is a little bit stiffer, but still a great material to work with. Few people have allergies to sterling silver while many can be sensitive to copper. For golden colors, your most inexpensive option is brass wire. However, brass tarnishes easily and wire wrapping can be difficult to clean. Gold-filled wire is an excellent, high-quality material for a long-lasting shine. A premium option for high-end designs is solid 14 karat gold wire.
- 16-20 gauge – Great for creating frames
- 24-28 gauge – Perfect for wrapping, but you can go up to 22g before it becomes more difficult
- 28-30 gauge – weaving requires more movement and the thinner wires will be easier to use
It’s important to keep in mind that whenever you move or bend the wire, you are work hardening it. This means that you’ll likely want to purchase all your wire dead soft, so that it’s malleable enough to wrap when you are ready. Try not to wrap and unwrap the same section too often – the more you move the wire, the more you work harden it, and the more likely it is to break and crack.
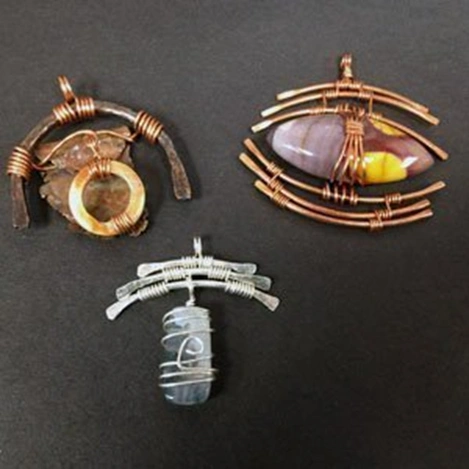
Beads, Stones, and Other Materials
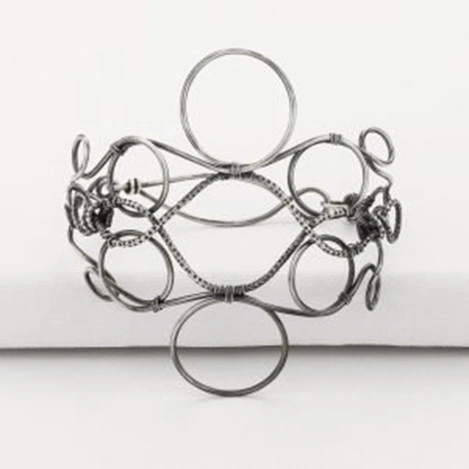
Objects to wrap are completely up to you! You can find semi-precious stones with or without holes, beads, crystals, cabochon stones, found objects, and more! The list goes on! This is where you get to let your creativity shine through. You also don’t have to wrap any object if you don’t want to!
Tips and Tricks
Wire wrapping takes a bit of time to get the hang of and get used to how to use the tools and get the results you want. Watch some videos or look at some books to get started. We like “Moods in Wire” by Ellsowrth Sinclair. Check out the video below to see of the projects we made here at Halstead when we were first starting out, and how to use the tools.
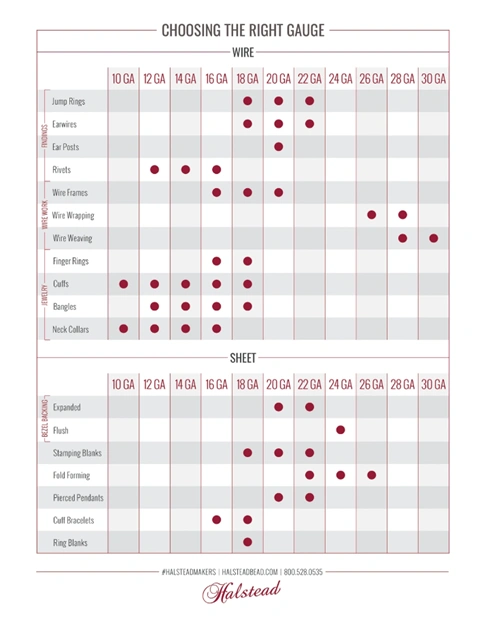
Below we’ve got some charts that help outline what gauge of material is best for what kind of work. This explains more than just wire wrapping, it includes the right gauge for earwires, ring shanks, and bangles if you choose not to purchase them premade.
Helpful Tips
- Work hardening – every time you bend or wrap your wire, it will work harden and get stiffer. Use lengths of wire 5-6 inches in length to prevent your wire from breaking due to stress. You can seamlessly piece wire segments together if you need to by starting right next to the you just finished and wrapping snuggly against it.
- Leave ends flush – some instructors will suggest that you tuck the ends of your wire under the coils. However, when you do this, I can leave your coils vulnerable to loosening. Instead, leave the end snug and flush against your coil; thinner gauged wires should stay in place just fine
- Nylon tip pliers – these won’t mar you wire while wrapping. They also help you to tug and snug your coils without scratching the piece. Remember that over time the nylon parts of the pliers will wear out and need to be replaced.
- Tighten your coils – constantly tighten and snug your wire wraps as you go. If you wait too long and try to tighten out the slack at the end, it will be very difficult to work your way back to the loose spot. Be sure to tighten everything up after every 2-3 wraps.
Shop Bulk Jewelry Wire:
Further Reading:
How to Make Wire Wrapped Jewelry

