


Find instructions and tips on how to make chain necklaces and bracelets! Large and small chain links are covered including different chain styles and finishing techniques.
How to Make Chain Necklaces & Bracelets
Silver chain comes in a wide range of sizes and link styles. Larger link chains over 2mm wide are easiest to cut and assemble into necklaces or bracelets with just a pair of pliers and a few jewelry findings. This is a fun beginner jewelry making project. You will need:
- One or two standard jewelry pliers
- Bulk silver chain measured and cut to length
- Jump rings as attachment loops at the ends
Be sure to select jump rings that will fit through the inner diameter openings of the chain links. At Halstead, we provide all the product measurements you need for chain and jump rings to ensure a good fit. Our chain by the inch product pages also include suggested jump rings that will fit through links.
Once you have your supplies together, use your pliers to twist open jump rings to attach to each end of he chain. The graphic below shows the best way to open and close jump ring loops to connect jewelry components.
Then, attach the clasp and twist the jump rings closed again. You may also want to register for free blog access and refer to our blog Guide to Necklace Lengths.

How to Solder Silver Jewelry Chains
Sometimes jewelry chains do not have wire links or the links are too small to fit a jump ring through the end. For dainty chains, you will need to solder the ends to make a finished chain necklace or bracelet. This remainder of this blog instructs on the following skills:
- How to solder jump rings or end caps to small jewelry chains
- How to use a heat sink when soldering delicate chain
- How to attach a tab end or end cap to jewelry chain
Soldering a Jump Ring to a Tiny Chain
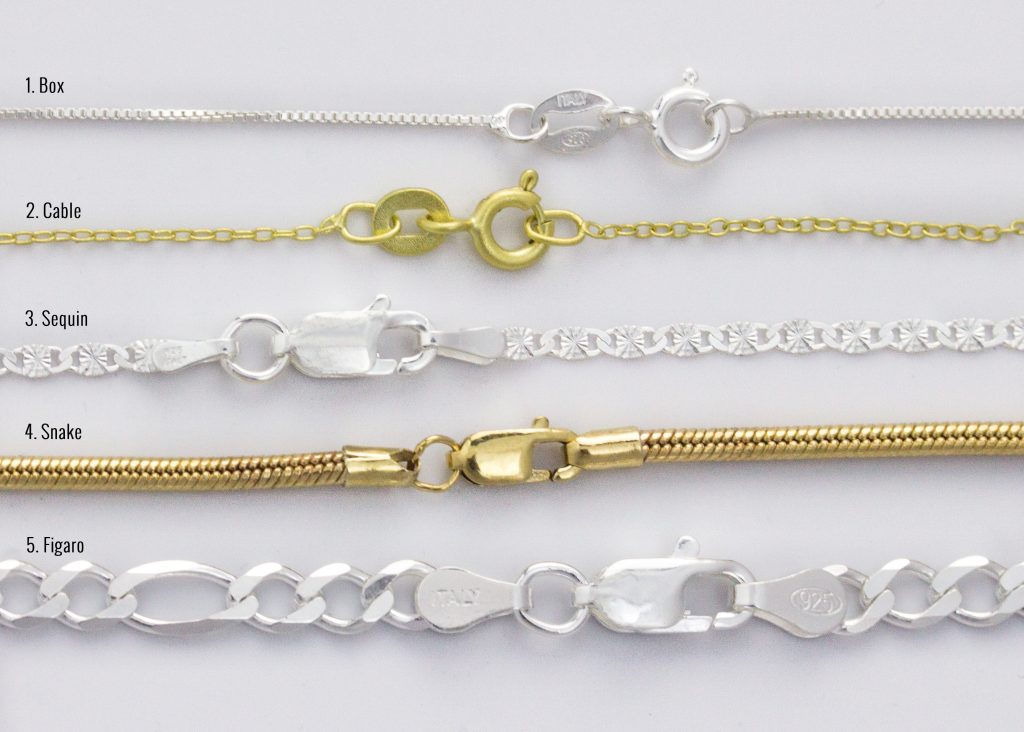
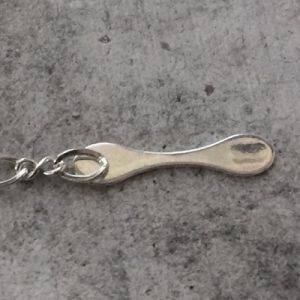
Small linked chain, such as the .7mm box chain (1) and the 1.2mm cable chain (2) shown here, are too small to allow a jump ring to thread through the links. Don't be discouraged though, adding a jump ring is very easy.
Make sure you select jump rings that will fit through the inner diameter of the chain links. Reputable jewelry chain suppliers will provide detailed measurement specifications on their website product listings so you can find compatible products. SHOP JUMP RINGS >>
Instructions: To finish chain, you'll need a small open or closed jump ring. Stretch the chain straight and place a jump ring right up against it, making sure that they are touching. If you are using an open jump ring, now would be a good time to attach a quality tag or lobster clasp to it.
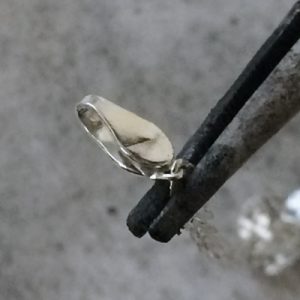
The image to the left shows an open jump ring. To close that jump ring, lightly clean the oils and dirt off of the pieces where the solder will flow using 800 grit sandpaper, then line up the jump ring opening to the chain end. This allows you to close the jump ring while soldering the two pieces together.
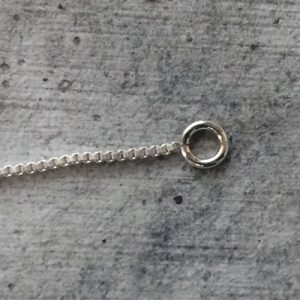
Flux and then take a silver solder chip and lay it directly underneath the opening in the jump ring and the very end of the box chain. By having the chip below the chain and the jump ring, then heating above that, you are drawing the solder up through the jump ring and link.
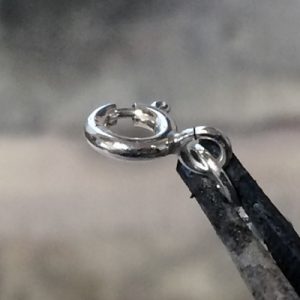
When first heating your piece, run the flame across all of it a few times to evenly heat it, then focus the flame on the area where you need the solder to flow (Note: never keep your flame still, it always needs to be moving). Once it's soldered, then pickle, quench and dry. After you are done, the piece will look like the one shown to the right, which shows a tiny cable chain soldered onto a jump ring.
Tip:
If you're comfortable with this technique, solder a jump ring onto each end at the same time. It will save you a lot of time!
Using a Heat Sink to Solder Jewelry Chains
A chain that's made of larger links will allow a jump ring to thread through, but a delicate chain will require protection from the torch flame.
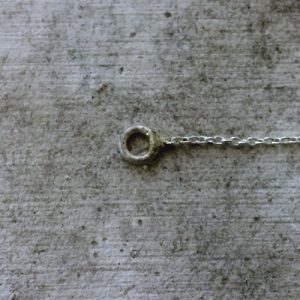
Instructions: To solder a jump ring closed and protect your links from melting, place the chain in a third hand. Whenever you heat a piece, no matter where you aim the flame, the entire piece will become hot in a matter of seconds. When you add a third hand to the mix, the steel will actually draw the majority of the heat away and protect the pieces that are not hit with the flame.
For instance, in the image above, I have placed the jump ring above the third hand and the chain below it. Since the flame will be focused on the jump ring to flow the solder, I have left enough of the jump ring exposed so it will maintain a high temperature, but the steel on the third hand will protect the chain in its grip and the chain below as well. Take advantage of a third hand whenever possible, it makes a lot of metalsmithing soldering techniques possible.
Tip:
Be sure to solder all of your jump rings closed when creating necklaces. Your work will look more finished and will be so much more durable!
Using Tabs or End Caps to Finish Chain Jewelry
You've seen the two ways to attach jump rings to chain ends, but what can you do about those fancy chain links where a jump ring just can't work? Use a chain end cap and solder it in place.
Instructions: A chain solder end tab will work great with different styles of chain. For instance, these end tabs were used to finish the sequin (3) and Figaro (5) necklaces shown above.
To start, clean the end tab and chain link with 800 grit sandpaper. Situate the chain link on the end tab so it lies half on/half off the tab as seen in the image on the right. Flux and place a piece of medium solder on the link. Heat the chain and the end tab using several passes with the torch, then focus on the end tab and the link. Once the solder flows, you can pickle, quench and dry it.
Tip 1:
You can flow solder up to three times before it is unusable so there's no need to add more.
The link is now attached to half of the tab. Sand the other end to prepare it for soldering. Fold the end tab over in the middle until it lays over the link (Note: do not flatten the middle of the tab where you bend it because you will need to pass a jump ring through it later when you attach a clasp). Place the piece in a third hand, soldered side up. Heat the entire tab from underneath allowing the solder to flow once more down onto the unsoldered tab. Pickle, quench and dry, then repeat with the other end of the chain.
Tip 2:
To keep the bend in a round shape as seen in the image to the left, place a mandrel inside the fold such as cylindrical jaw pliers, the handle on a small punch (or something similar) when you fold the tab.
Soldering jump rings closed near a clasp
Once you've attached a jump ring or fold-over end tab to your chain end, but how do you get that small spring ring clasp attachment loop soldered closed? Use a third hand to protect it, too!
Instructions: Many clasps have an attachment loop that will need to be soldered to securely attach it to the chain.
Thread the clasp's attachment loop through the jump ring that's attached to your chain. Then, place the jump ring in a third hand and expose the clasp above its grip. Keep the area you are soldering as far away from the jump ring and third hand as possible. Flux, then place a tiny piece of soft solder across the ring's seam. Heat the clasp, then focus just on the attachment loop. Since solder flows toward the heat source, aim the flame upward from the bottom so the solder flows downward through the seam.
Tip:
Use less solder! The more you use, the more clean-up you have.
Using End Caps to Make Chain Necklaces or Bracelets
With smooth chain like snake chain (5) or tiny diameter link chain, you have the option of using an end cap. SHOP END CAPS >>
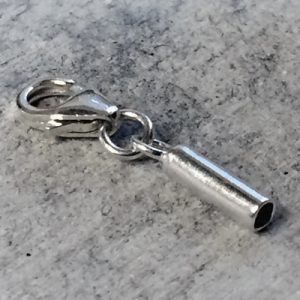
Instructions: First, find an end cap that fits your chain end. Place your tube end cap into a third hand, tube side sticking straight up with the clasp protected at the bottom underneath the jaws. Drop one piece of soft solder in the tube, making sure it's at the bottom of the tube, then flux.
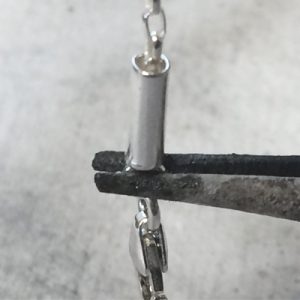
Place your chain in a second third hand with the chain extending downward inside the tube. Be sure the chain end reaches the bottom of the tube. Heat the tube with your flame until the solder flows. Pickle, quench and dry. Repeat with the other chain end, minus the clasp.
Tip:
Some end caps come with lobster claws or spring rings already attached, but you can always add one if they don't.
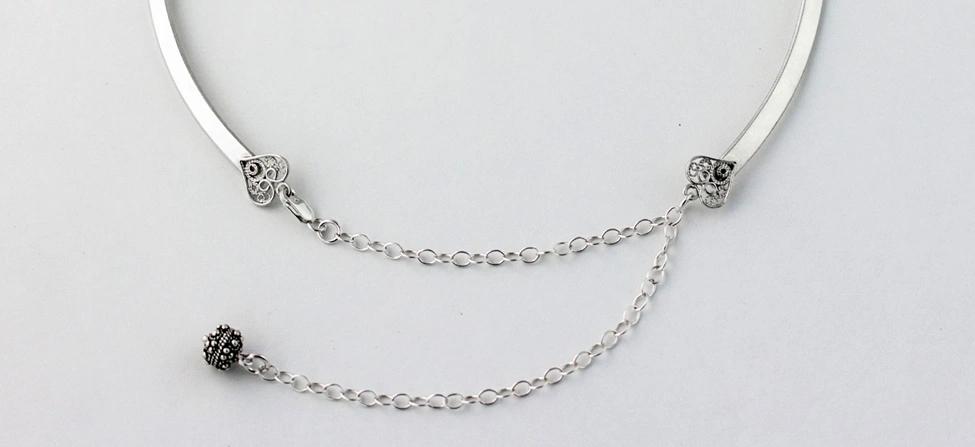
Making Neck Collars
Neck collars are wire or sheet that is formed in a circle and fits close to the neck. You can buy these as pre-made blanks that you embellish or make them yourself with heavy gauge jewelry wire. There’s a few ways you can finish off the ends of a neck collar to make them functional and beautiful.
- Ball up the ends of a wire collar with a torch. Keep the wire straight up and down and heat from underneath so the metal balls up on itself. This rounds out the ends and makes them smooth and comfortable to wear.

- Add a clasp to your collar for extra security. You can drill a hole in the ends of your collar if you don’t have access to a torch, or can solder small jump rings to the ends. From there, connect whatever clasp you like best! Hook and eye, lobster, or a magnetic clasp with chain extenders.
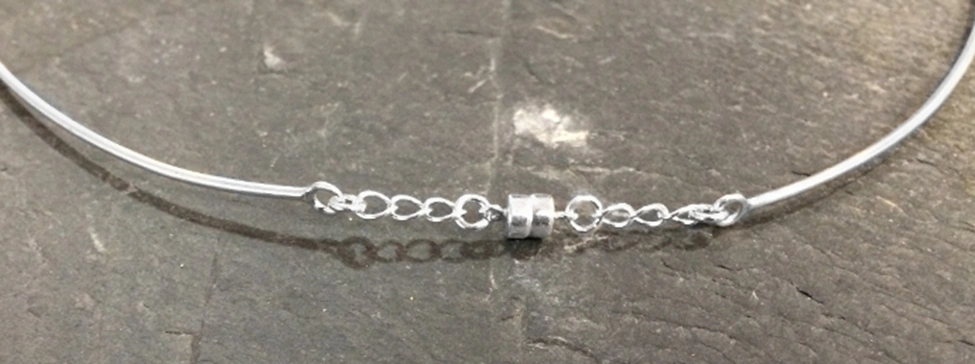
- Add personality and your design voice by adding solder ornaments or decorative elements at the ends. You can then finish using the method above.
Visit Halstead Online
Shop hundreds of styles of bulk silver chains sold by the inch at Halstead!
Halstead is proud to offer a huge selection of jewelry chain, exceptional customer service from real humans, and education resources. But don't take it from us, check out Halstead Google Reviews!
Further Reading
How to Make Gold-filled Chain Jewelry
Types of Jewelry Chain Link Styles
Permanent Jewelry Welding Best Practices
Check out these chain buying tips from Metalsmith Society

