


Solder not flowing? Find out the reasons why. Jewelry soldering can be frustrating at times, but with the right knowledge, you can quickly troubleshoot the problems.
Have you ever had your solder just ball up and refuse to flow or not even ball up at all? Possibly your metal turned bright red, but that little piece of jewelry solder stayed the same. No matter how hard you tried, it simply refused to flow. Trust me it has happened to all of us. Don't give up or become frustrated. Through troubleshooting, you gain knowledge and knowledge helps you and everyone you choose to share it with. Here's what I've learned from my own soldering pitfalls. READ OUR TIPS TO START SOLDERING >>
1. Forgot to Flux
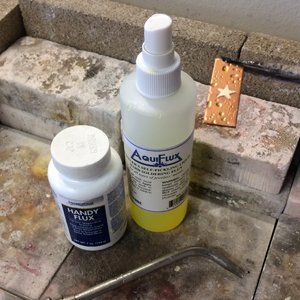
When I first started soldering, I had a habit of forgetting to use flux. Between the heat, copper oxides and the air, copper sheet would become nearly black and the solder bit just wouldn't flow. If you forget your flux, drop your whole piece in the pickle to clean off the firescale, add the flux, try it again and this time it should flow just fine. Remember: flux is your friend. It reduces firescale and helps the solder flow.
2. Oil, Grime, and Dirt

Don't forget to clean your pieces before soldering. A light sanding with an 800 grit sandpaper will remove oil left behind from your fingerprints plus grease and dirt, as well. Just remember, don't touch where you've just sanded it or you will need to do it over again. Copper and brass sheet are notorious for rapid surface oxidation. Get in the habit of a quick surface cleaning before soldering your metals. It is surprising what one little fingerprint can do!
3. Wrong Torch Tip or Flame Size

Be sure your torch tip is large enough for the job. A tiny torch tip is for small findings like jump rings while a larger torch tip is for larger pieces like pendants. Just remember: you want a flame that will get in there and get the job done quickly. Your solder should flow long before your metal melts, so hit it hard and fast with the heat. Now that you have the right torch tip, you'll have the flame that you need. Some jewelry torches don't have separate tips, but do have the ability to adjust the flame size. Make sure you adjust the flame accordingly!
4. Contaminated Solder
This one is a bit controversial. I've heard that solder itself can become dirty which prevents it from flowing. If this is the case, it needs to be cleaned in pickle. We've dropped bits and pieces in our studio and without cleaning have used them just fine afterward, but if all else fails, give a pickle bath a chance.
5. Heat Sink Culprits
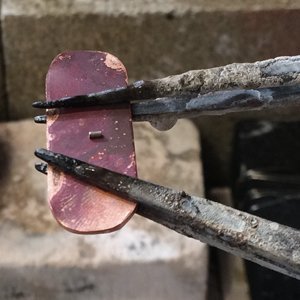
Heat is the number one reason that solder flows. Without it, you'll unsuccessfully try to solder a piece for a very long time. Heat is a tricky thing to figure out, especially if you're just starting out. If you know the torch tip and flame size are accurate, you remembered to flux, and have removed the oil and dirt, it's time to look at your soldering set-up. There is a good chance that you have something else drawing your heat away from where you need it.
Anything like a steel tripod mesh or a third hand can draw heat away from your jewelry piece, which is called a "heat sink". As you heat your piece up, that steel item is pulling that heat away just as quickly. So basically, you'll never get it hot enough for the solder to flow.
If you have it on a tripod, remove the tripod and lay it on a soldering board. If you're using a third hand, try to place just the corner of your piece in it. Just enough to hold it, but not to pull a lot of heat from it. If it's still not working, consider a charcoal block which reflects heat, making it easier to solder.
Note: Keep in mind that using a heat sink in certain soldering situations is crucial, however for this particular scenario, it's not. Yet, when you're soldering an earring post onto a finding, using a heat sink method is actually preferred.
Speaking of Heat Sinks and Earring Posts...
This quick 30-second video will show you a heat sink set-up and how to solder an earring post onto a heart blank.
More Jewelry Soldering Troubleshooting Tips:
The metal allows the solder to flow, not the flame. Make sure your metal reaches the soldering temperature because that's what counts. You can heat the solder with the direct flame, leave the metal cool, and watch the solder ball up. Without the metal reaching the flow temperature, that ball of solder will just sit there and look pretty. So make certain the flame is heating the metal and not the solder.
Solder flows towards the hottest point. If you're soldering an L-shaped piece, for instance, and you don't reach the solder flow temperatures on both pieces of metal, the solder will flow onto the hottest one. Make sure both pieces of metal are equally heated or you'll have a puddle of solder on only one side.
Make those final seconds count! After your solder flows, you have a few seconds to adjust your flame and have the solder move in the direction you want it to go. For instance, if you're soldering a bangle closed and the solder flowed onto only one side of the join, quickly angle your flame to where you want the solder to go and it will travel in that direction, as long as you adjust it immediately.
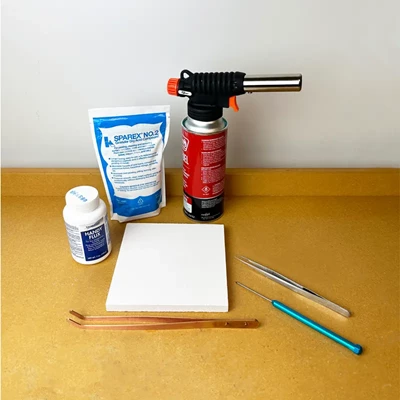
Having the proper set up. Having the proper tools is really important to make soldering an enjoyable and easy process! Our jewelry soldering kit comes with the basics you need to get started.
Additional Articles:
Learn About Jewelry Torches and Pickle
Halstead is one of North America's leading distributors of jewelry supplies. The firm is celebrating its 46th anniversary this year. Halstead specializes in wholesale findings, chain, and metals for jewelry artists.
Got questions? Email us at [email protected]. We'd love to hear from you. Sorry, studio support is not available by phone. Emails only, please.

