


Soldering sterling silver is one of the fundamental skills that every jeweler should have. However, starting up at home can be a little intimidating so we've put together this guide so you can feel confident. It includes the tools and supplies you need, as well as important info about different types of solder.
These days a lot of budding metalsmiths are firing up torches for the first time in order to tackle more advanced jewelry making techniques, like silver soldering! It’s one of the fundamental skills that every jeweler should have. However, starting up at home can be a little intimidating so we've put together this guide and list of jewelry soldering tools & supplies to get you going. You'll find sterling silver sheet metal and silver solder on the Halstead jewelry supplies website.
Jump ahead for quick answers to common questions:
What is Silver Solder Made of?
What is the Melting Point of Silver Solder?
What are the Types of Silver Solder?
What is silver soldering?
Soldering joins two or more metal surfaces by using a compatible alloy that flows at a lower melting point and creates a permanent bond. It's important that the solder flows at a lower temperature so your metal surfaces will remain solid and hold their form. As you heat the material, the atoms that form the metal start to separate. This separation allows the solder, when it flows, to enter those spaces and bond to the original material. The solder has now created a tight fit with the material and the pieces are bonded.
Getting to Know Your Material
Know the ins-and-outs of the material you're working with. It's important when applying solder, that the melting point of the solder is lower than the metal you are working with. If you were applying solder to a metal in your piece that melted quickly, your piece would become ruined before the solder had a chance to flow. For instance, pewter melts at about 500 degrees F, but easy silver solder doesn't melt until it reaches 1240 degrees F. So if you wanted to solder two pieces of pewter together and used easy silver solder, the pewter would be a melted mess but the silver solder wouldn't be even close to flowing yet.
Note: It's always important to check the melt and flow points between your material and the solder; it could vary between vendors and solders. The words Easy, Medium and Hard are not standardized to fixed temperatures.
What is Silver Solder Made of?
Silver solder has other metals, besides silver, alloyed into it. The alloy is primarily silver but the additional metals provide sought-after characteristics for the purpose of bonding. Copper (Cu) is soft and a great heat conductor plus it's resistant to corrosion. Zinc (Zn) and tin (Sn) have really low melting points, which lowers the overall melting point of the solder. All the silver solders sold at Halstead are lead and cadmium-free. You can find out more of the specifics by reading the SDS sheets on item detail pages on our website, however, the majority of silver solders have a combination of silver, copper, and zinc and the percentage of each metal varies depending on the solder flow point. The solder metal alloys and general percentages are listed in the chart below.
|
Solder Type |
Silver |
Copper |
Zinc |
Tin |
|
Extra Easy (lowest melting temp) |
56% |
22% |
17% |
5% |
|
Easy |
65% |
20% |
15% |
- |
|
Medium |
70% |
20% |
10% |
- |
|
Hard (highest Melting temp) |
75% |
22% |
3% |
- |
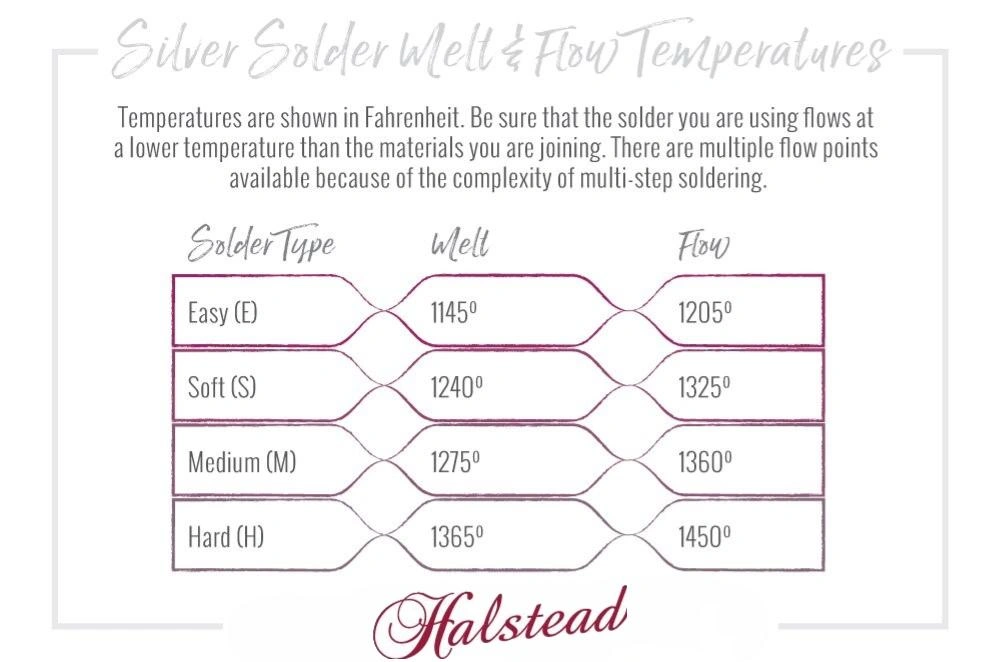
What is the Melting Point of Silver Solder?
In the chart below, you will find the melt and flow points. As I stated earlier in understanding your materials, you must always be sure that the solder you are using flows at a lower temperature than the materials you are joining. When working with silver, the melting point for .999 fine silver is 1761 degrees F and with sterling silver, it is 1640 degrees F. With solder, there are multiple flow points available because of the complexity of multi-step soldering.
Types of Silver Solder
Solder comes in 5 basic types: pallion chips, paste, wire, sheet, and powder. I've tried four of these, unfortunately, the opportunity to try the powder form hasn't come up yet because it is fairly uncommon in jewelry applications. But here's information about each option and their best applications.
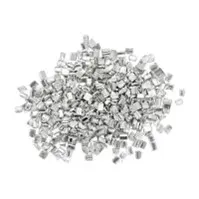
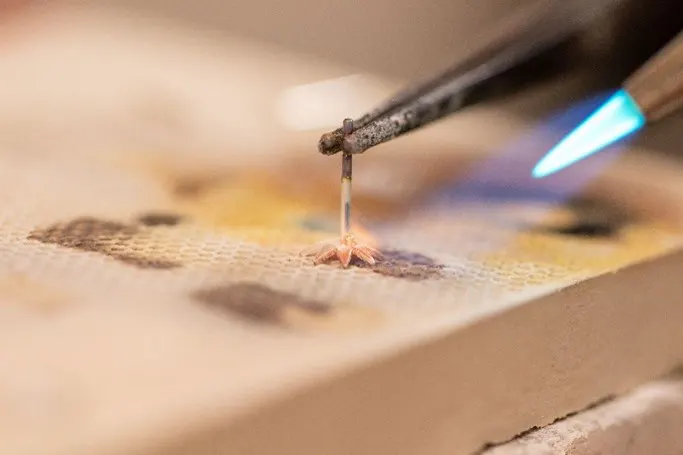
- Pallion chips: Pallion chips are tiny clipped pieces of solder alloy that can be easily moved with a solder pick. Exact size varies but these are often just 1x1 millimeters or even smaller! I was disappointed when I first tried pallion chips because I used them on a piece that needed more solder than the chips provided. My first reaction was wrong; now, I wouldn't use anything else on chain links, jump rings or small soldering ornaments. I quickly learned with experience that the trick is to add more chips along a join if you need more solder. The small size of chips means you can easily scale the amount of solder you need in very small increments. When working on smaller joins, Pallion chips are a must! SHOP SILVER SOLDER CHIPS >>
- Wire: My go-to solder form. I love using wire solder the most. It can stay in wire form or be clipped and flattened with a hammer, or it can be short or long depending on the work you're doing. It has more versatility than the others so this form is my favorite. A short segment of wire solder goes a long way. It's also easy to pigtail wire solder with different loops to signify the flow temperature points. That way you never have to worry about mixing up your solders! SHOP SILVER WIRE SOLDER >>
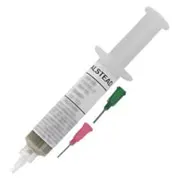
- Paste: This comes in a syringe and is a mixture of flux, binder, and powdered solder. The shelf life on paste is about one year. My experience with paste is that it bubbles, pops and is porous after it flows, plus I'm not crazy about the limited shelf life. The part that I can see as an appeal to others would be that the flux is mixed in so that's one less step. It is also clean and portable if you are creating work outside of your studio on a regular basis. Also, if you use it for closing jump rings and links it can really speed up production work. What about using it with a filigree piece? I personally have never done a filigree piece but a peer in the Orchid Community swears by it. SHOP SILVER SOLDER PASTE >>
"While paste solder may not be the best type of solder to use when sizing rings or fabricating from sheet, it is excellent for hand fabricating filigree jewelry. My primary focus is filigree and I use a lot of paste solder. I also use it to attach findings ie. ear posts, jump rings, etc to my filigree pieces. The joints are strong and do not fail".~ Milt Fischbein
- Sheet: Sheet solder is ideal for large-scale projects where you need a large area joined, such as sculptural pieces or vessels. It's versatile just like wire solder and is easy to use, especially when sweat soldering two flat pieces together. It's easy to use too much when you are trimming from sheet solder, so remember that less is usually better so you don't have too much clean up work.
- Powdered: Powdered solder is created by filing solder ingots. You can use it either with a liquid flux or borax and I've heard that it works well for intricate joins.
How to Solder Silver
Now that we’ve got the details about silver solder out of the way, it’s time to learn how to do it! Continue reading for all the materials and supplies you’ll need, as well as a step-by-step and video about silver soldering. SHOP SOLDERING SUPPLIES >>>
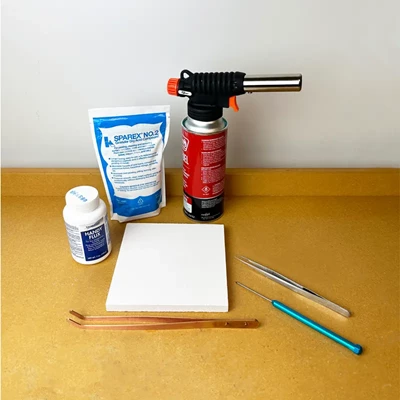
Materials
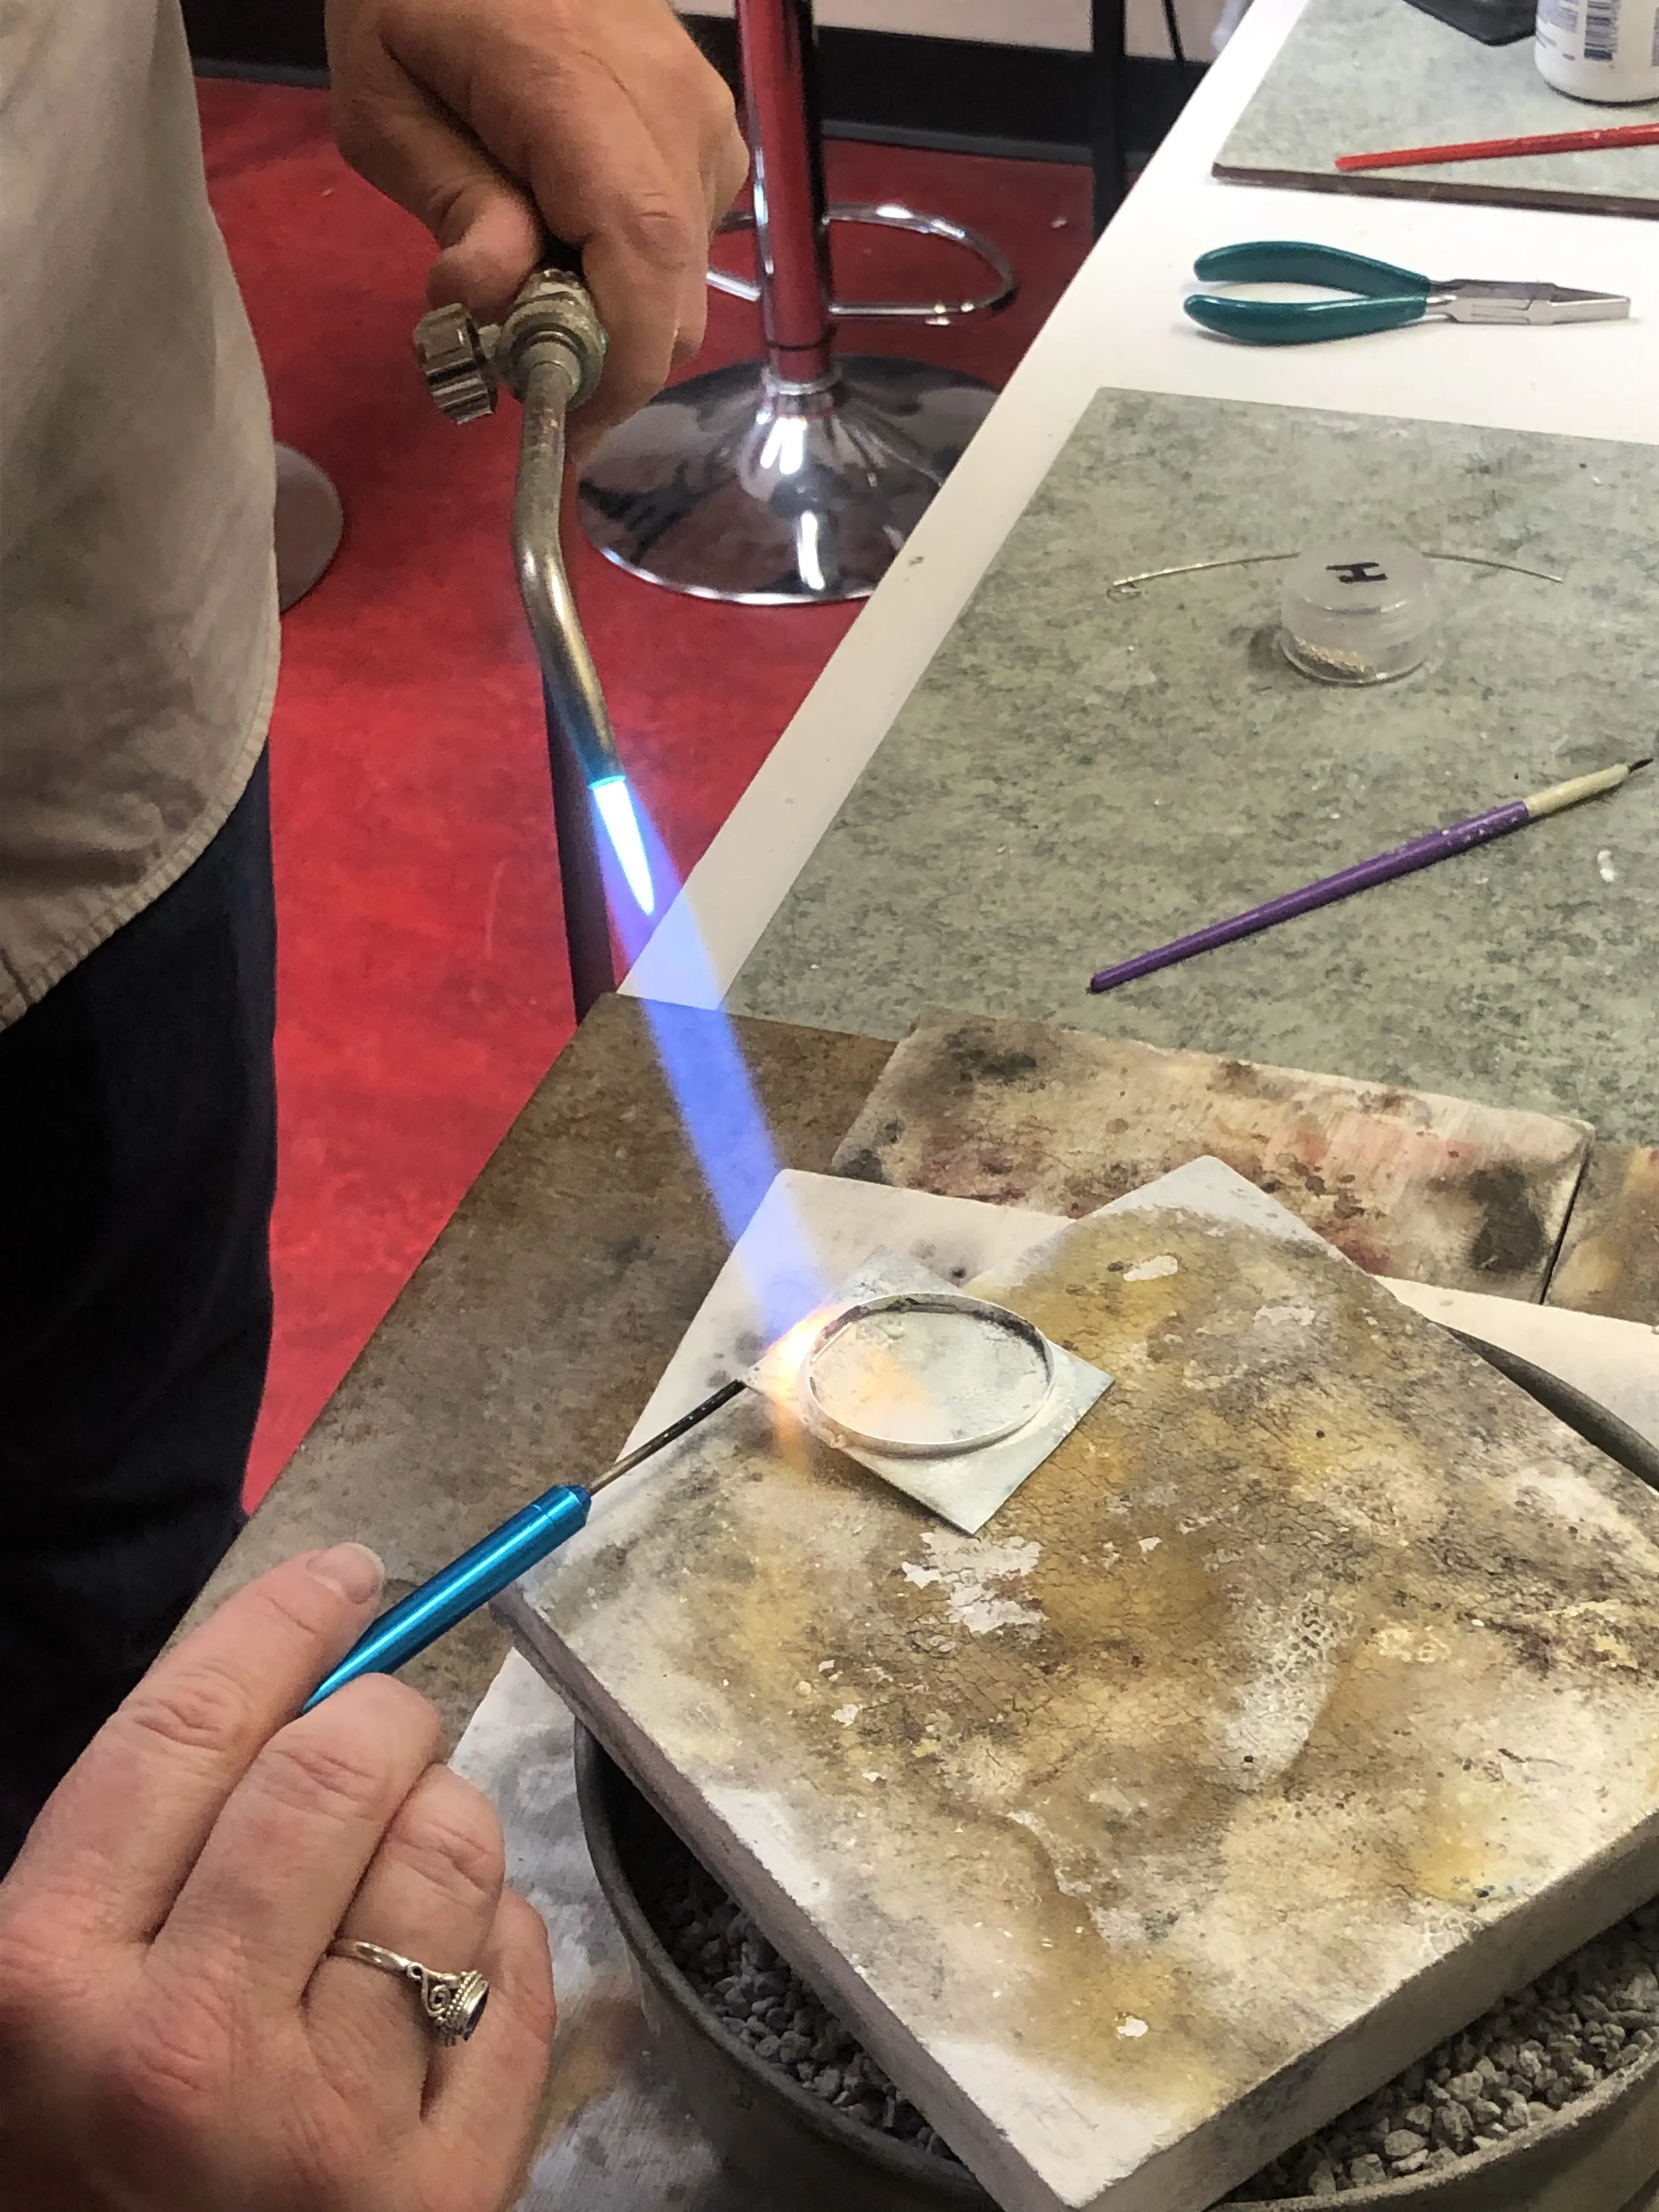
- Soldering surface - This is a small work area that will take the direct heat from your torch flame. Everyone has their own preference but common options include a mesh screen and tripod, magnesia block, a charcoal block, a honeycombed piece of ceramic or solderite board. You will only need one of these when you start out, but down the road, you will gather more of these soldering supplies as you learn new techniques.
- Soldering pick - You will need one of these to adjust your solder or jewelry piece while it is hot. Always keep a soldering pick in your dominant hand while soldering so you don't accidentally touch hot metal with your fingers in case something shifts.
- Tweezers - With a pair of tweezers you can grab a hot item and lay it off to the side to air cool plus you can also use it to place your solder as well.
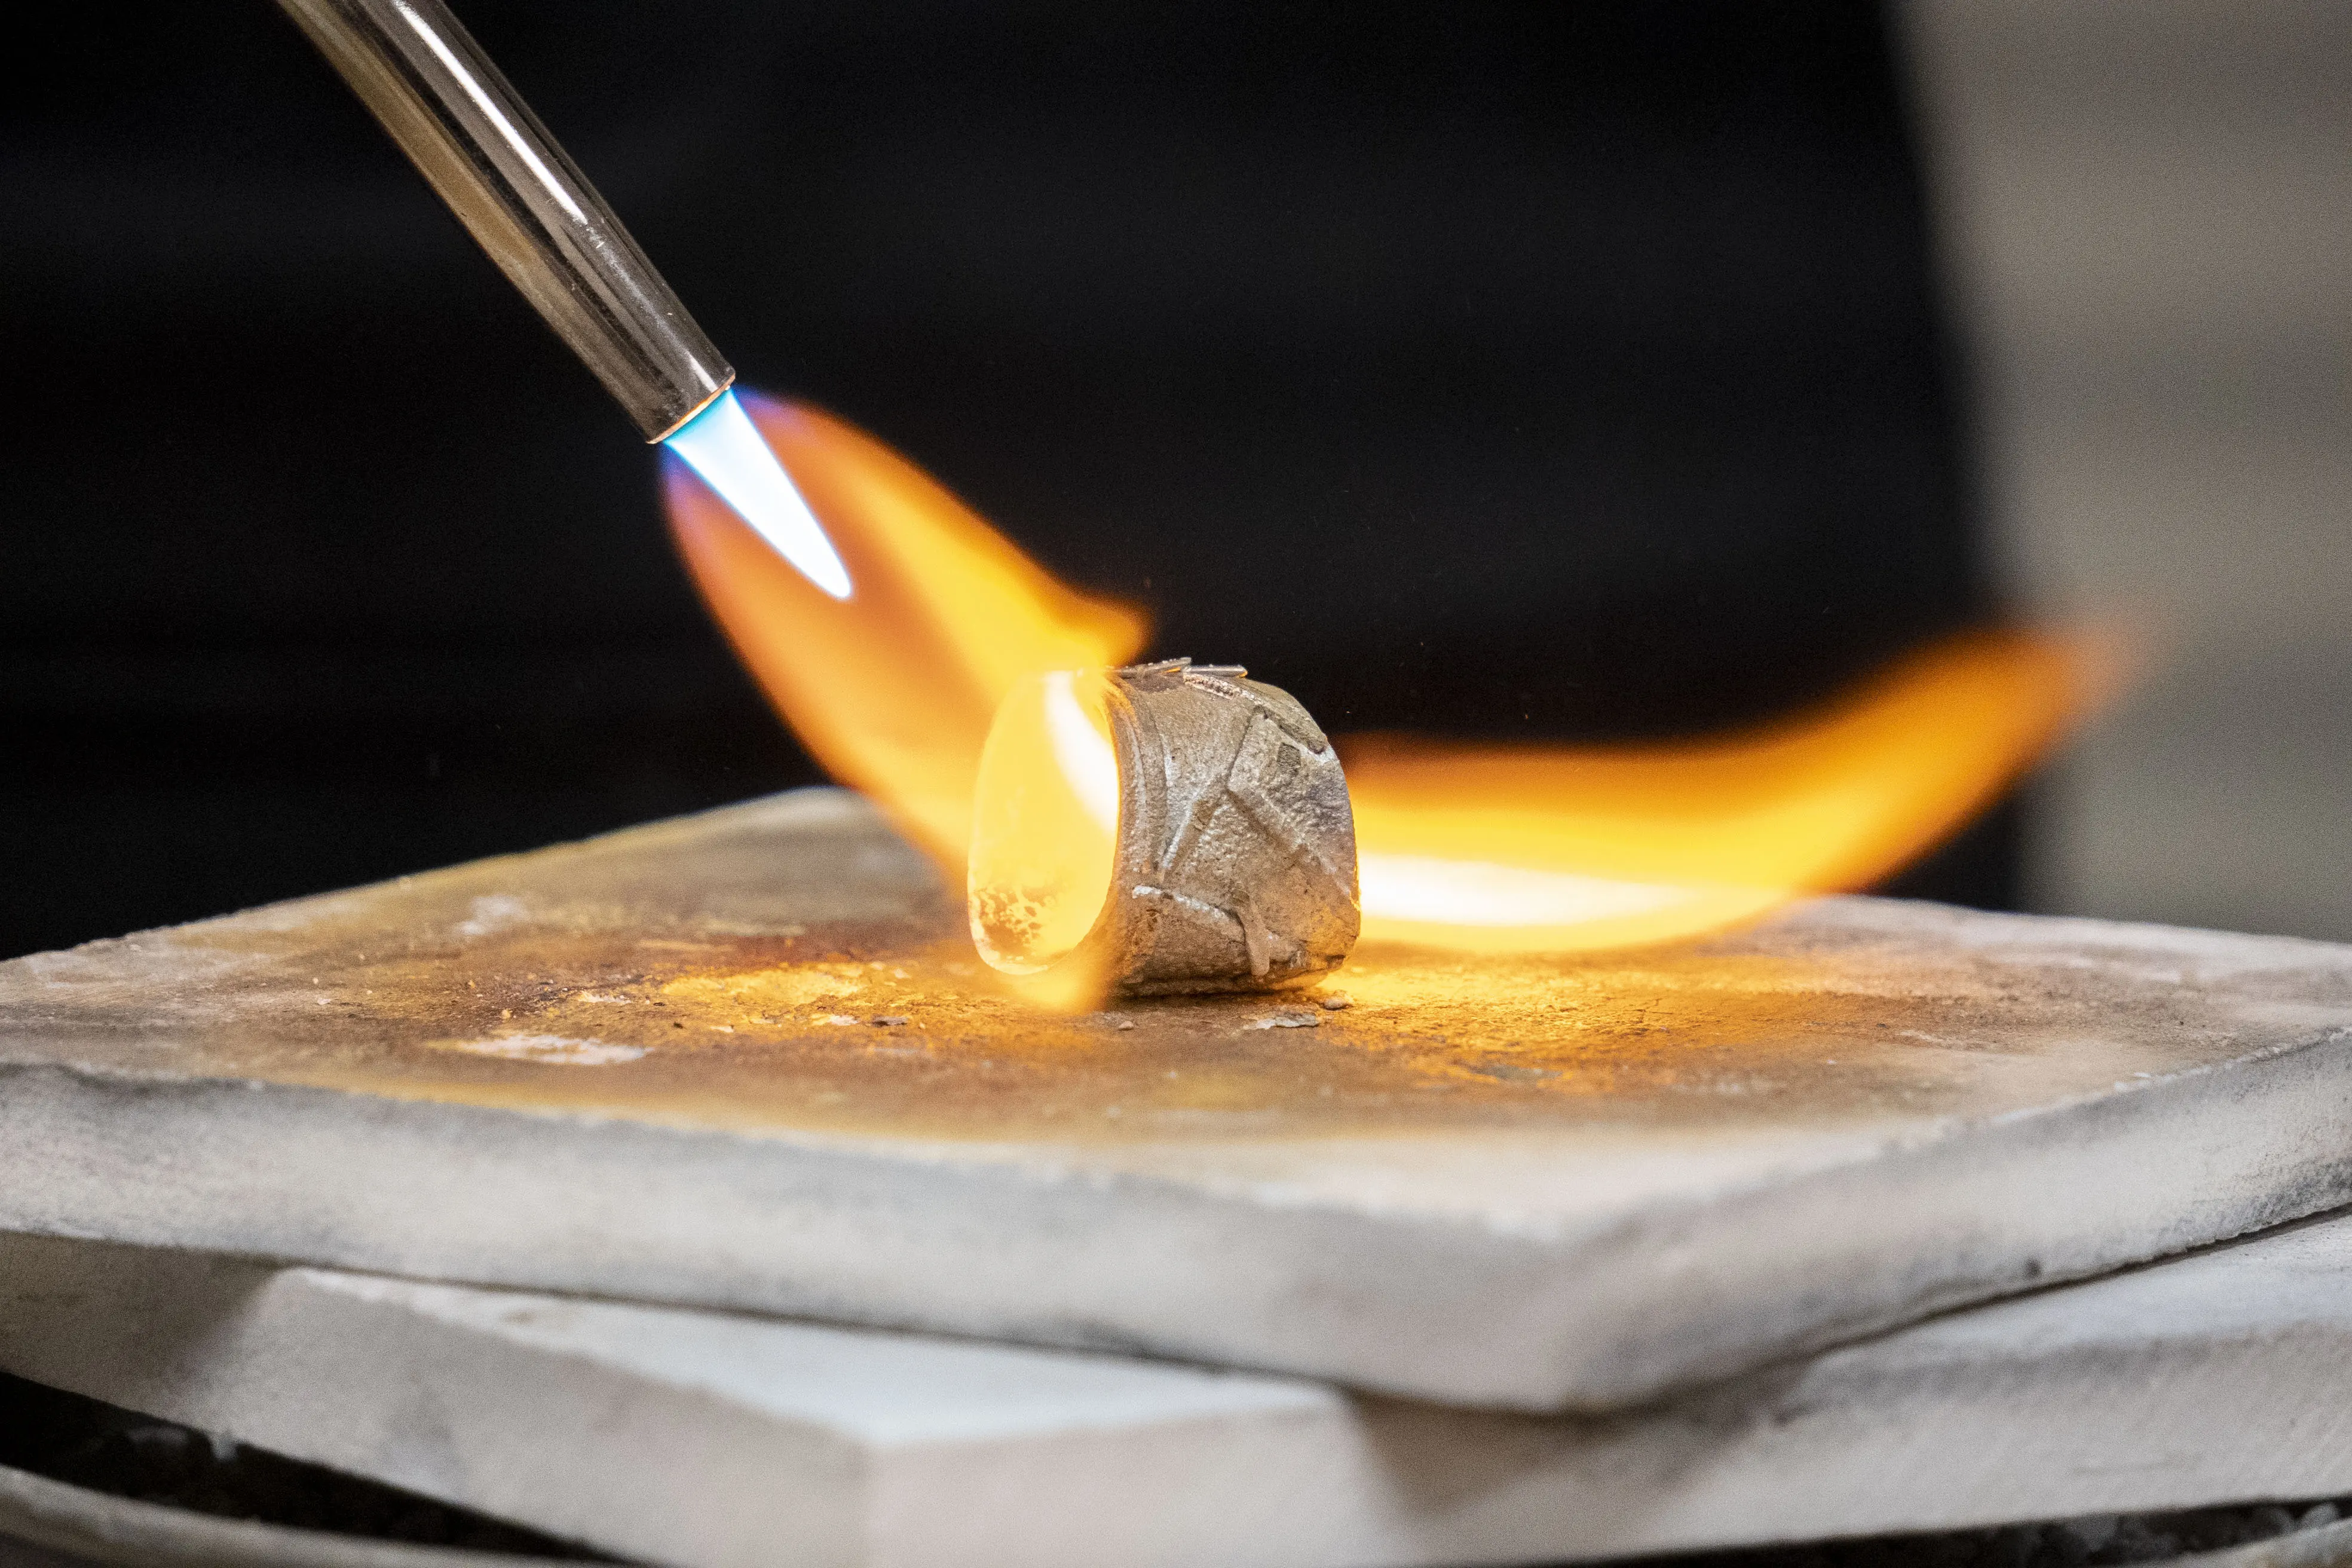
- Jewelry Torch and butane - Handheld Micro-flame or Max Flame torches are great starter torches for soldering silver. You will also need a butane canister from the hardware store. Practice lighting your torch, it can be tricky. Your altitude will affect where the gas valve setting should be when you ignite. Always point the torch away from you and hold it in your non-dominant hand while soldering.
- Solder - Silver solder comes in chips, sheet, wire or syringe paste forms. Everyone has their own preference and different forms can be better suited for specific soldering applications. Personally, I like the wire for ease of use. The temper of the solder refers to the melting point of the solder. There is soft, medium or hard solder. For simple starter projects, you will just need soft solder. As your skills advance you should have all three temper solders on hand so you can do more complicated soldering with multiple solder joints.
- Flux - Flux is an oxygen reducing agent that will facilitate soldering and reduce firescale. You will need to choose between a liquid or paste flux. Paste flux can be applied with a small paintbrush but it tends to dry out so you'll need to periodically add water to soften it up. A liquid spray flux will cover your entire piece with flux, however, the nozzle tends to clog up so you'll need to occasionally unclog the tip.
- Pickle- Pickle dissolved in warm water is used to remove firescale from your silver after you have soldered it. Firescale is a surface effect on the metal that stains the silver red, orange or black. You can use Sparex or another brand as your pickling solution.
- Crockpot - A small crockpot with a little bit of tap water combined with a scoop of pickle will warm up in five minutes and be ready to go. You can keep your pickle solution for weeks or longer before you need to swap it out for efficacy.
- Warning: Once the crockpot has pickle in it, you can no longer use it for food items.
- Copper tongs - Do not put your tweezers in pickle! Steel will ruin your pickle solution so get in the habit of using copper tongs whenever you put items in your pickle pot or remove them.
- Quench cup - A small ceramic cup or bowl with tap water.
- Clean Rag - Use a clean rag to dry your piece after quenching it in the warm water.
You can find flux, tongs, tweezers, pickle, a solderite board, solder pick, and torch head all in one place in our jewelry soldering kit! It makes starting to solder easy and simple. The butane canister can be picked up wherever camping supplies are sold!
Steps to Soldering Silver
- Clean and fit your two pieces together; you want a tight fit with no gaps
- Set up pieces
- Flux
- Heat the entire piece until the flux goes clear and glassy – this means you’re getting close to the melting temperature of the solder
- Focus in on where you want the solder to flow
- Heat until it flows!
- Quench and pickle
- Rinse
*You can pre-place your solder before heating the piece or add it with your solder pick once the flux has gone clear and glassy. That’s a bit more advanced though!
Always be sure to take the proper safety precautions while soldering. Tie back hair and loose clothing, wear closed toed shoes, wear safety glasses, and have proper ventilation. Soldering involves a flame, so be sure that your workspace is clear of paper, rags, or anything else that could catch on fire. Watch the video below to see soldering in action!
Now that you’re armed with the right information – it’s time to get soldering! It can be tricky at first, but the more you practice, the easier it’ll get! You’ll learn how much solder to use, what type you prefer, and the best set ups for you. Be sure to check out our YouTube channel to see soldering in action. Watching tutorials first can really help! Happy soldering!
Check Out Our Google Reviews and Start Sourcing with Halstead!
Halstead is proud to offer quality jewelry making supplies, exceptional customer service, and resources. But don't take it from us, hear what customers are saying about Halstead!
Federal Trade Commission Rules
Legally, in the United States, in order to call a piece sterling silver, the alloy has to meet the specifications below:
- Sterling Silver = .925 (92.5% silver)
Time and time again, I see inquiries about sterling silver soldered items. Jewelers new to the field worry about the purity of the silver after soldering. The FTC established rules regarding minor variances between batches of manufactured materials. Here are the tolerances for sterling silver based on the National Stamping Act:
Sterling Silver
- .921 = Unsoldered Items
- .915 = Soldered items
As you can see in the solder alloy chart above, silver solder has quite a bit of silver in it. It is unlikely to lower the silver content of an entire jewelry piece enough to fall below the legal requirements because of the alloyed metals in a small solder join. The only time I would worry about it is if I did a fine silver filigree piece with many joins or an intensely granulated design with solder over an entire surface. Here is what Milt Fischbein said about filigree work and soldering:
"My filigree wire is always fine silver and my filigree frames are always sterling silver. Paste solder that I use is about 65% silver. I use as little paste as possible, so it doesn't depress the silver content much. A typical pendant might be about half sterling and half fine silver, although this varies quite a bit depending on the design. Taking it a bit further, if a final piece contained as much as 5% solder, and 45% fine and 50% sterling, it would assay at 94.5% silver. So I always mark my filigree 925. as it should always assay higher and is very unlikely to assay lower." - Milt Fischbein
If you are concerned about a piece, you can always send it off to a lab for testing, that way you can be certain of the results. However, lab tests are destructive so you would need to sacrifice a sample. This is only practical if you are designing a production piece that you intend to produce in quantities.
About Milt Fischbein
Milt Fischbein has been creating jewelry for about 25 years now. He has a Bachelor's degree in Chemical Engineering from McGill University, but 6 years ago he began to focus on fabricating filigree jewelry. You can read his full bio and CV on his website: mfmetalarts, where you can also find his filigree jewelry, tiaras, and crowns. He has taken dozens of courses with teachers such as Alan Revere, Michael David Sturlin, Gerry Lewy and Charles Lewton Brain.
More on Soldering:
Jewelry Soldering Techniques in the Studio

