


Not all stones are perfectly calibrated. This blog covers alternative stone setting methods for crystals, geodes, and slabs. Use these techniques to make crystal jewelry.
Not all of your jewelry making stones are going to perfectly calibrated – that’s part of the fun! They come in so many different shapes, sizes, and thicknesses, that sometimes our tired and true methods of setting won’t work best. Crystal points are particularly challenging for jewelry making enthusiasts. These oddly-shaped natural wonders are a challenge in the studio. Learn how to conquer this technique with confidence.
Raw Crystal Points
You might think setting raw crystal drops and points might be tricky, but it actually isn’t! We have a few ways for you to set raw crystals that make it easy to create crystal jewelry. Crystals are also a great way to add meaning into your jewelry – many symbolize different things like protection, calmness, and more. Some also believe in the healing power of crystal points. New Age jewelry artists have a wealth of information on the properties of different stones.
Many crystal vendors sort points into batches with fairly uniform diameters at the crown. This is the easiest way to buy crystals for jewelry making and it will save you a lot of time in the studio.
Wire Wrapping
Wire wrapping is one of the easiest ways to start setting crystal points! Wire wrapping is perfect for something with an irregular shape because it's totally up to you the design. It also requires few tools - just a few different pairs of pliers and a pair of cutters is usually all you need! Twists are great details to add because they add to the visual interest, but can be tightened up after to ensure your crystal is locked in.

You can also add beaded details to your wire wrapped crystals like the piece below. I carved a groove into the crystal for the wire to sit so that it wouldn't slide out. Some crystals are too hard to drill through yourself, even with a diamond drill bit/water. We recommend purchasing crystal pre-drilled if you want to string them like beads - it will save you a lot of time and energy! You can even substitute silver beads for gemstone beads for added color and meaning.
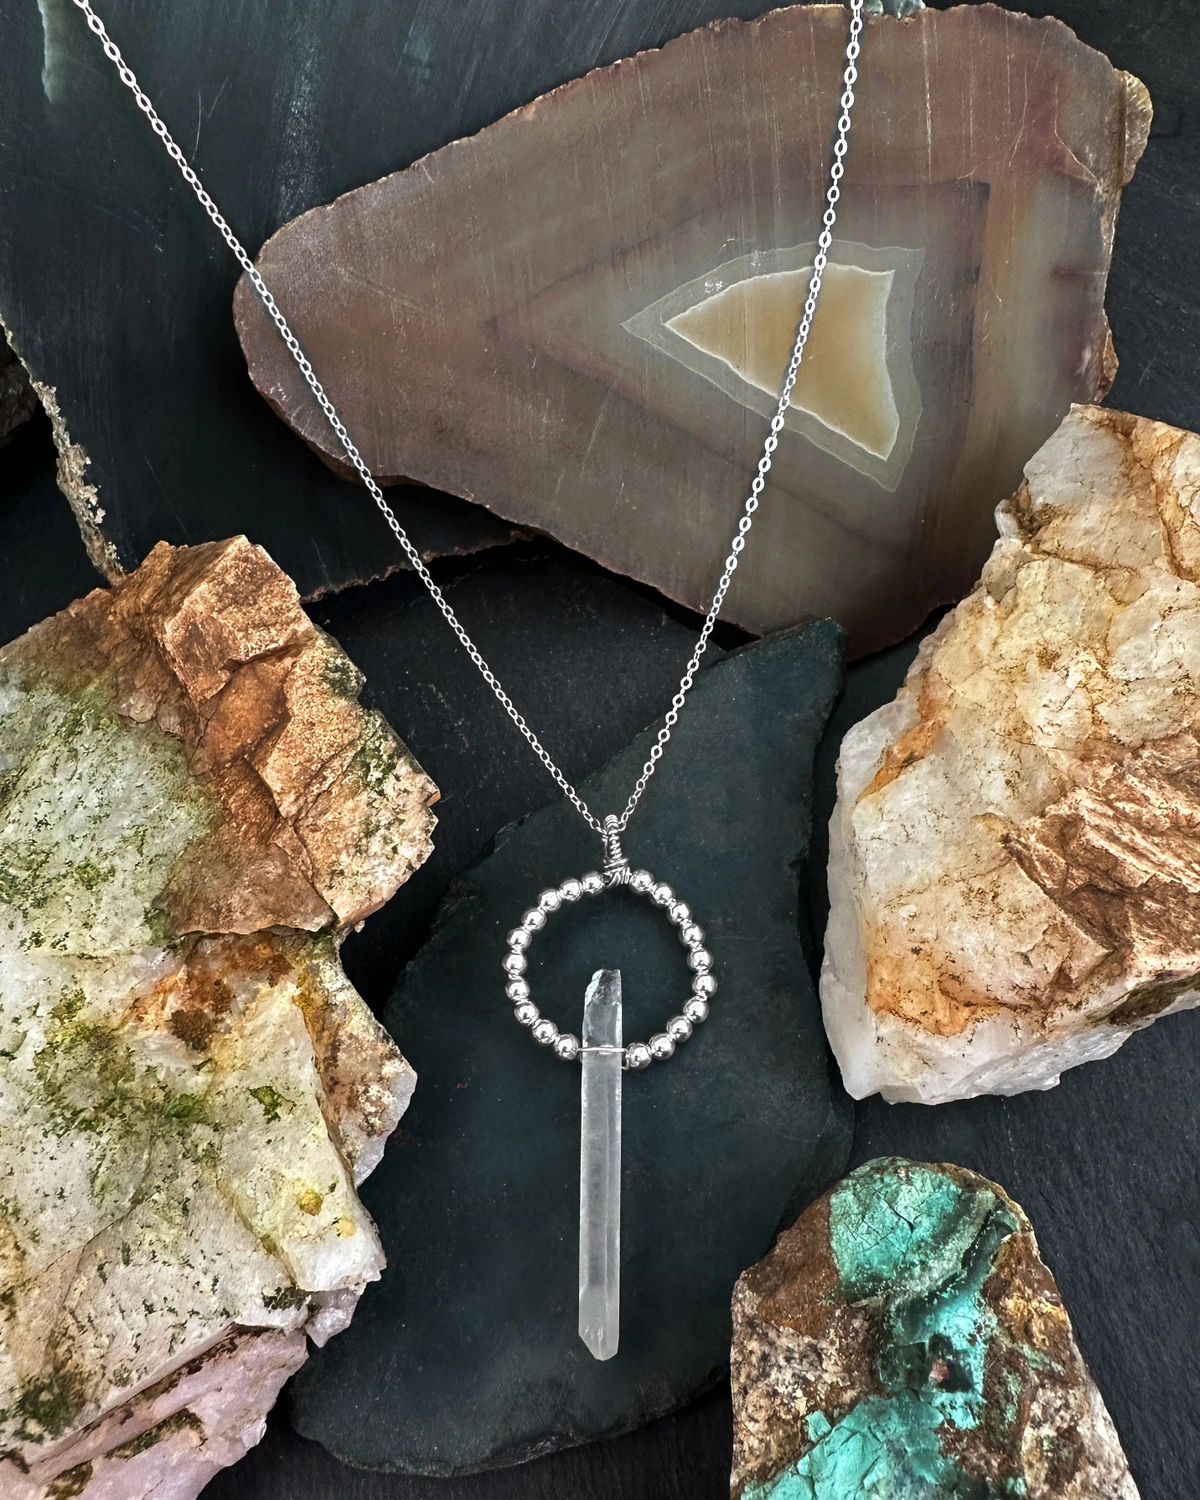
Check out the video below to see the process of making this necklace!
End Caps and Bead Cones
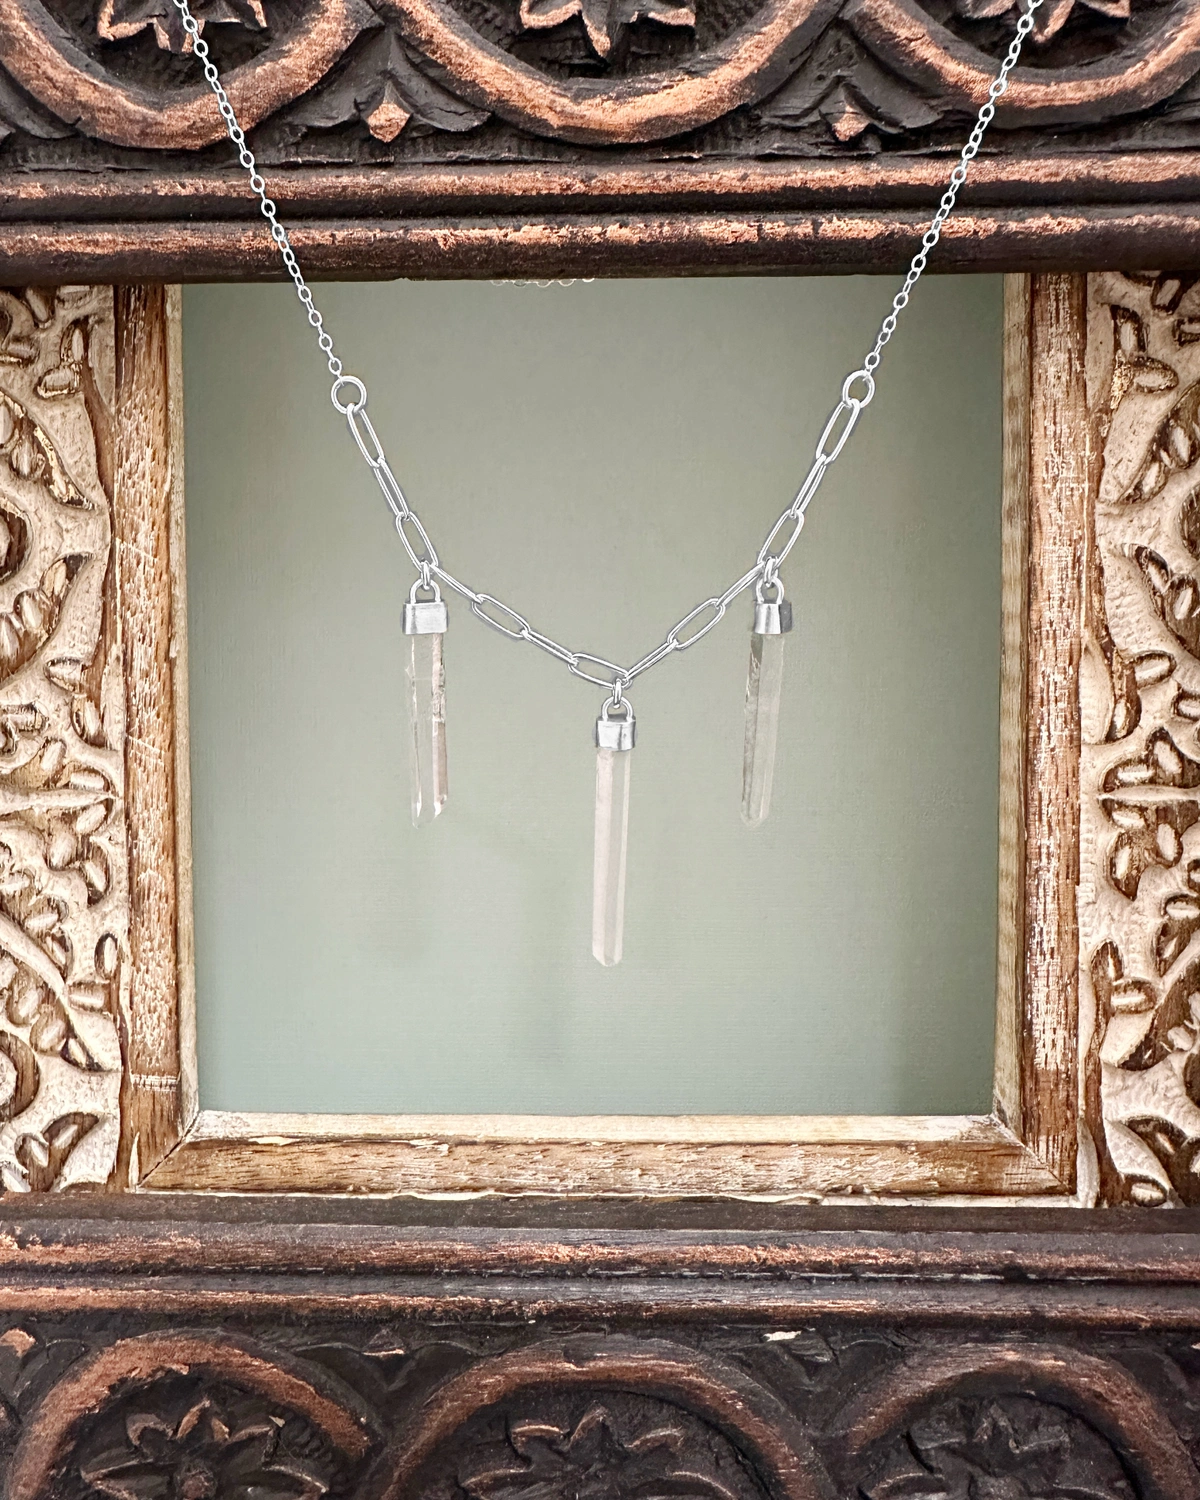
Decorative endcaps are easy to use and can add extra personality to the crystal setting. You’ll want to select an end cap that is as close to the end diameter of your crystal. But, these beading findings are tapered so you have a lot of wiggle room on sizing. You’ll line the end cap with glue or 2-part epoxy before sliding your crystal into the cap. Once it’s in, you’ll tighten the cap as needed around the crystal. Be sure to only use as much glue as you need and wipe up any extra immediately. SHOP BEADING SUPPLIES >>
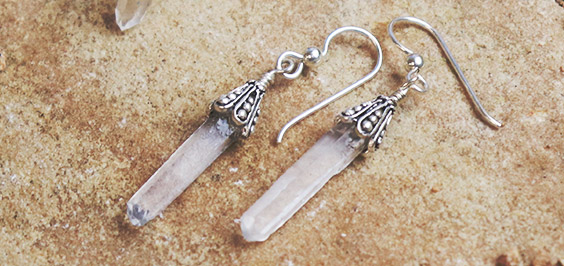
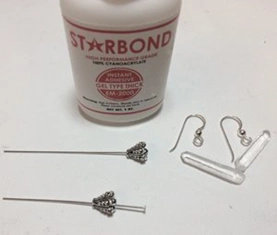
Bead cones or caps are a great way to set raw crystals because they’re tapered, which allows you more flexibility in crystal size. They don’t have to match perfectly. To use this method, you will slide a headpin into the bead cone and create a loop on top to secure it. Make sure the dead of the headpin is larger than the bead hole inner diameter. Now you’ve created an element that you can hang. Attach it to earring wires or turn it into a pendant. You’ll also want to use glue or 2-part epoxy for this method. Place some glue in the cope where the crystal touches.
Center Banding
This technique is perfect to make a crystal ring. A band fits snugly around the center of the crystal and is soldered onto a ring band for a striking look. I like to mix in some pattern wire for the band to add a little extra personality. You’ll want to first fit bezel wire around the center of the crystal to get as tight a fit as possible. Then fit the patterned wire around the bezel wire. This is optional – you don’t have to add an extra band. It’s important to make sure your crystal fits once the band is soldered closed, but before you solder it to your ring band. This method is great because it doesn’t require glue like the other one. If your band is well-fitted, that crystal won’t go anywhere!

Bezel Setting
Similar to end caps and bead cones are bezels. It's easy to create a custom bezel for your crystal point. Choose a thinner bezel wire, like one that's 28 gauge. This will be thin enough to easily wrap around the top of your crystal and conform to all the facets. Bezels are great too because you know it'll be a custom fit and sized perfectly to the crystal you're using. Decorative bezel wire is a great way to add extra personality to your piece! Use 2-part epoxy to do the final setting.
Geodes and Slabs
Setting geodes, druzy, and slabs can be challenging at times, but we’ll cover two basic ways to get you started. These methods can work for other irregular shaped stones as well. Soldering skills are necessary for both of these methods.
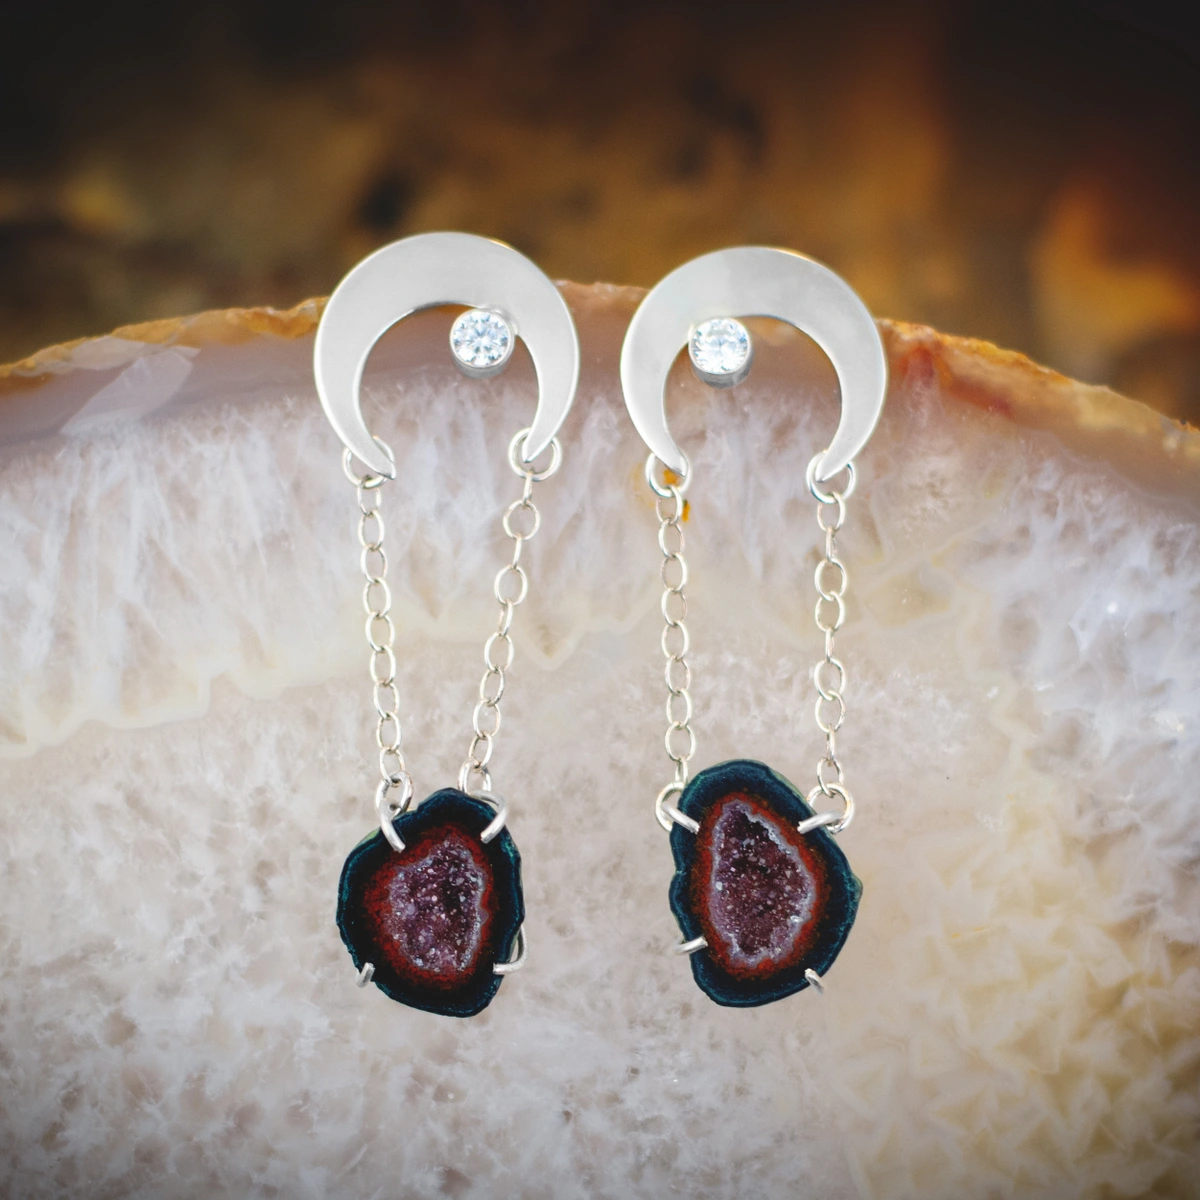
Geodes
Geodes often have a curved or rounded back, so a great method is to create a ‘basket’ and set the geode with prongs. It’s a visually minimal setting that doesn’t take away from the sparkle and allows you to fit it to each piece perfectly. We create a ring where the back of the geode will sit into and solder the prong wires onto that. You will want at least 3 prongs, but can add as many as you like for aesthetics.
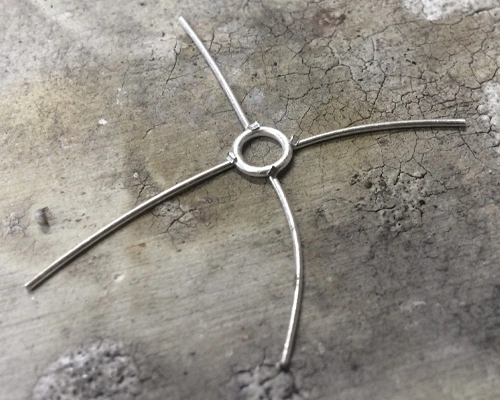
You do want to be mindful when closing the prongs not to damage the crystals, which can be delicate. The size wire you use will be related to the size geode you’re setting. Make sure it’s not too thick for the smaller pieces or it will be easier to damage the geode.
Stone Slabs
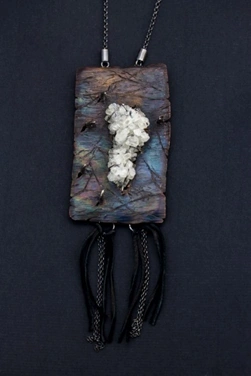
Slabs or slices are stones that are usually flat, rough and irregular shaped around the edges, but have polished faces. They come in a wide array of shapes and sizes so no two will ever be the same. Tab settings are a great way to set slabs because they are fairly thin.
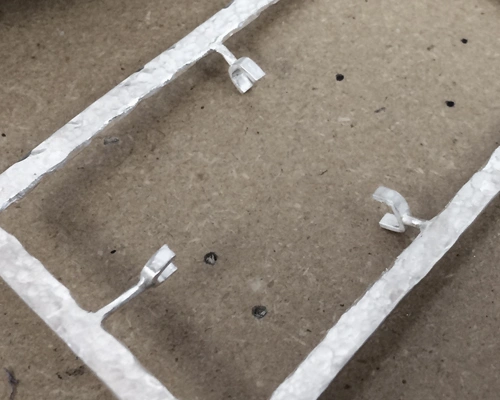
The tabs above were made from flat sire, but you can also cut thin strips of sheet. This style is great because it allows you to see both sides of the stone. Tabs do not have to be double-sided like the image above. A very common way is to cut sheet to the same shape as your stone with tabs added. Then you just fold the tabs over the edge of your stone.
Get Creative!
Now that you’re aware of some common ways to set irregular stones, don’t be afraid to change, alter, and make them your own! Prongs can be soldered to sheet or a frame that goes around the stone. The most important thing to remember is that regardless of setting type or stone shape and size, is that the stone is well supported and snug. If using prong or tab settings, you should have enough prongs/tabs so the stones doesn’t wiggle and place them in strategic areas to secure it. Have fun making crystal jewelry that is beautiful and meaningful to wear.
More on Stone Setting
5 Tips to Start Setting Stones
Jeweler’s Guide to Ready Made Settings

